Updated March 26, 2025 06:08PM
Monkey Pose
Take a leap of faith into Hanumanasana or Monkey Pose, named for a figure in Hindu mythology who did just that. And when faith doesn't get you all the way there, practice will.
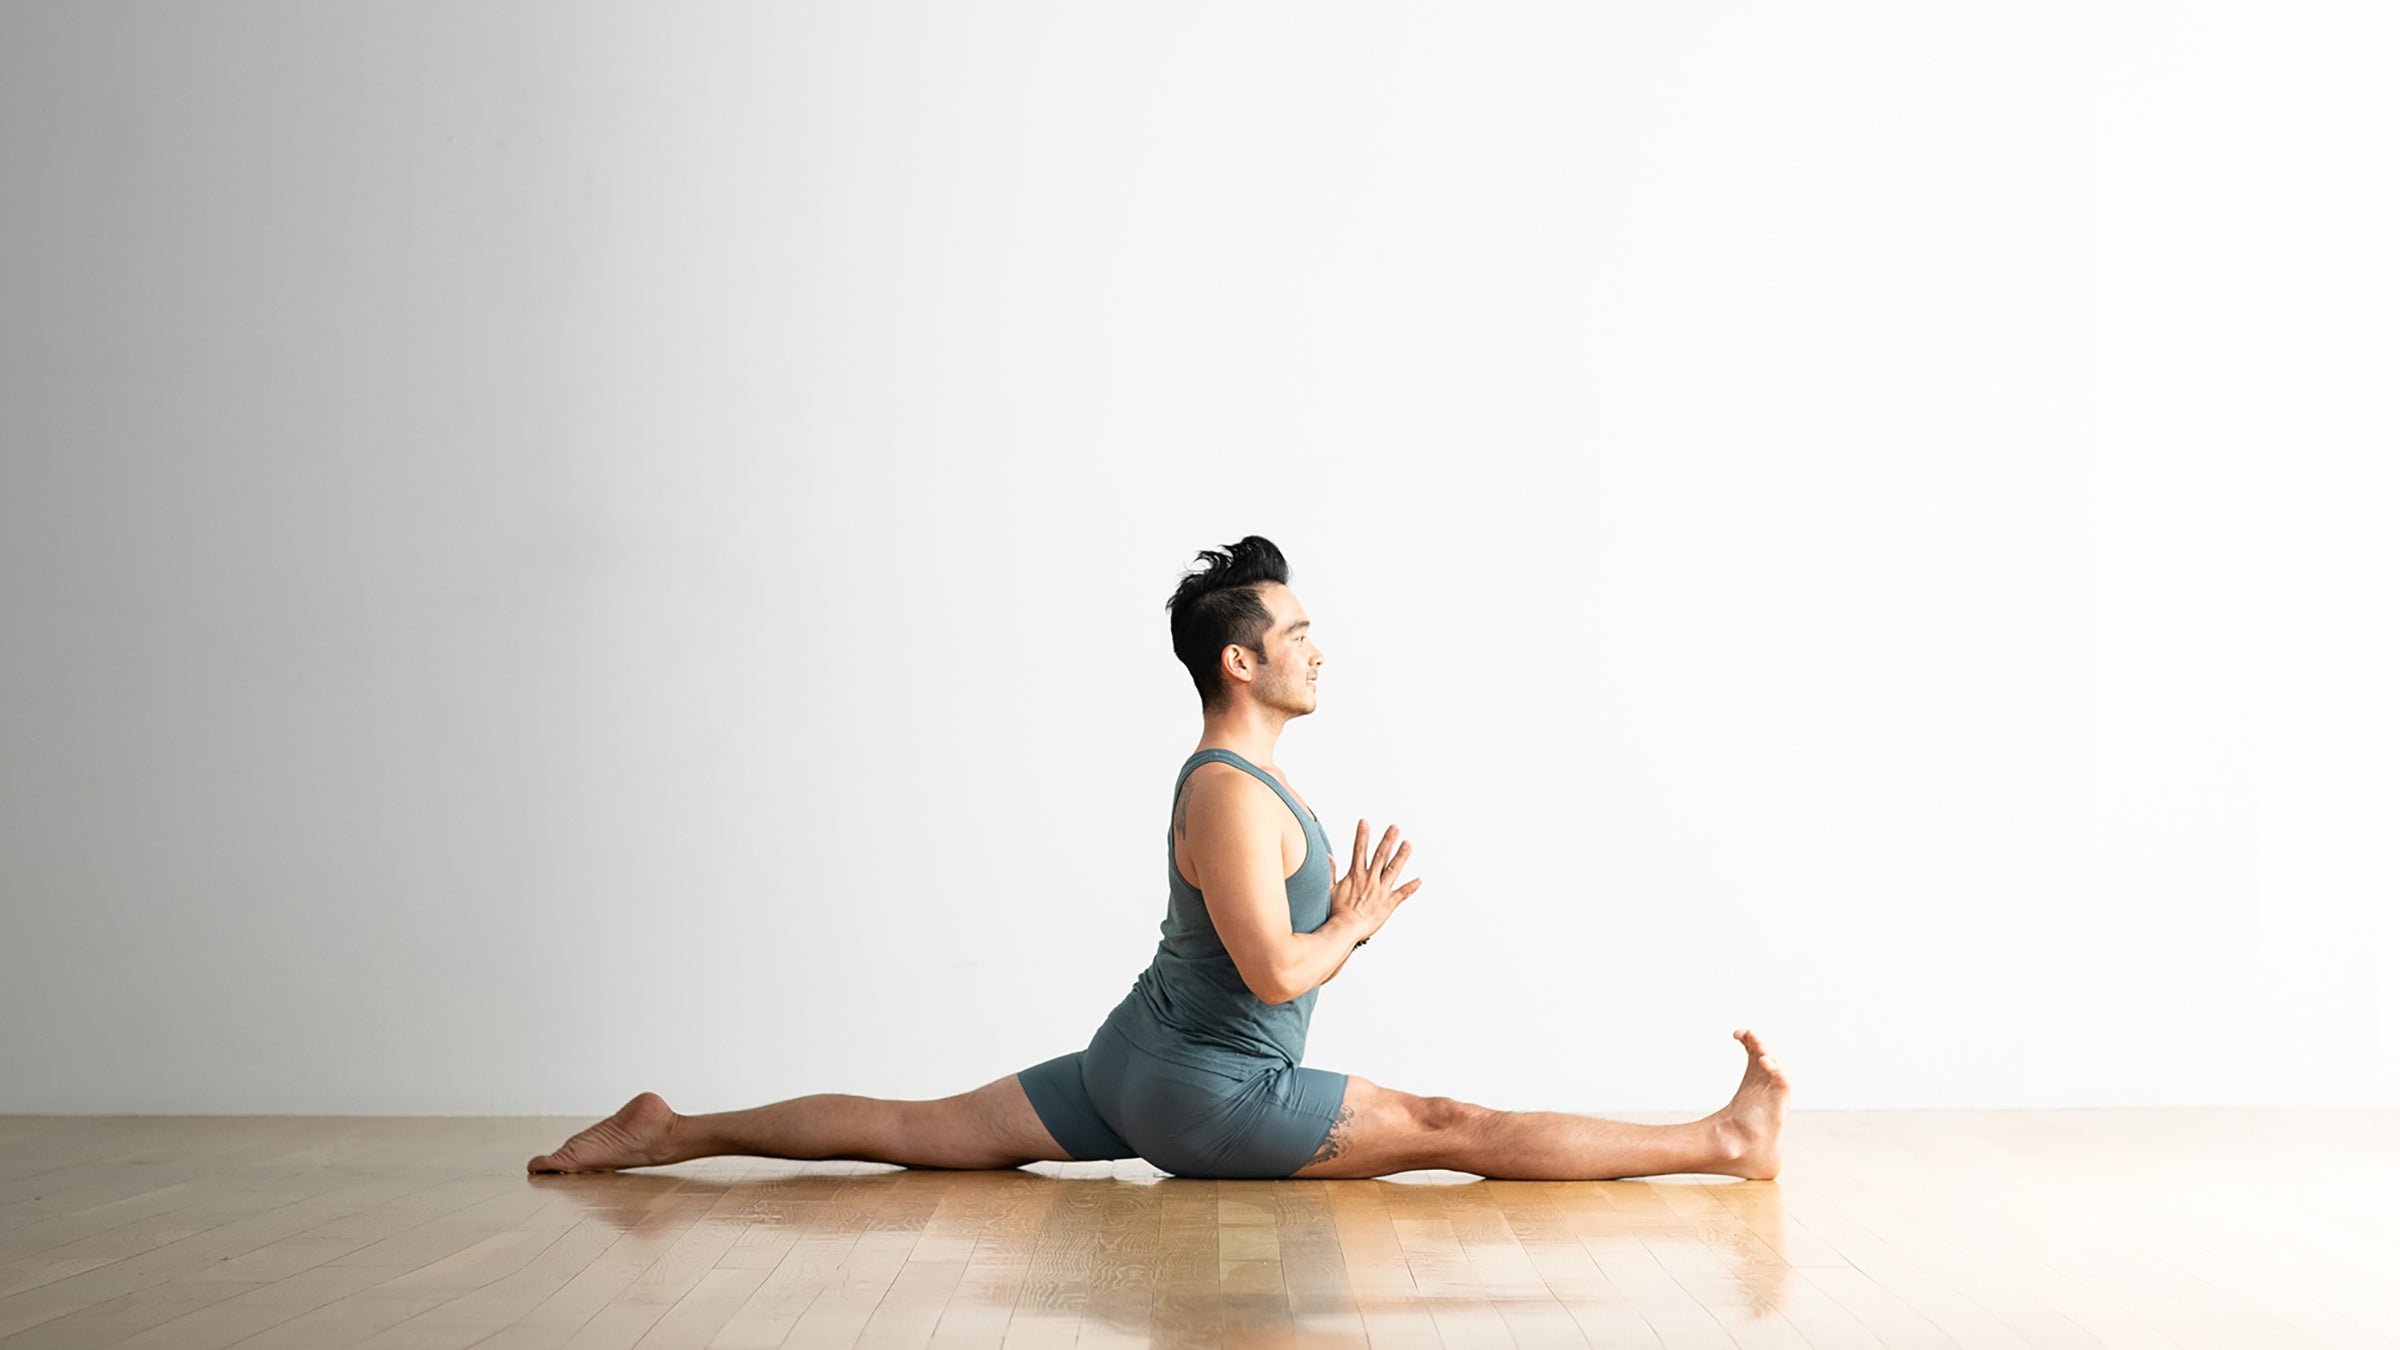
Photo: Andrew Clark; Clothing: Calia
This asana, commonly thought of as the splits, may take you back to elementary school when the teacher had you working on gymnastics moves in class. And let’s be honest, a lot of people who could do the splits when they were kids find that they struggle with it now. While some yogis can still whip out a Monkey Pose without a lot of warm up or effort, most students will be challenged. That’s because the pose is very demanding on the hamstrings, glutes and groin. For people who are naturally flexible—meaning that they have long hamstrings—this is a non-issue. But regular folks tend to have shorter muscles in the back of the legs and inside the pelvis. So, think of this pose as a progression. When you try it, go almost to your edge—but not quite! —and then back off a bit to keep your legs safe and healthy in Monkey Pose.
Sanskrit
Hanumanasana (hah-new-mahn-AHS-anna)
Monkey Pose: Step-by-step instructions
- Begin in Adho Mukha Svanasana (Downward-Facing Dog Pose); notice that your upper arms frame your ears, your pelvis is square to the front of the mat, and your thighs are neutral—all elements that will be central to the final pose.
- Step your right foot forward between your hands so your toes are in line with your fingertips. Drop your left knee to the mat, and point your toes.
- Pin your right hip back and in, and roll your left outer hip forward, squaring your hips toward the front of the mat.
- Maintaining this alignment, shift your hips back so they stack over your left knee, then adjust your right foot forward to straighten your leg, keeping your hips over your left knee and facing straight forward.
- Pause here with your fingertips on either side of your right knee; press into your right big toe mound, and extend straight back with your left big toe.
- Start to slide your right foot forward while continuing to pin your right hip back and in.
- Your pelvis moves forward and down through space as your left leg straightens.
- As your legs open, release the flesh of your buttocks away from your back waist, and gently tone the pit of your abdomen to find a lift in the front of your pelvis.
- Maintain the neutrality of your legs by pressing into your right big toe mound and spinning your left inner thigh to the ceiling while rotating your left outer hip forward.
- Keep descending your pelvis until the back of your right thigh and the front of your left thigh come to the floor.
- Continue to prioritize your pelvis remaining square to the front of the mat and your legs remaining neutral; the back thigh tends to externally rotate, so keep insisting on the lift of your inner thigh.
- Descend your tailbone, and soften your front ribs, then take your arms to the ceiling with your upper arms framing your ears.
- Hold for 10–12 breaths, then retrace the entrance, returning to Downward-Facing Dog Pose.
- Repeat on the other side.
Variation: Half Monkey Pose with Blocks

This focuses on stretching the back of the thigh (hamstring) of the forward leg. Start in Anjaneyasana (Low Lunge) with blocks (at any height) under your hands. Slowly straighten your front leg. Lean forward if comfortable, avoiding coming to a point of feeling strain in your low back.
ADVERTISEMENT
Variation: Half Monkey Pose

It may take some practice before you can come into a split with both of your thighs on the ground. Continue to explore this posture, working to increase the stretch of your quads and hamstring. Place a block under your front thigh for support.
Monkey Pose basics
Pose benefits
Monkey Pose stretches your entire lower body, including your thighs, hamstrings and groin. It also stimulates the abdominal organs and engages your core.
Beginner’s tip
To increase the length of the torso and spine, press the back foot actively into the floor and, from this pressure, lift the shoulder blades firmly into your back.
ADVERTISEMENT
Teaching Hanumanasana
These tips will help protect your students from injury and help them have the best experience of the pose:
- Students just beginning to learn this pose are often unable to get the legs and pelvis down on the floor, which is usually due to of tightness in the backs of the legs or front groins. While they are in the starting leg position, have them place a thick bolster below their pelvis (with its long axis parallel to their inner legs). As they straighten their legs, cue them to slowly release their pelvis down onto the bolster. If the bolster isn’t thick enough to comfortably support their pelvis, invite them add a thickly folded blanket.
- Have students practice this pose on a bare floor (without a sticky mat) with folded blankets under the back knee and front heel.
- When in the full pose, yoga teacher Kathryn Budig reminds students to engage their front quad and core. Cue students to press their fingers into the ground to lengthen the torso, she says.
Preparatory and Counter Poses
Preparatory Poses
Baddha Konasana (Bound Angle Pose)
Janu Sirsasana (Head-t0-Knee Forward Bend)
Paschimottanasana (Seated Forward Bend)
ADVERTISEMENT
Follow-Up Poses
Eka Pada Rajakapotasana (One-Legged King Pigeon Pose)
Paschimottanasana (Seated Forward Bend)
ADVERTISEMENT