7 Ways to Switch Up Your Usual Bridge Pose

(Photo: Sarah Ezrin)
Potentially embarrassing confession time! When I first started practicing yoga, I thought that Setu Bandha Sarvangasana (Bridge Pose) was just the beginning part of Urdhva Dhanurasana (Upward-Facing Bow or Wheel Pose). I literally didn’t understand that it was its own pose until I took my first yoga teacher training.
Even after I finally learned that Bridge was an actual pose unto itself and had its very own Sanskirt name, I continued to treat it as an extension of Upward Bow. That time corresponded with a period in my practice —and my life—where I thought I always needed to do more to feel fulfilled. I had to have all the cutest Lululemon outfits for class. I had to teach more classes a day than anyone I knew. And I had to do Upward-Facing Bow every single practice.
I would force myself past Bridge into Upward-Facing Bow each and every practice, whether my body was prepared or not. If a teacher was cueing Bridge but not Upward-Facing Bow, or even if we weren’t doing those backbends in class, I would ignore everyone else and pop right up into the pose. I’m pretty sure I’d also drop back into it from standing and then stand right back up, too. (My deepest apologies to any teachers if I did this in your class!)
After a severe overuse injury in my shoulder that led to surgery, I wasn’t able to pop up into anything. I had to dial my physical practice way back, especially poses that engaged the shoulders. My recovery was long and frustrating and required me to learn how to get comfortable practicing less intense poses. Whereas Upward-Facing Bow had been my desert island pose, Bridge Pose very quickly became my go-to backbend.
When I slowed down and learned to really work on tucking my shoulders and arms underneath me in Bridge, I actually started to feel more of a chest opening than when I used to ignore it and pop up into straight arms.
Lately, I am quite content to stay in Bridge Pose. I still think of it as an essential prep pose for Urdhva Dhanurasana, although I also deeply respect it for all that it brings to my practice, especially given all the amazing variations we can explore.
7 ways to change up your Bridge Pose
How to come into Bridge Pose
Lie on your back, bend your knees, and place your feet on the mat hip-distance apart. Align your ankles beneath your knees and bring your arms alongside your body. On an inhalation, lift your hips. See below for options on how to prop the pose or add arm or leg alternatives. When you are ready to come down, exhale and slowly lower your back to the floor.
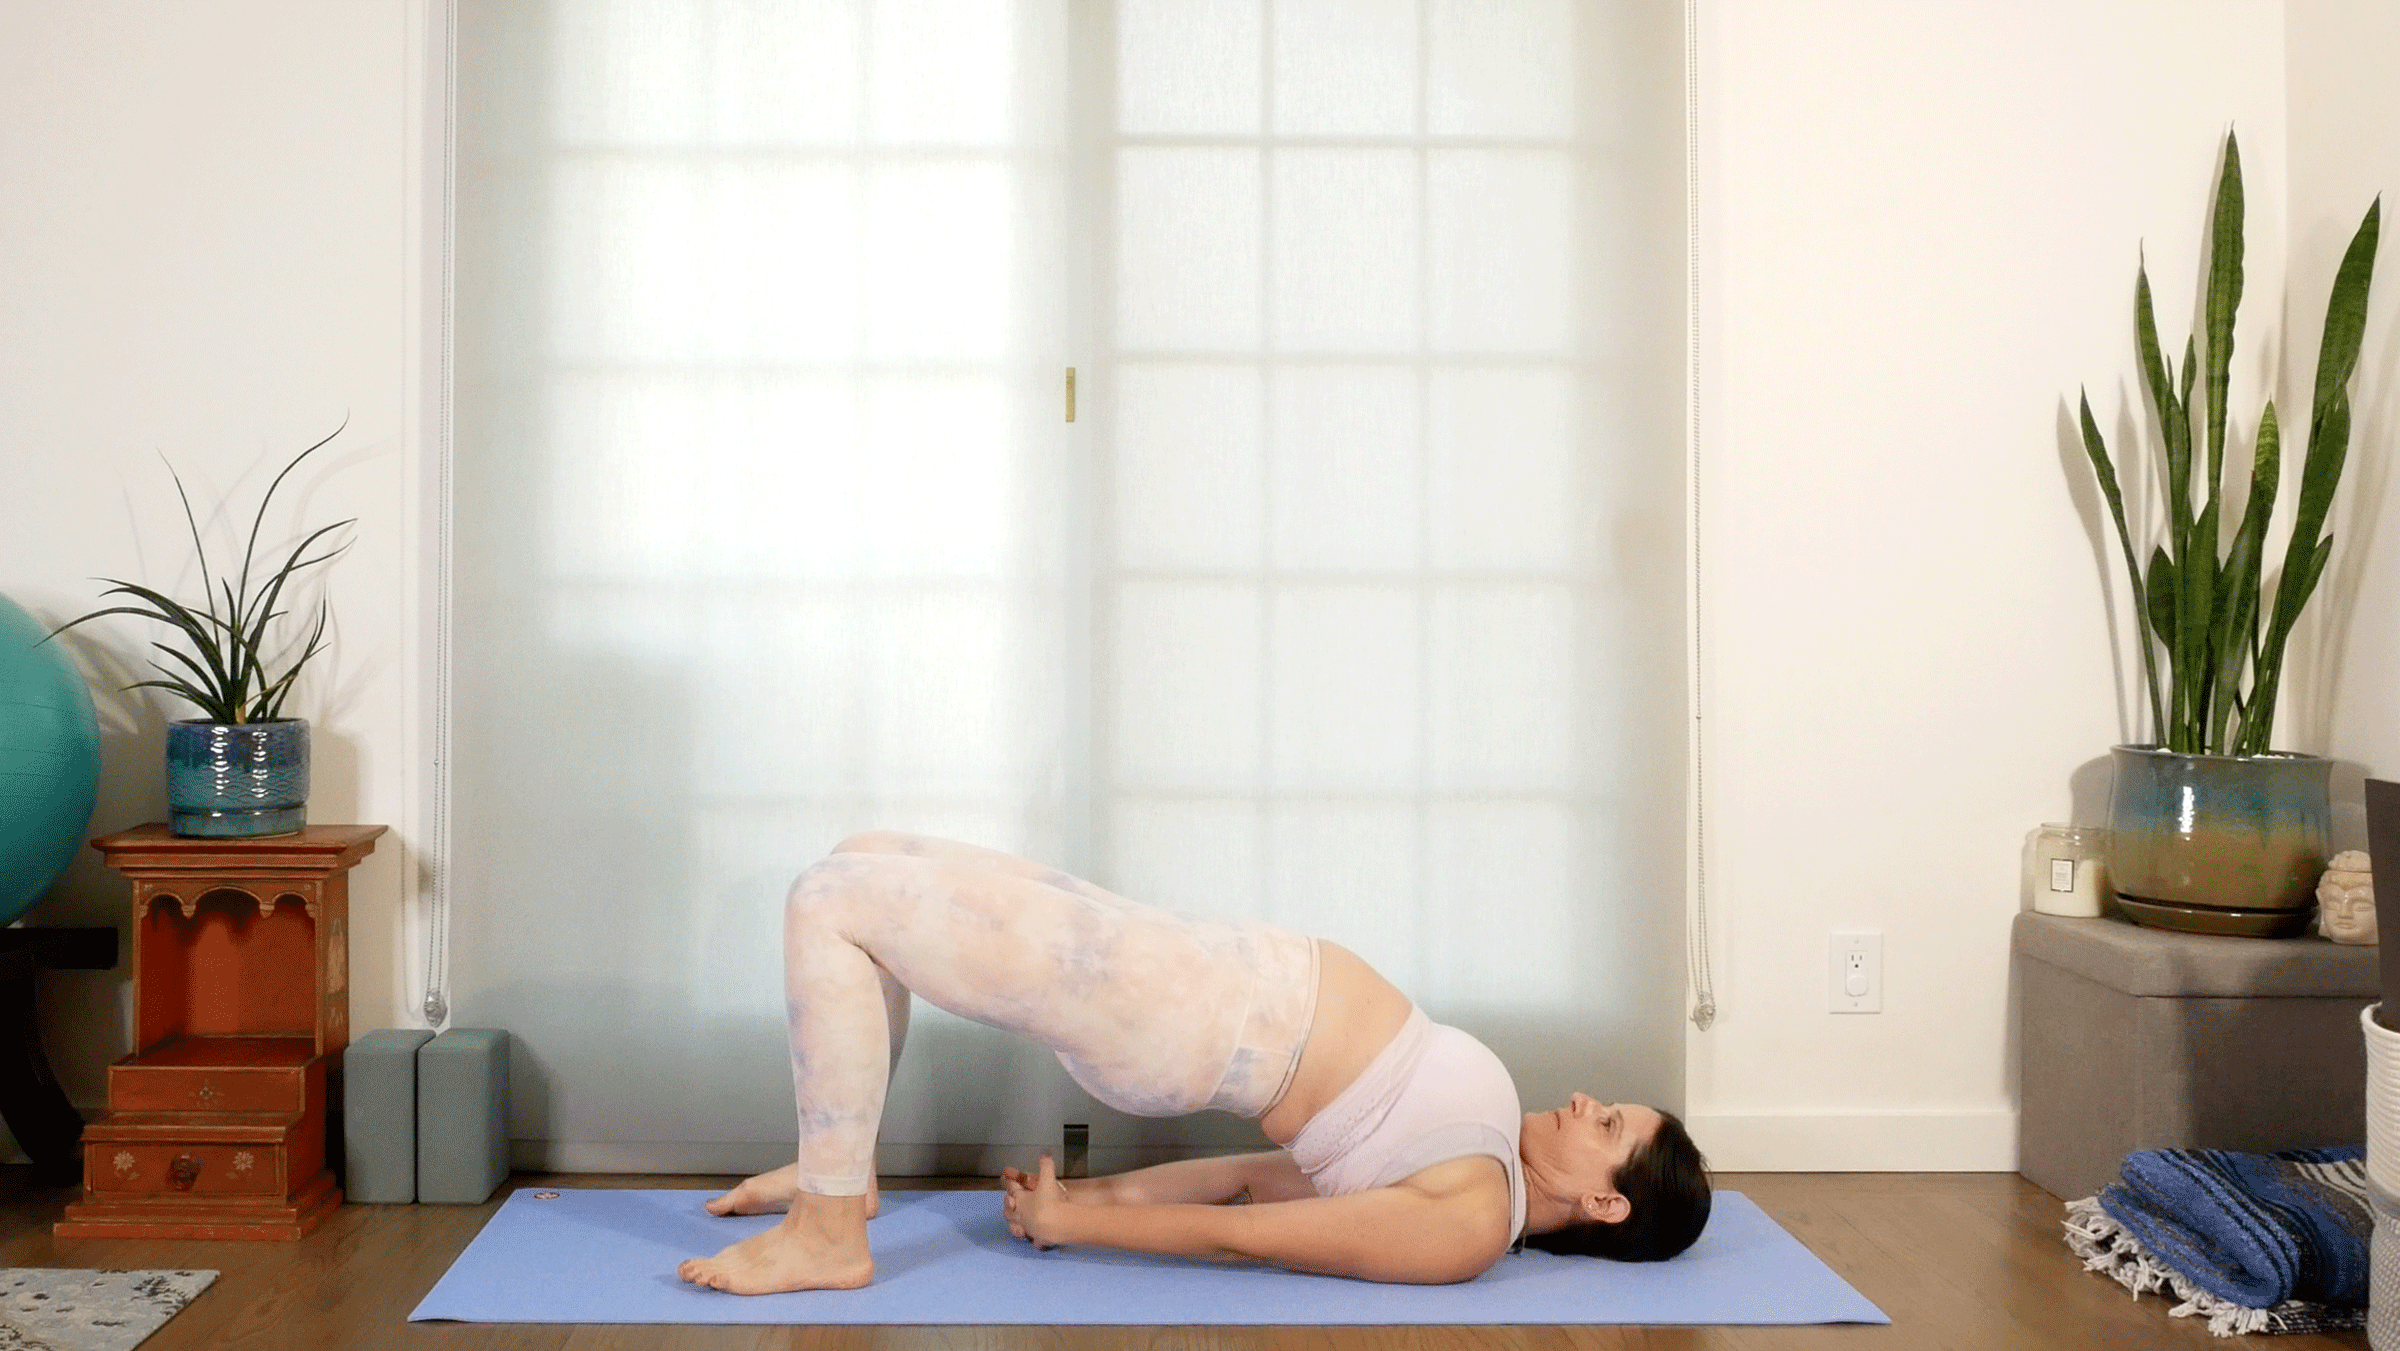
1. Clasp your hands
The “traditional” Bridge Pose is generally taught interlacing the fingers beneath you.You also find this grip in many other poses, including Humble Warrior and Prasarita Padottanasana C. In the YogaWorks method I teach, we call this grip the “C-clasp.”
From Bridge Pose, walk your upper arms beneath you and roll your inner arms toward the outer edge of the mat in external rotation and interlace your fingers behind your back. If you feel like it’s a struggle to remain clasped, try a different arm option below.
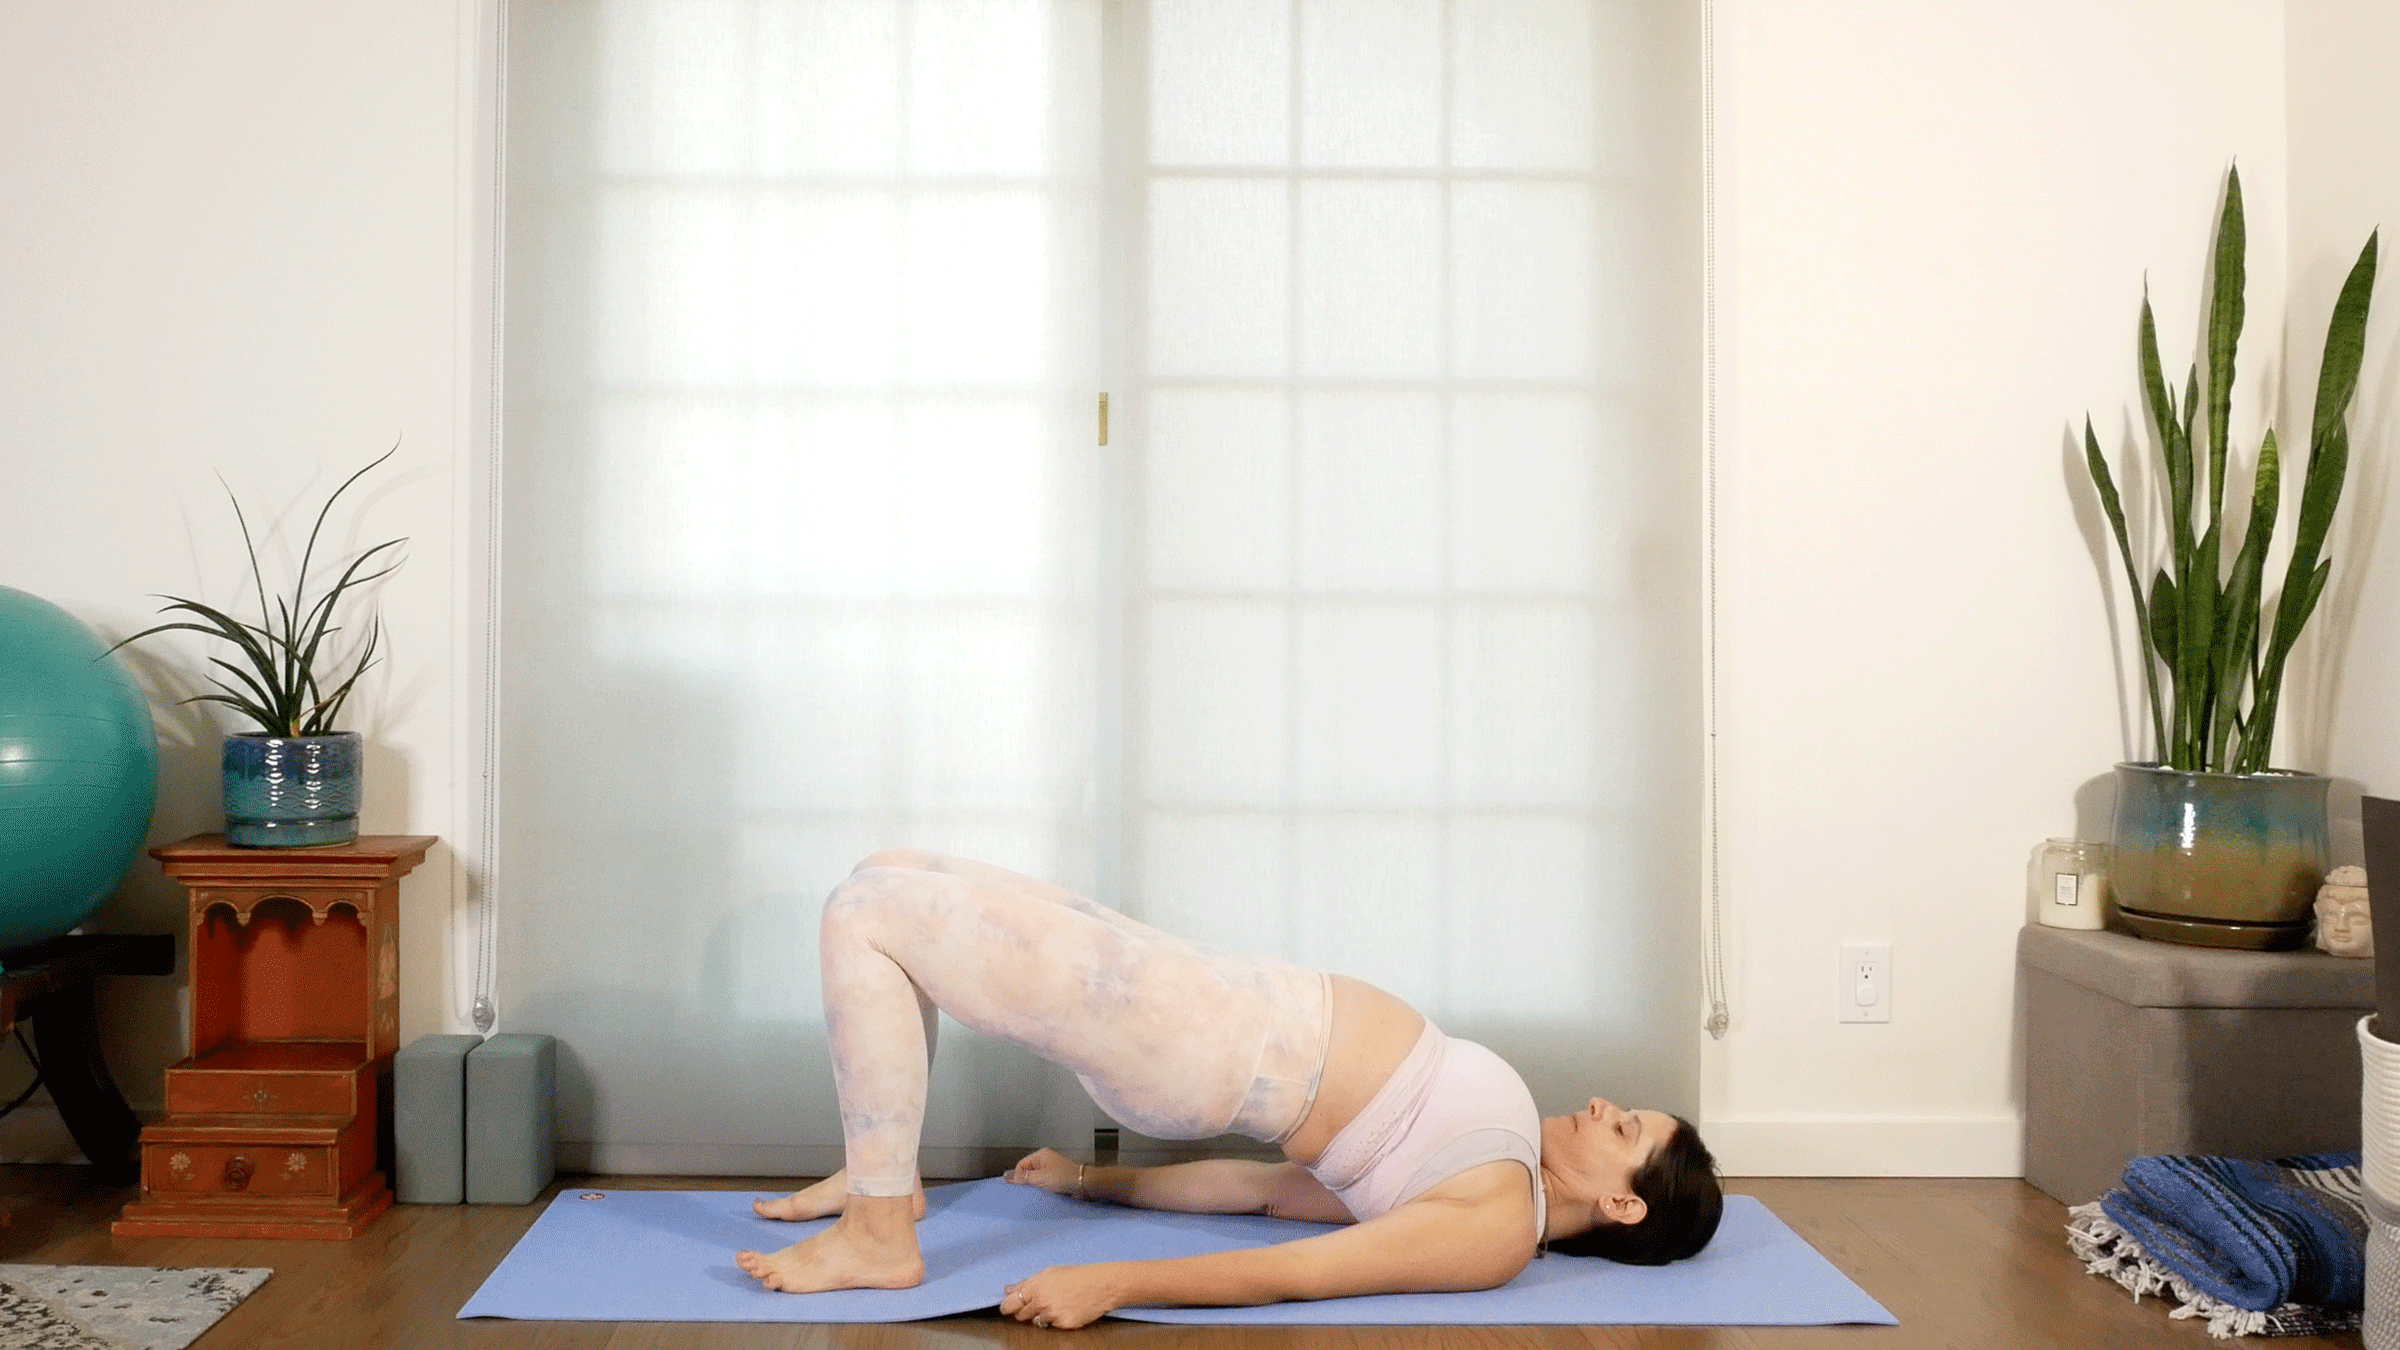
2. Hold the edges of the mat
This variation encourages the deep external rotation in your shoulders that’s necessary before you can bring your arms beneath your body to clasp your hands. It’s a much more accessible way for most bodies to practice Bridge Pose since many of us are limited in how far we can open our shoulders. I find this variation brings more of a stretch across my chest than clasping.
From Bridge Pose, grab onto and hold the edges of the mat, palms down, while pressing down through your upper arms.
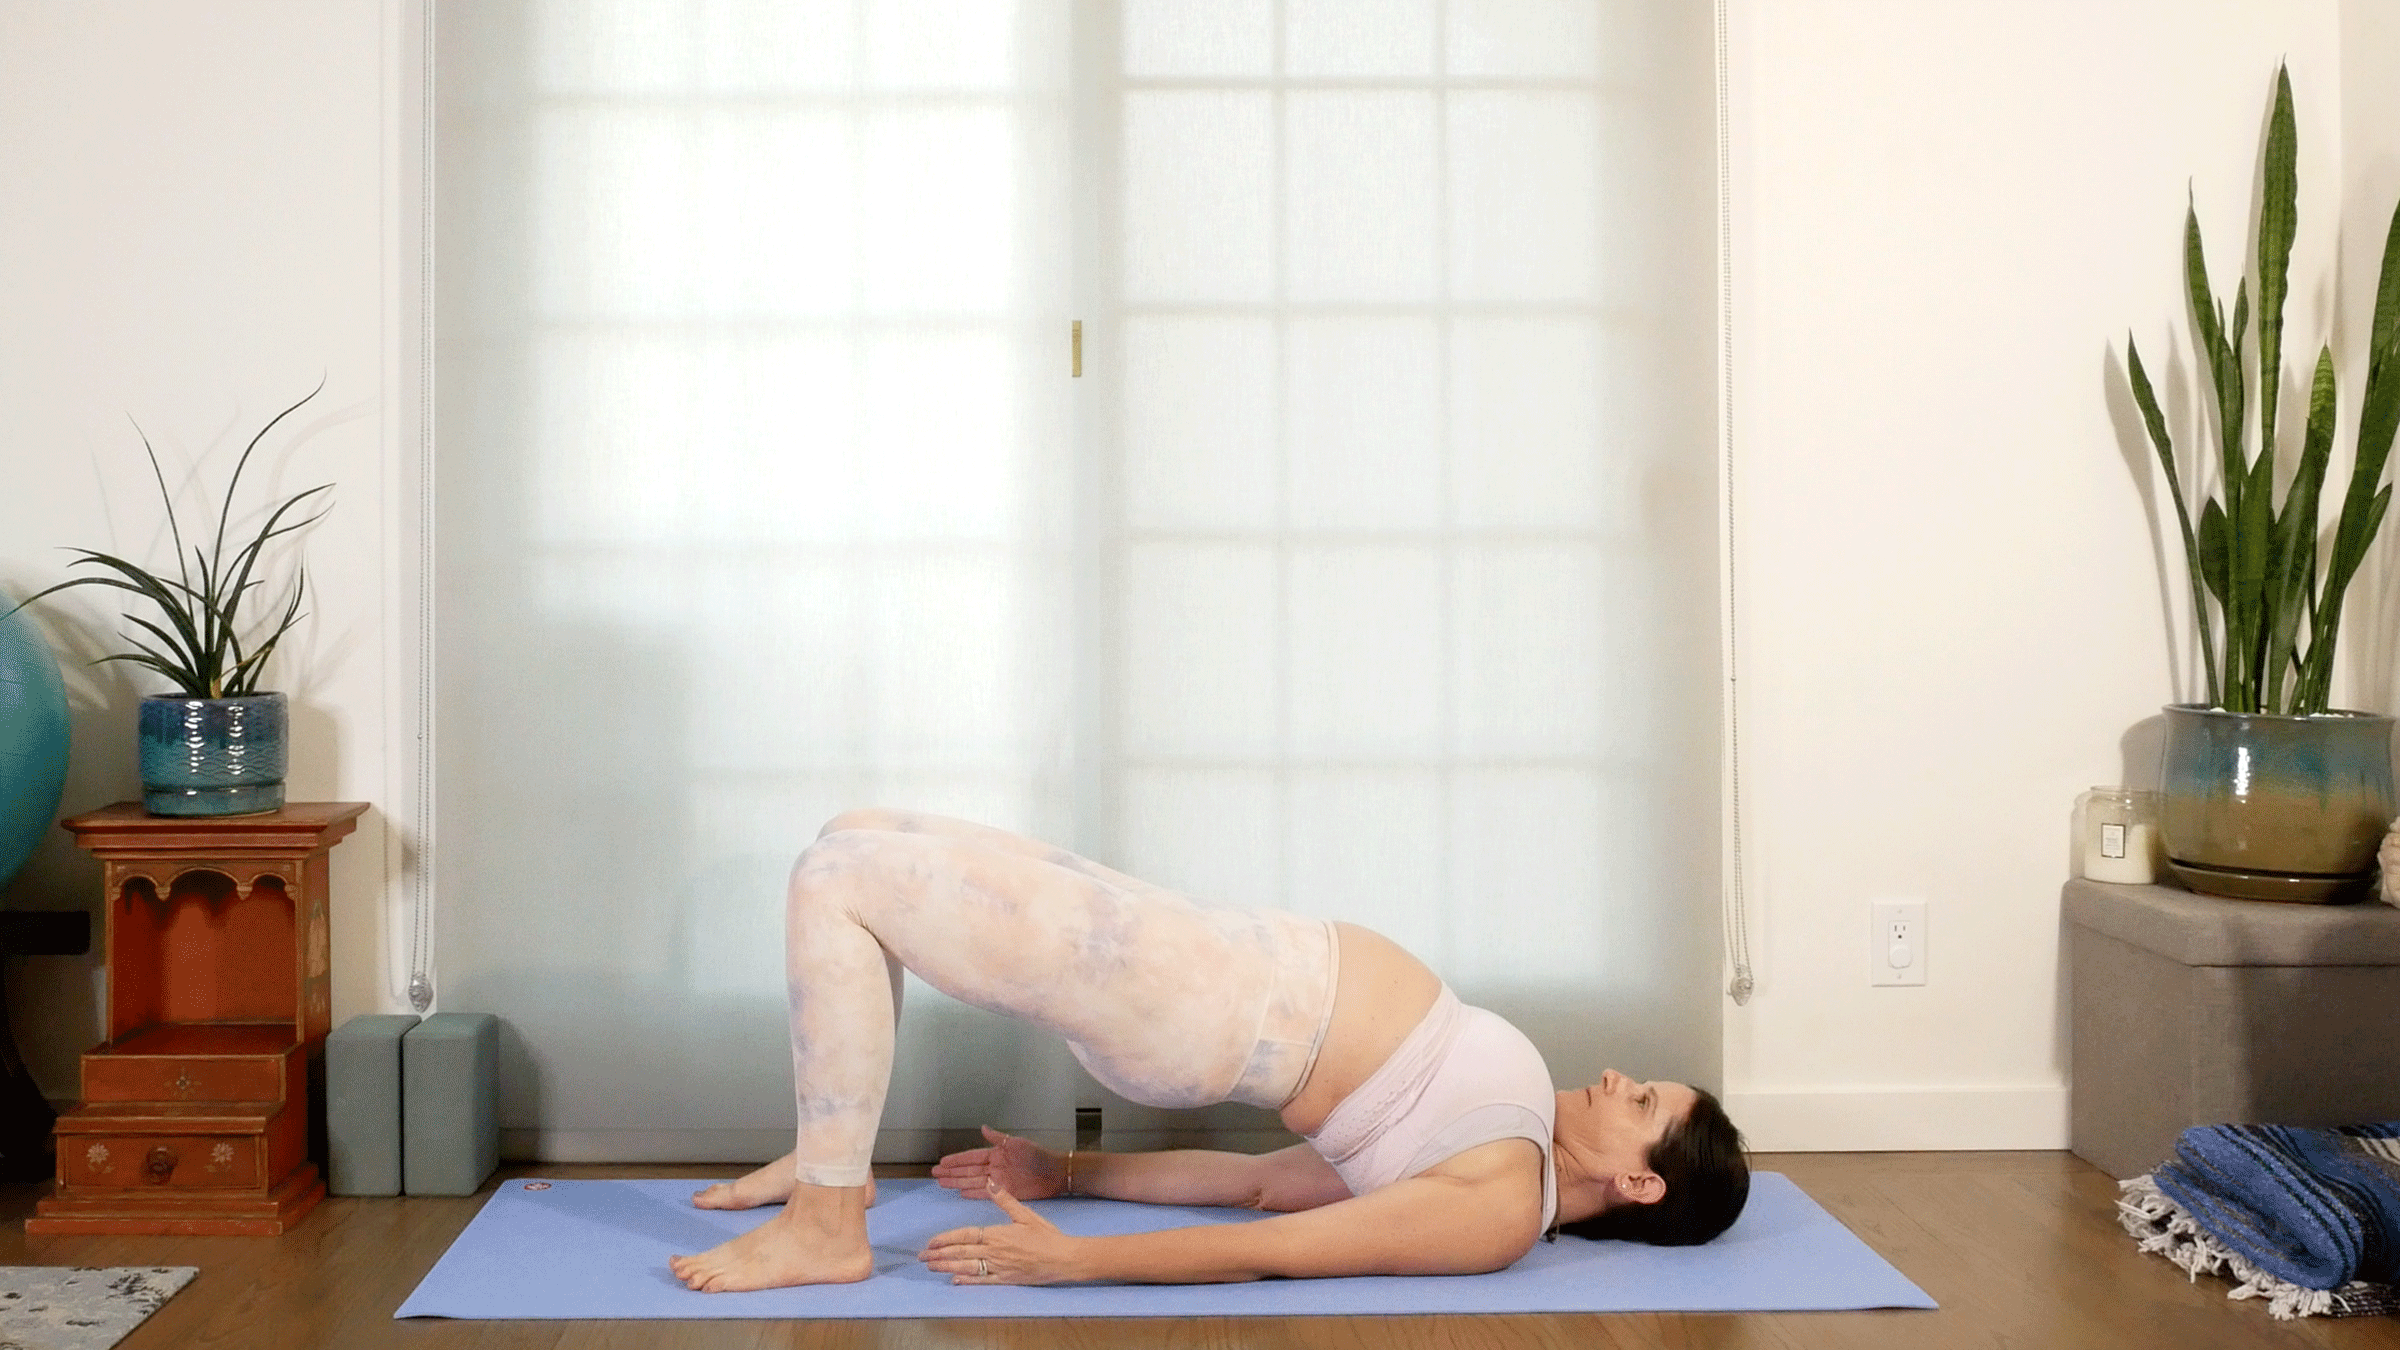
3. “Beach ball” arms
You can focus on opening your upper back, more than your chest, by not clasping at all.
From Bridge Pose, lift up onto the outer edge of your forearms, with your pinky side of your hand on the mat like a karate chop. Walk your shoulders underneath you and, rather than clasping your hands or grabbing the mat, isometrically squeeze your upper arms, forearms, and palms toward each other, as though you’re holding an imaginary beach ball. This variation can sometimes help us get higher on our shoulders than clasping, which emphasizes the arching in the upper back.
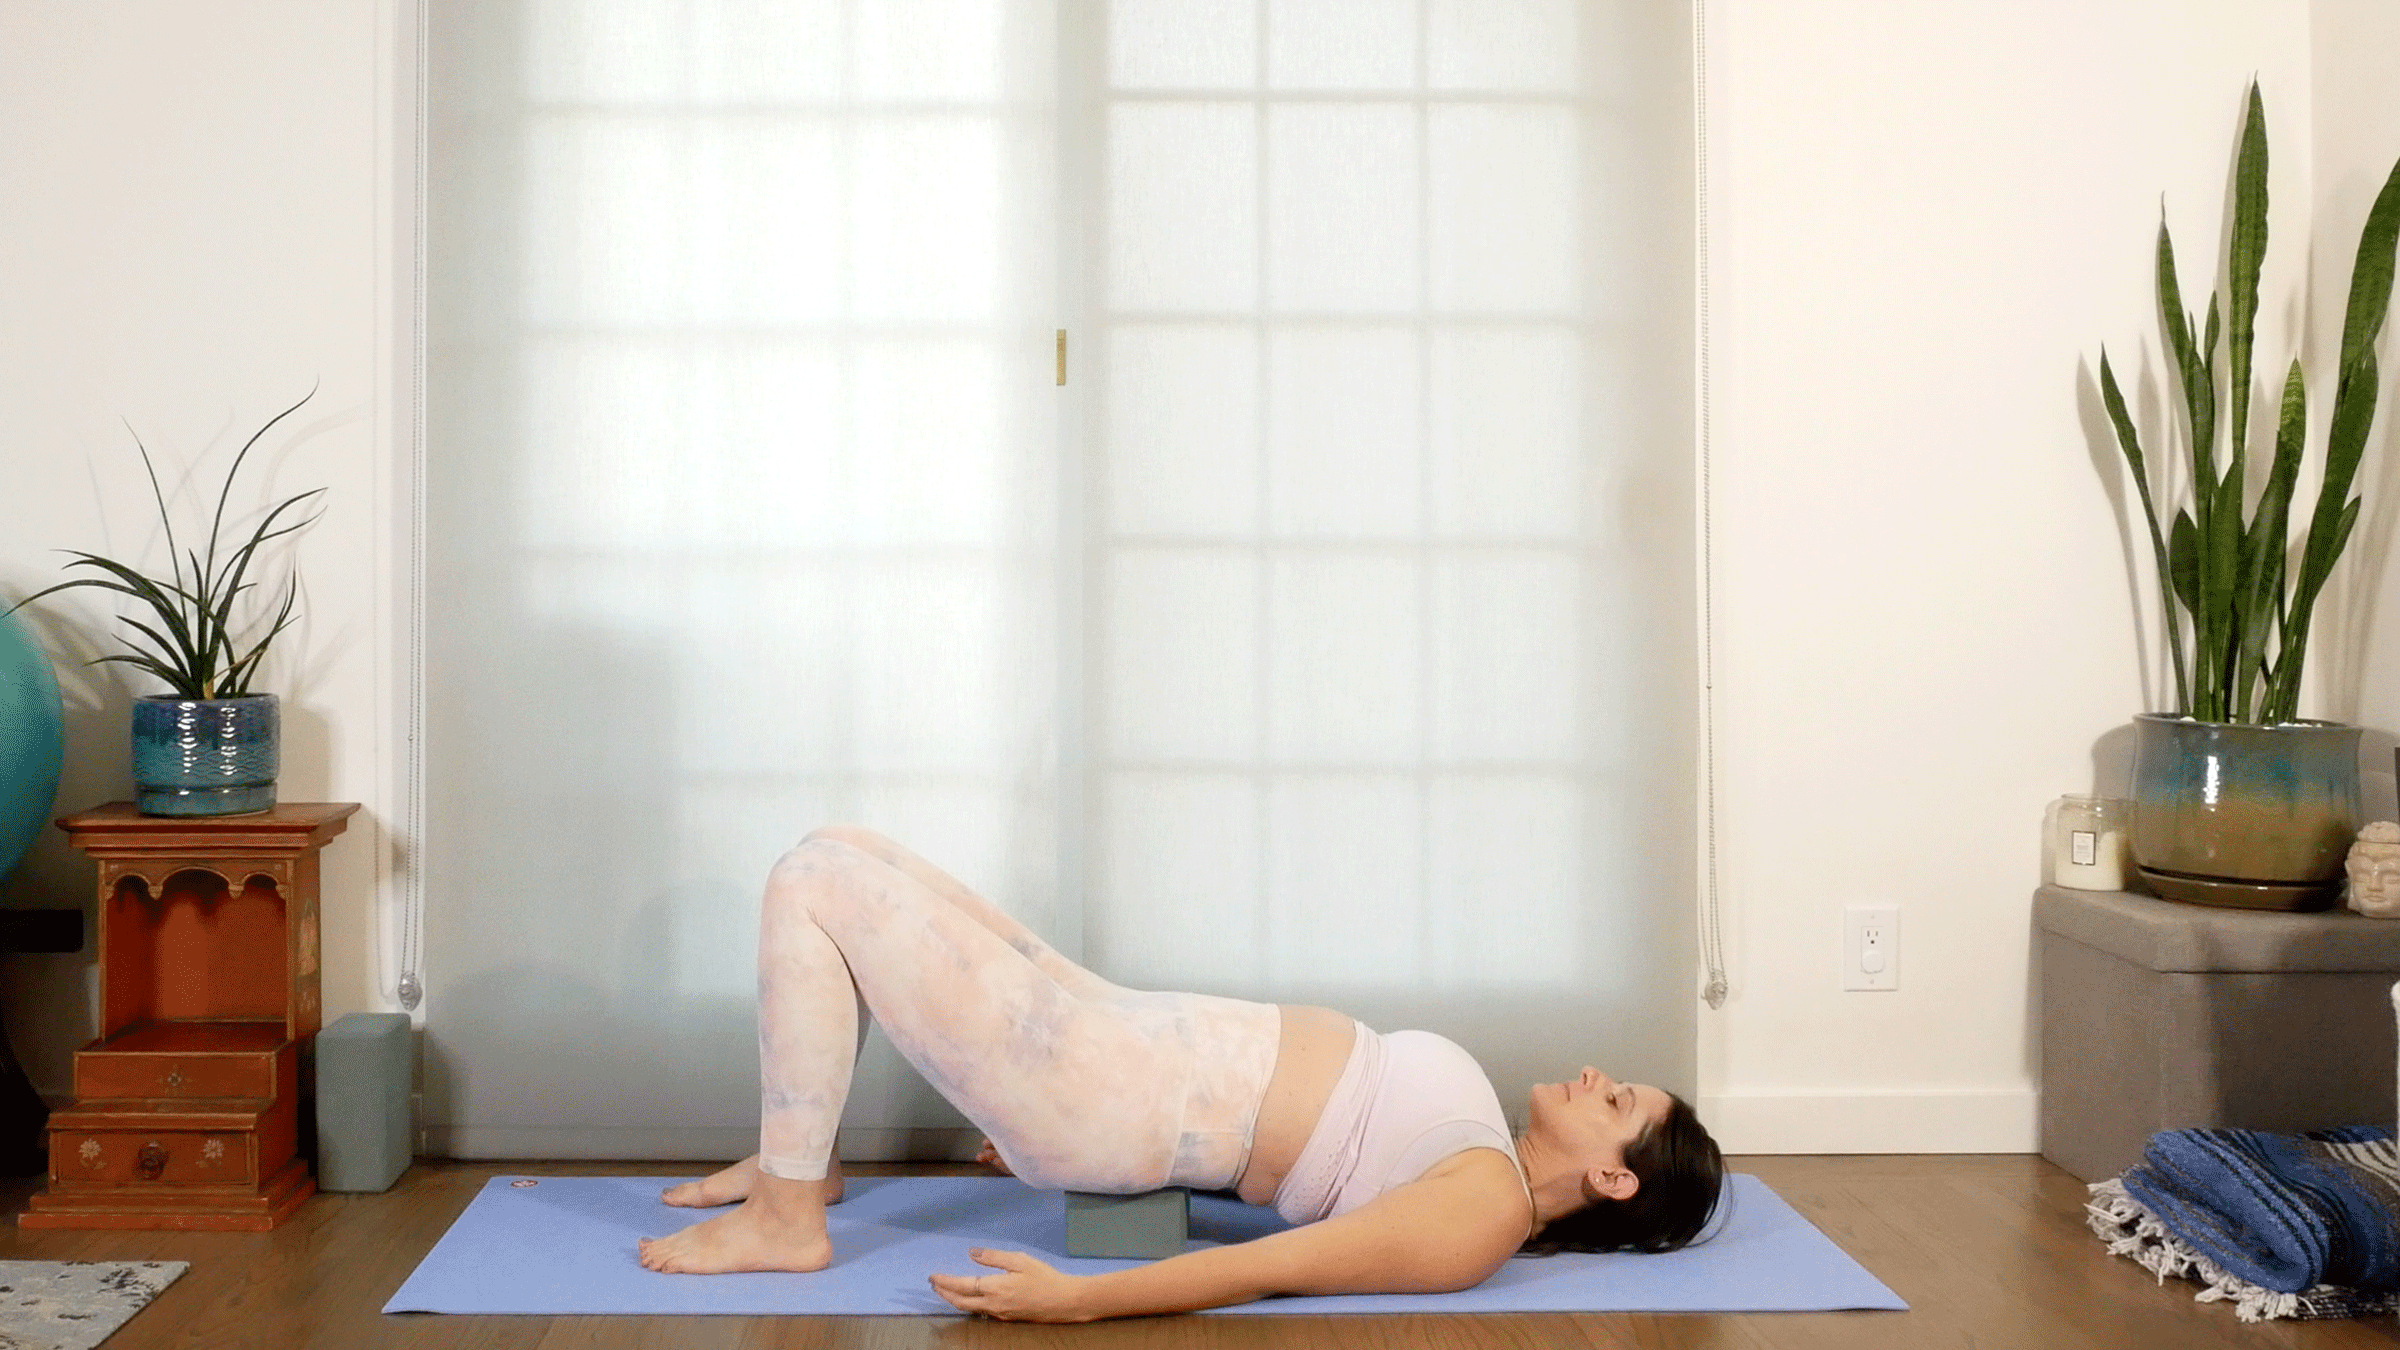
4. Supported Bridge
After I tell students that they can go from Bridge Pose into Upward-Facing Bow, I often say, “Or you can take the most ‘advanced’ variation of all: Supported Bridge.” Relying on the support of a block places this pose in the category of restorative yoga. The courage it takes to admit we need rest—and to then take that rest—is much more of an “advanced” practice than mindlessly popping into the deepest shape like I used to do.
From Bridge Pose, when you lift your hips, place the block low and wide underneath you and settle your sacrum down onto it. (The sacrum is the back of the pelvis and it will feel like a shelf.)
The following three variations can all be done on a block in a Supported Bridge Position (as well as in Upward Facing Bow).
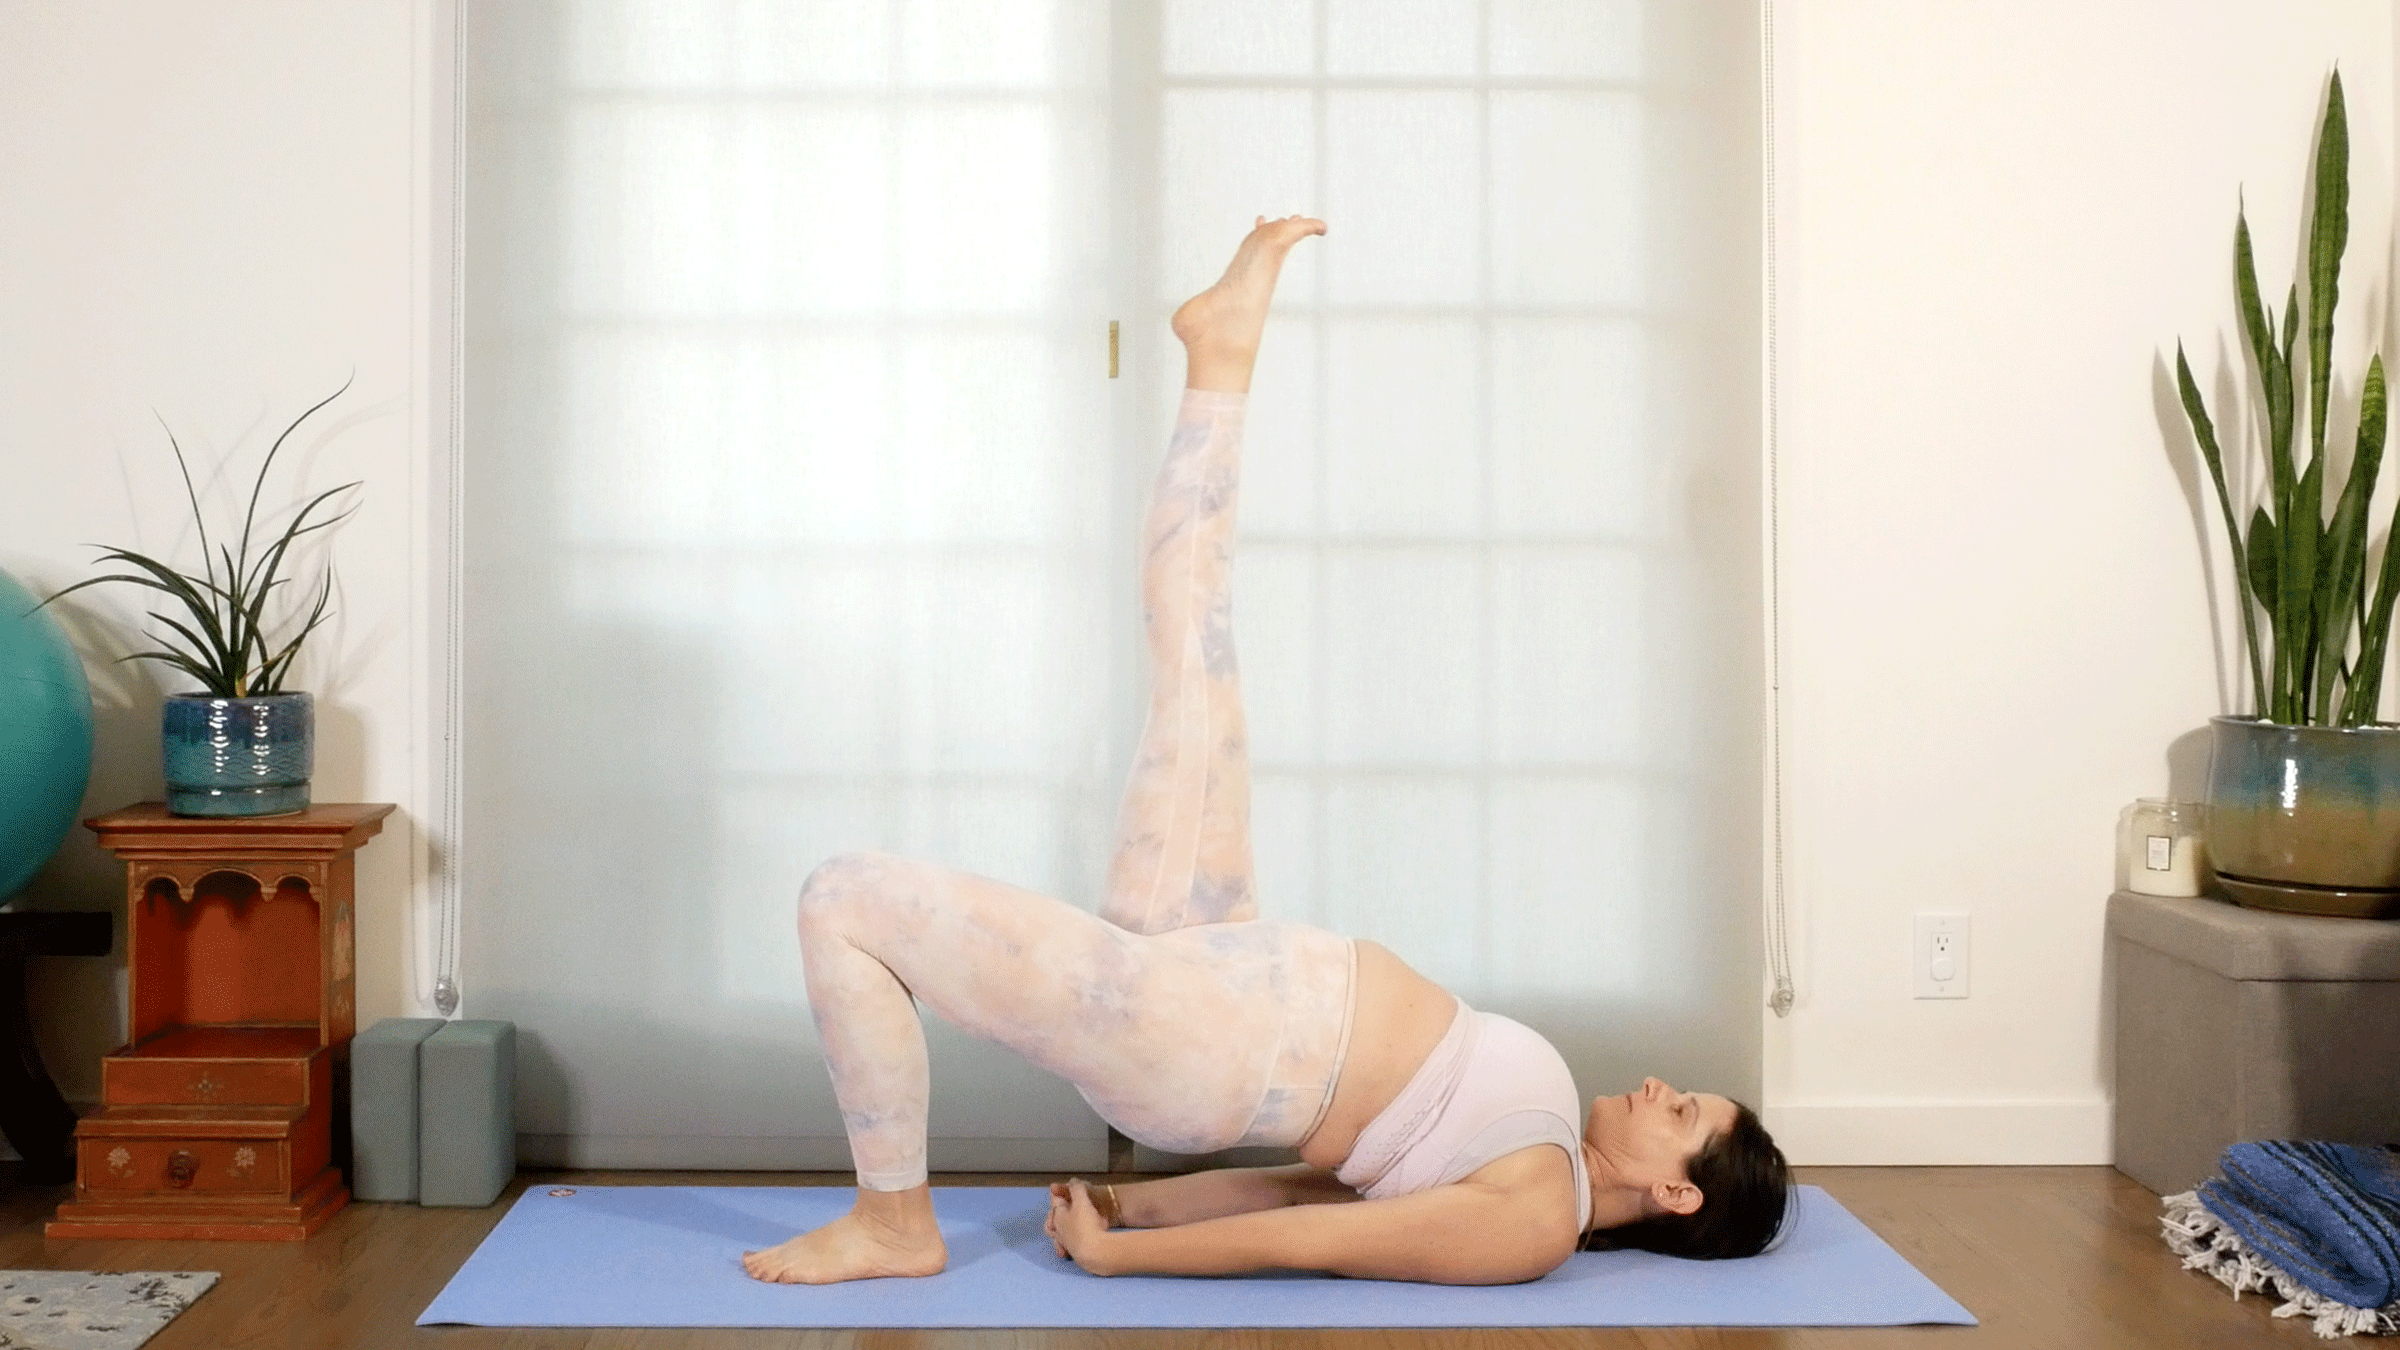
5. Half Splits
So far, we’ve focused on all the ways to adjust your upper body in Bridge. But the cool thing about this pose is that you can also play with the leg positioning. The half split is an awesome hamstring lengthener for the lifted leg. There is also a balance element as you learn to shift from four contact points on the floor (the outer shoulders and both feet) to three (outer shoulders and one foot).
From Bridge Pose, center your left leg and foot. Lift your right thigh toward the ceiling. Start with your knee bent and lengthen through your lower back. Straighten the leg as much as you comfortably can and reach your foot toward the ceiling. Stay here for 5 breaths. Bend your knee and lower your foot back to the floor. You can lower your back to the mat and rest before lifting your left leg.
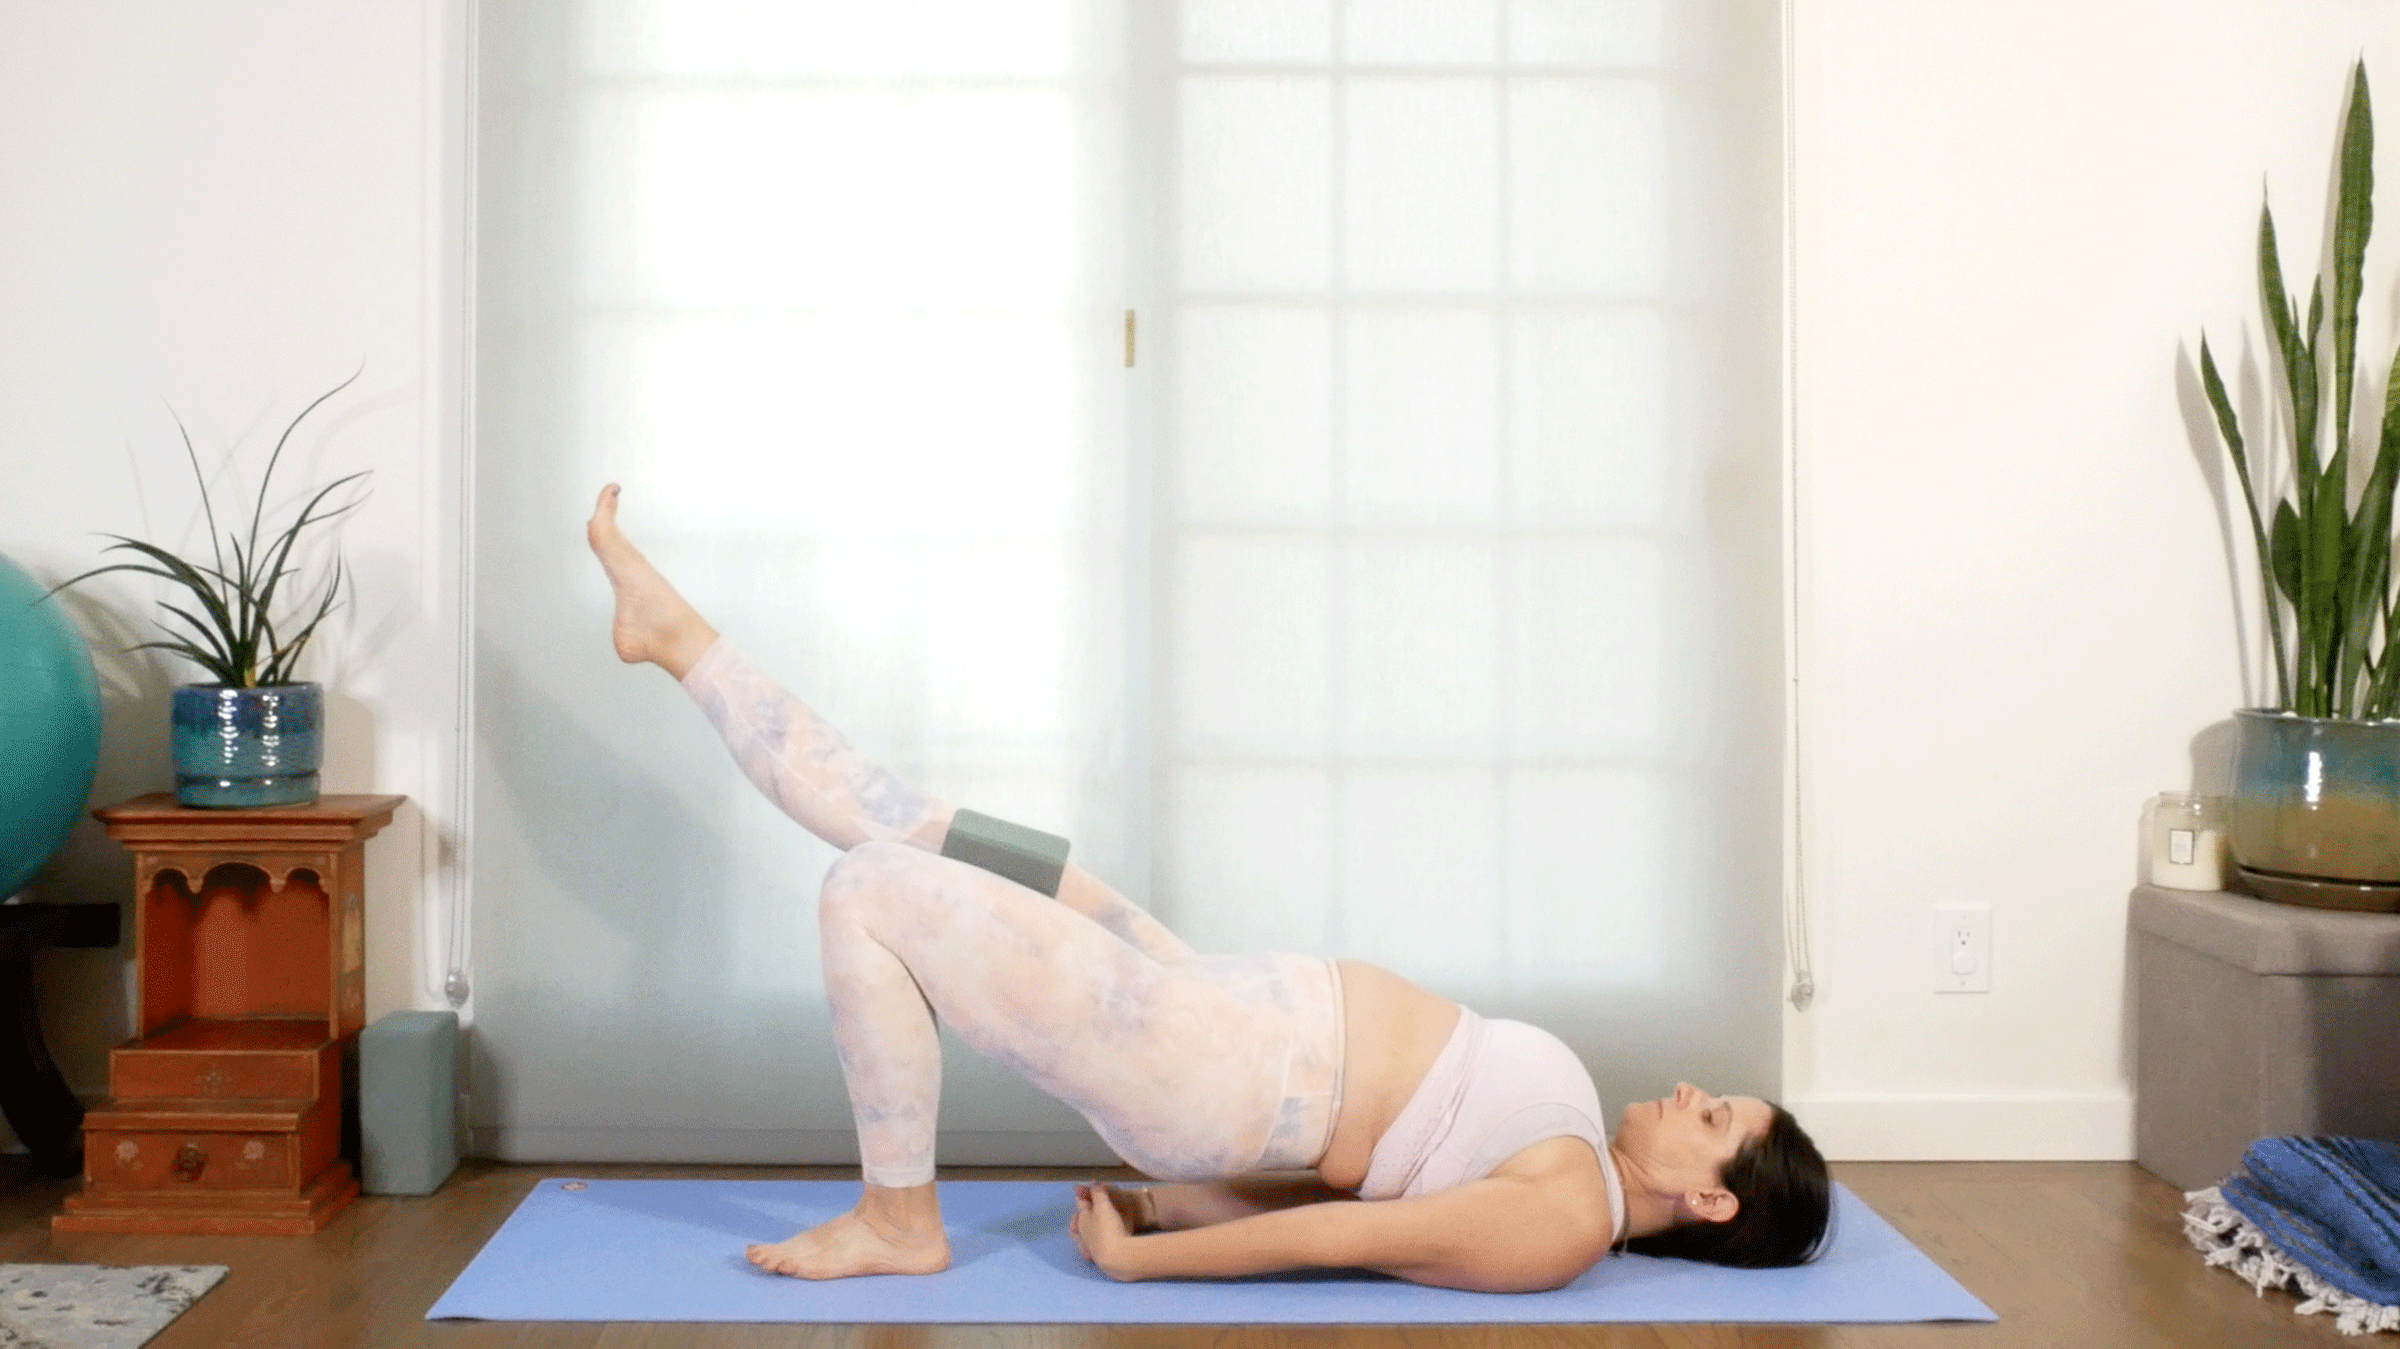
6. One leg forward at hip height
Unlike the Half Splits variation of Bridge, where lift one thigh into full hip flexion with the foot toward the ceiling, in this version, we keep the leg at the same height as the opposite thigh with the foot reaching toward the front of the mat. This strengthens the quadricep muscles on the lifted leg. It can be helpful to have a block between the thighs for this variation to help keep our pelvis level.
From Bridge Pose, straighten your right knee and reach your foot toward the front of the mat while keeping your thighs at the same height. Stay here for 5 breaths. Consider lowering your back to the mat and rest in between sides.
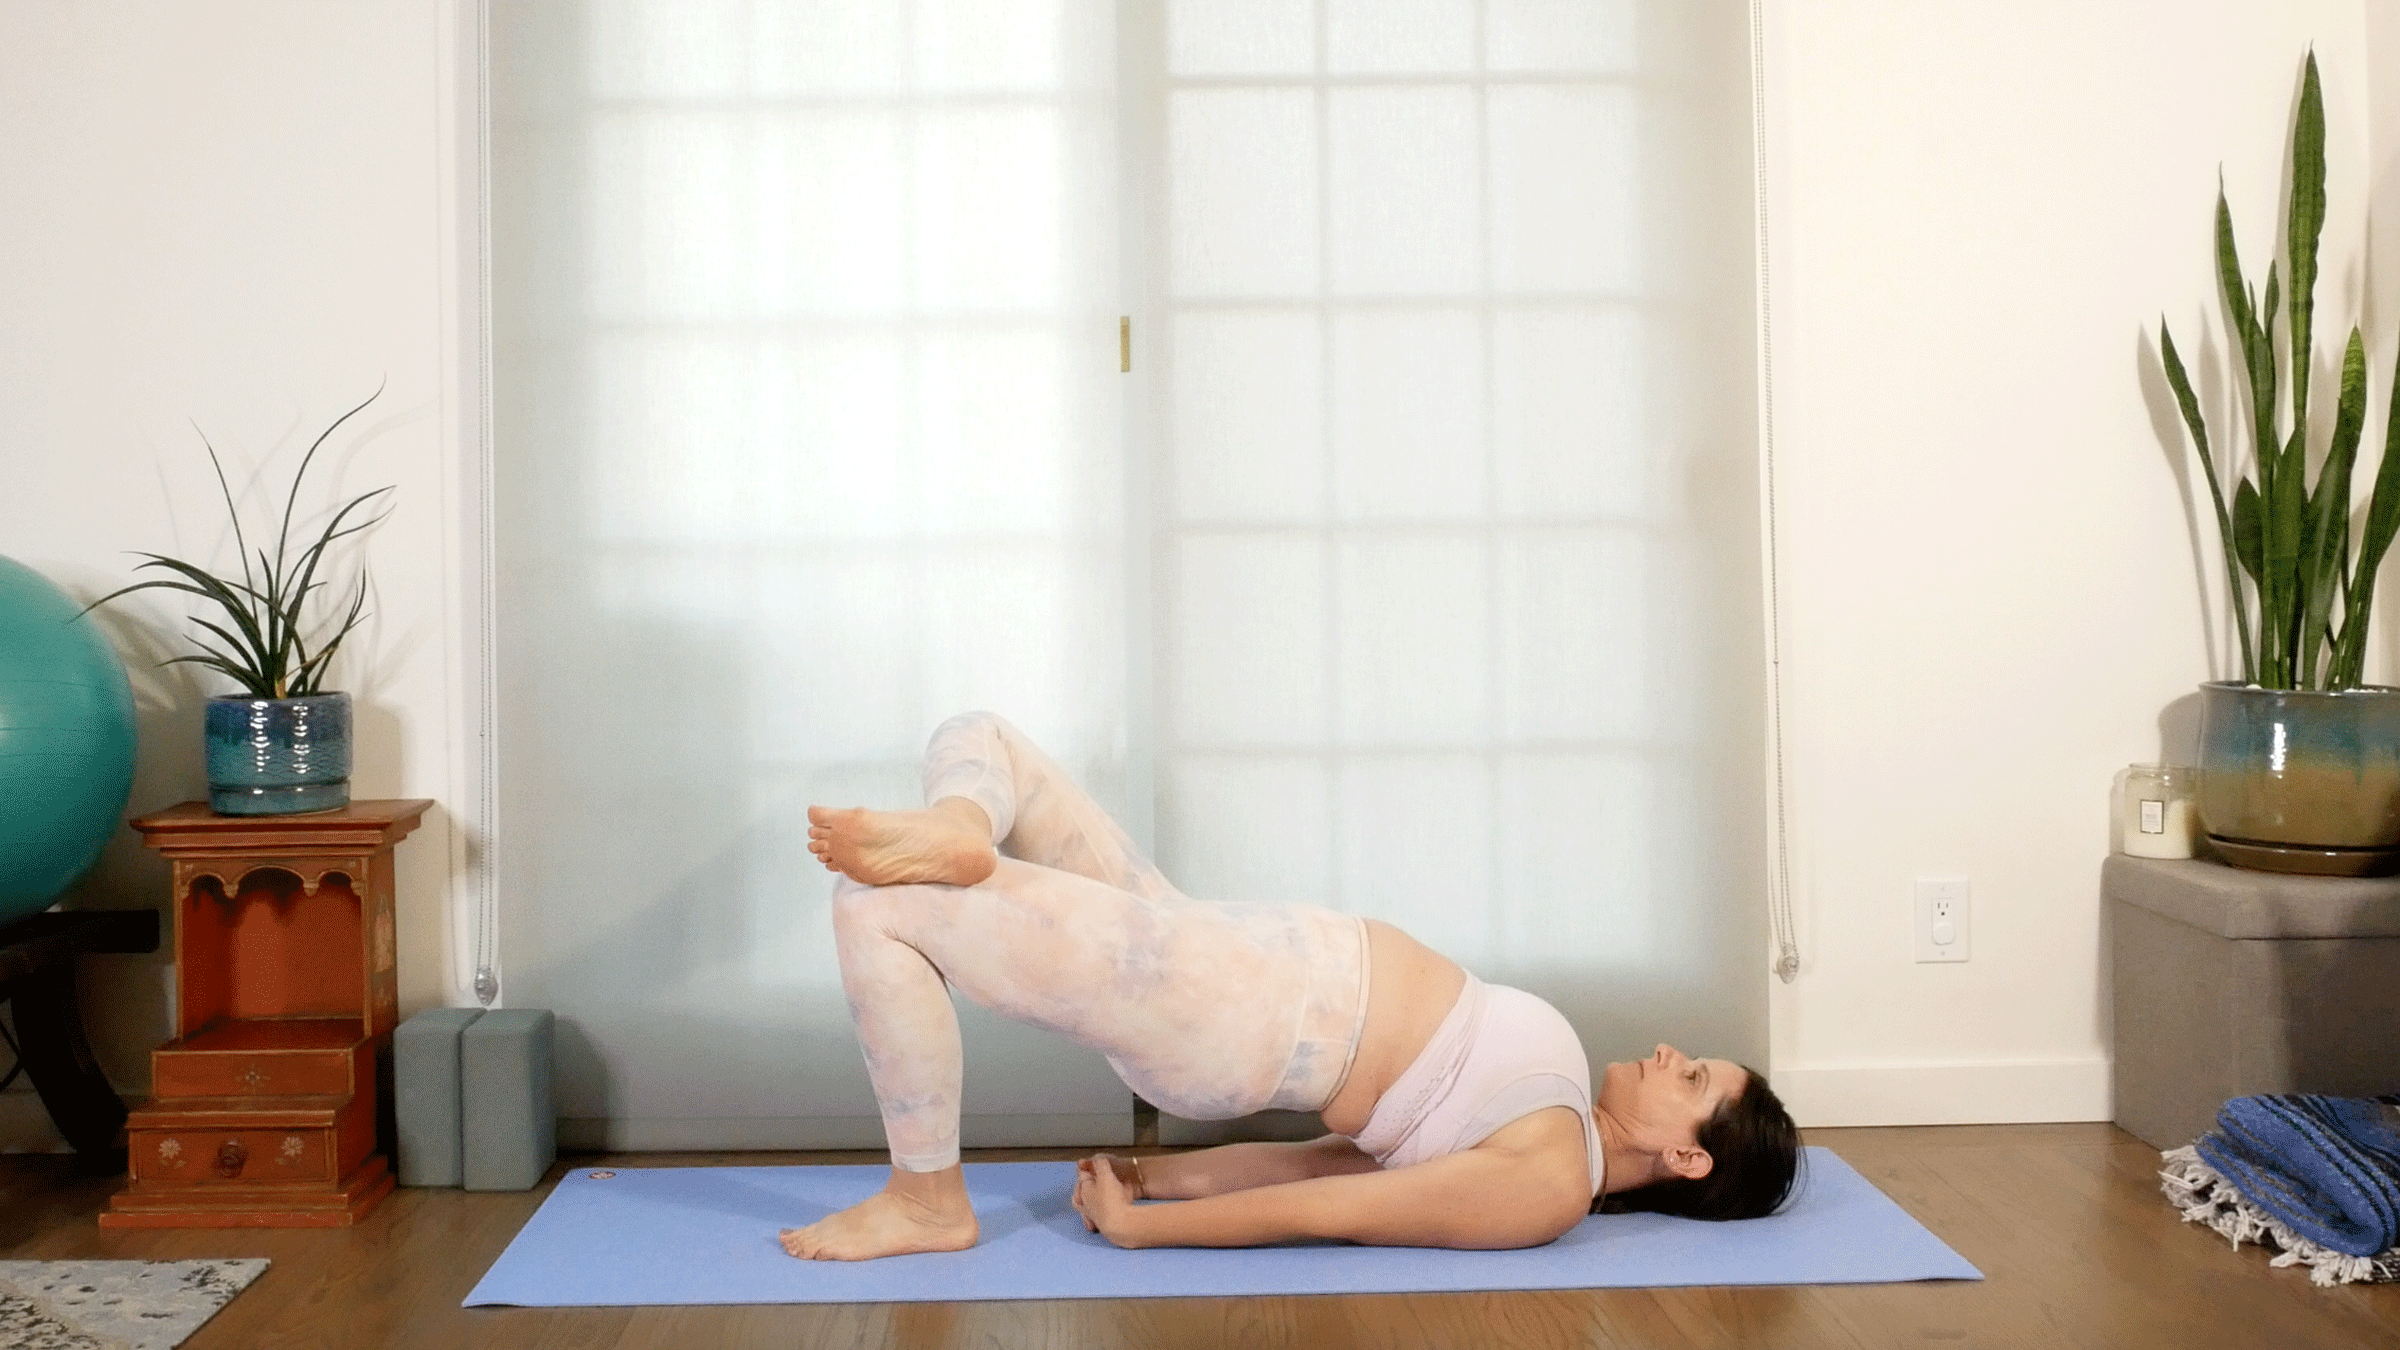
7. Figure 4
When I was fixated on the chest-opening aspect of all my backbends, I ignored the fact that Bridge is also a great hip opener. Lifting into the pose stretches the hip flexors along the front of the thighs. You can add another dimension of hip-opening by incorporating an inner thigh release that mimics the stretch felt in Pigeon Pose. This is also a good variation to access one’s oblique muscles as it requires effort and awareness to keep the pelvis level rather than let it sink in the direction of your bent leg.
From Bridge Pose, bring one leg into a figure 4 shape by crossing your ankle over the opposite thigh. Stay here for 5 breaths before lowering your leg. If you need, lower your back to the mat and rest before switching sides.
About our contributor
Sarah Ezrin is an author, world-renowned yoga educator, popular Instagram influencer, and mama based in the San Francisco Bay Area. Her willingness to be unabashedly honest and vulnerable along with her innate wisdom make her writing, yoga classes, and social media great sources of healing and inner peace for many people. Sarah is changing the world, teaching self-love one person at a time. She is also the author of The Yoga of Parenting. You can follow her on Instagram at @sarahezrinyoga and TikTok at @sarahezrin.