Published December 6, 2022 10:58AM
Switch Up Your Extended Side Angle With These 7 Arm Variations
Sometimes you just need to change things up.

(Photo: Sarah Ezrin)
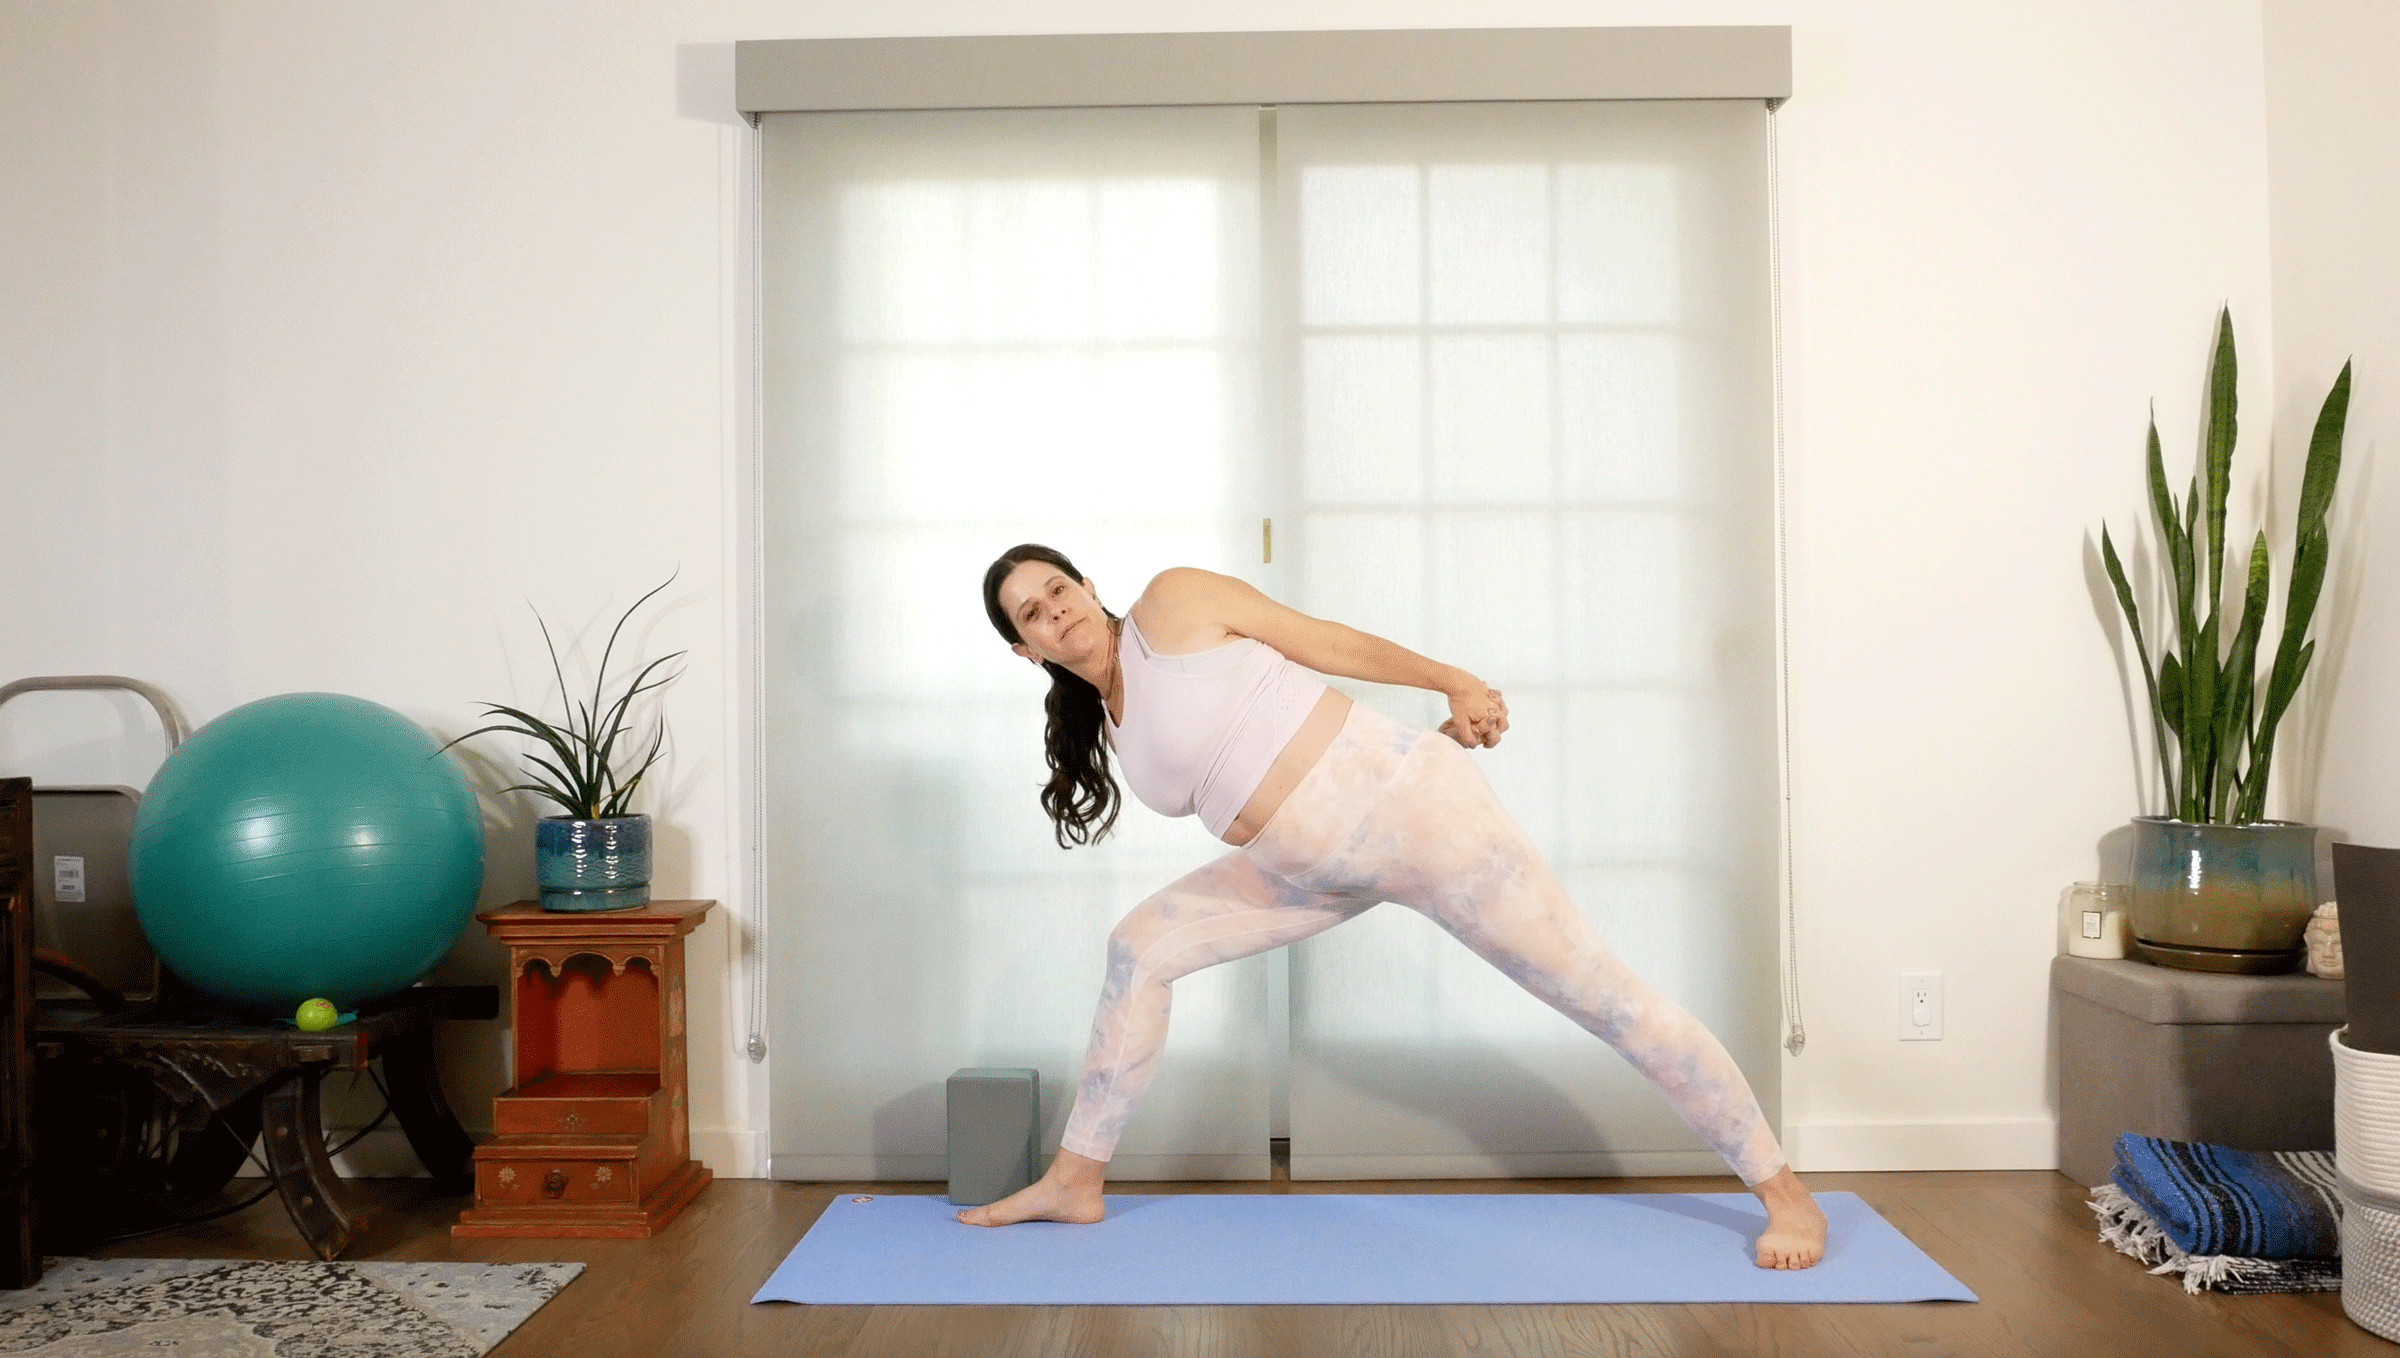
“I’m coming to your class today!” texted my sister, Jen, one morning. “Please don’t teach Parsvakonasana.” She and I agree on many things. But Utthita Parsvakonasana (Extended Side Angle) is not one of them. Whereas I would willingly practice it every day, my sister used to feel quite differently.
Her perspective started to change after she completed 500 hours of yoga teacher training. Her trainers emphasized that the “advanced” expression of Extended Side Angle is not when you can get your hand on the mat alongside your front foot. Instead, they taught that the most “advanced” version of any pose is whatever variation honors your body’s needs on that day—even if that means skipping the pose entirely.
One of the more frustrating aspects of the pose for her had been the intense challenge for the legs and hips. She found that by exploring different variations for her arms, she was able to take some of the focus away from her lower body. It was after realizing that the posture could be practiced in more ways than just one that Jen began to appreciate—or at least not dread—Extended Side Angle.
ADVERTISEMENT
The following untraditional arm variations for Utthita Parsvakonasana can make the pose feel like something new again or provide relief if you are dealing with a shoulder injury or sensitivity.
How to come into Extended Side Angle
Stand facing the long side of the mat. Inhale your arms straight out to the sides, like a “T,” and step your feet apart so your ankles are below your wrists. Turn your right leg away from your body toward the front of the mat. Angle your back foot and hip slightly inward. As you exhale, start to bend your front knee toward Warrior 2. As you inhale, reach your right arm forward and tip your pelvis. Bring your right hand down inside or outside of your right foot and extend your top arm alongside your ear. Or explore any of the below options for what to do with your arms. When you’re ready to come out, inhale yourself upright. Straighten both legs and repeat on your left side.
How to vary your arm placement in Extended Side Angle
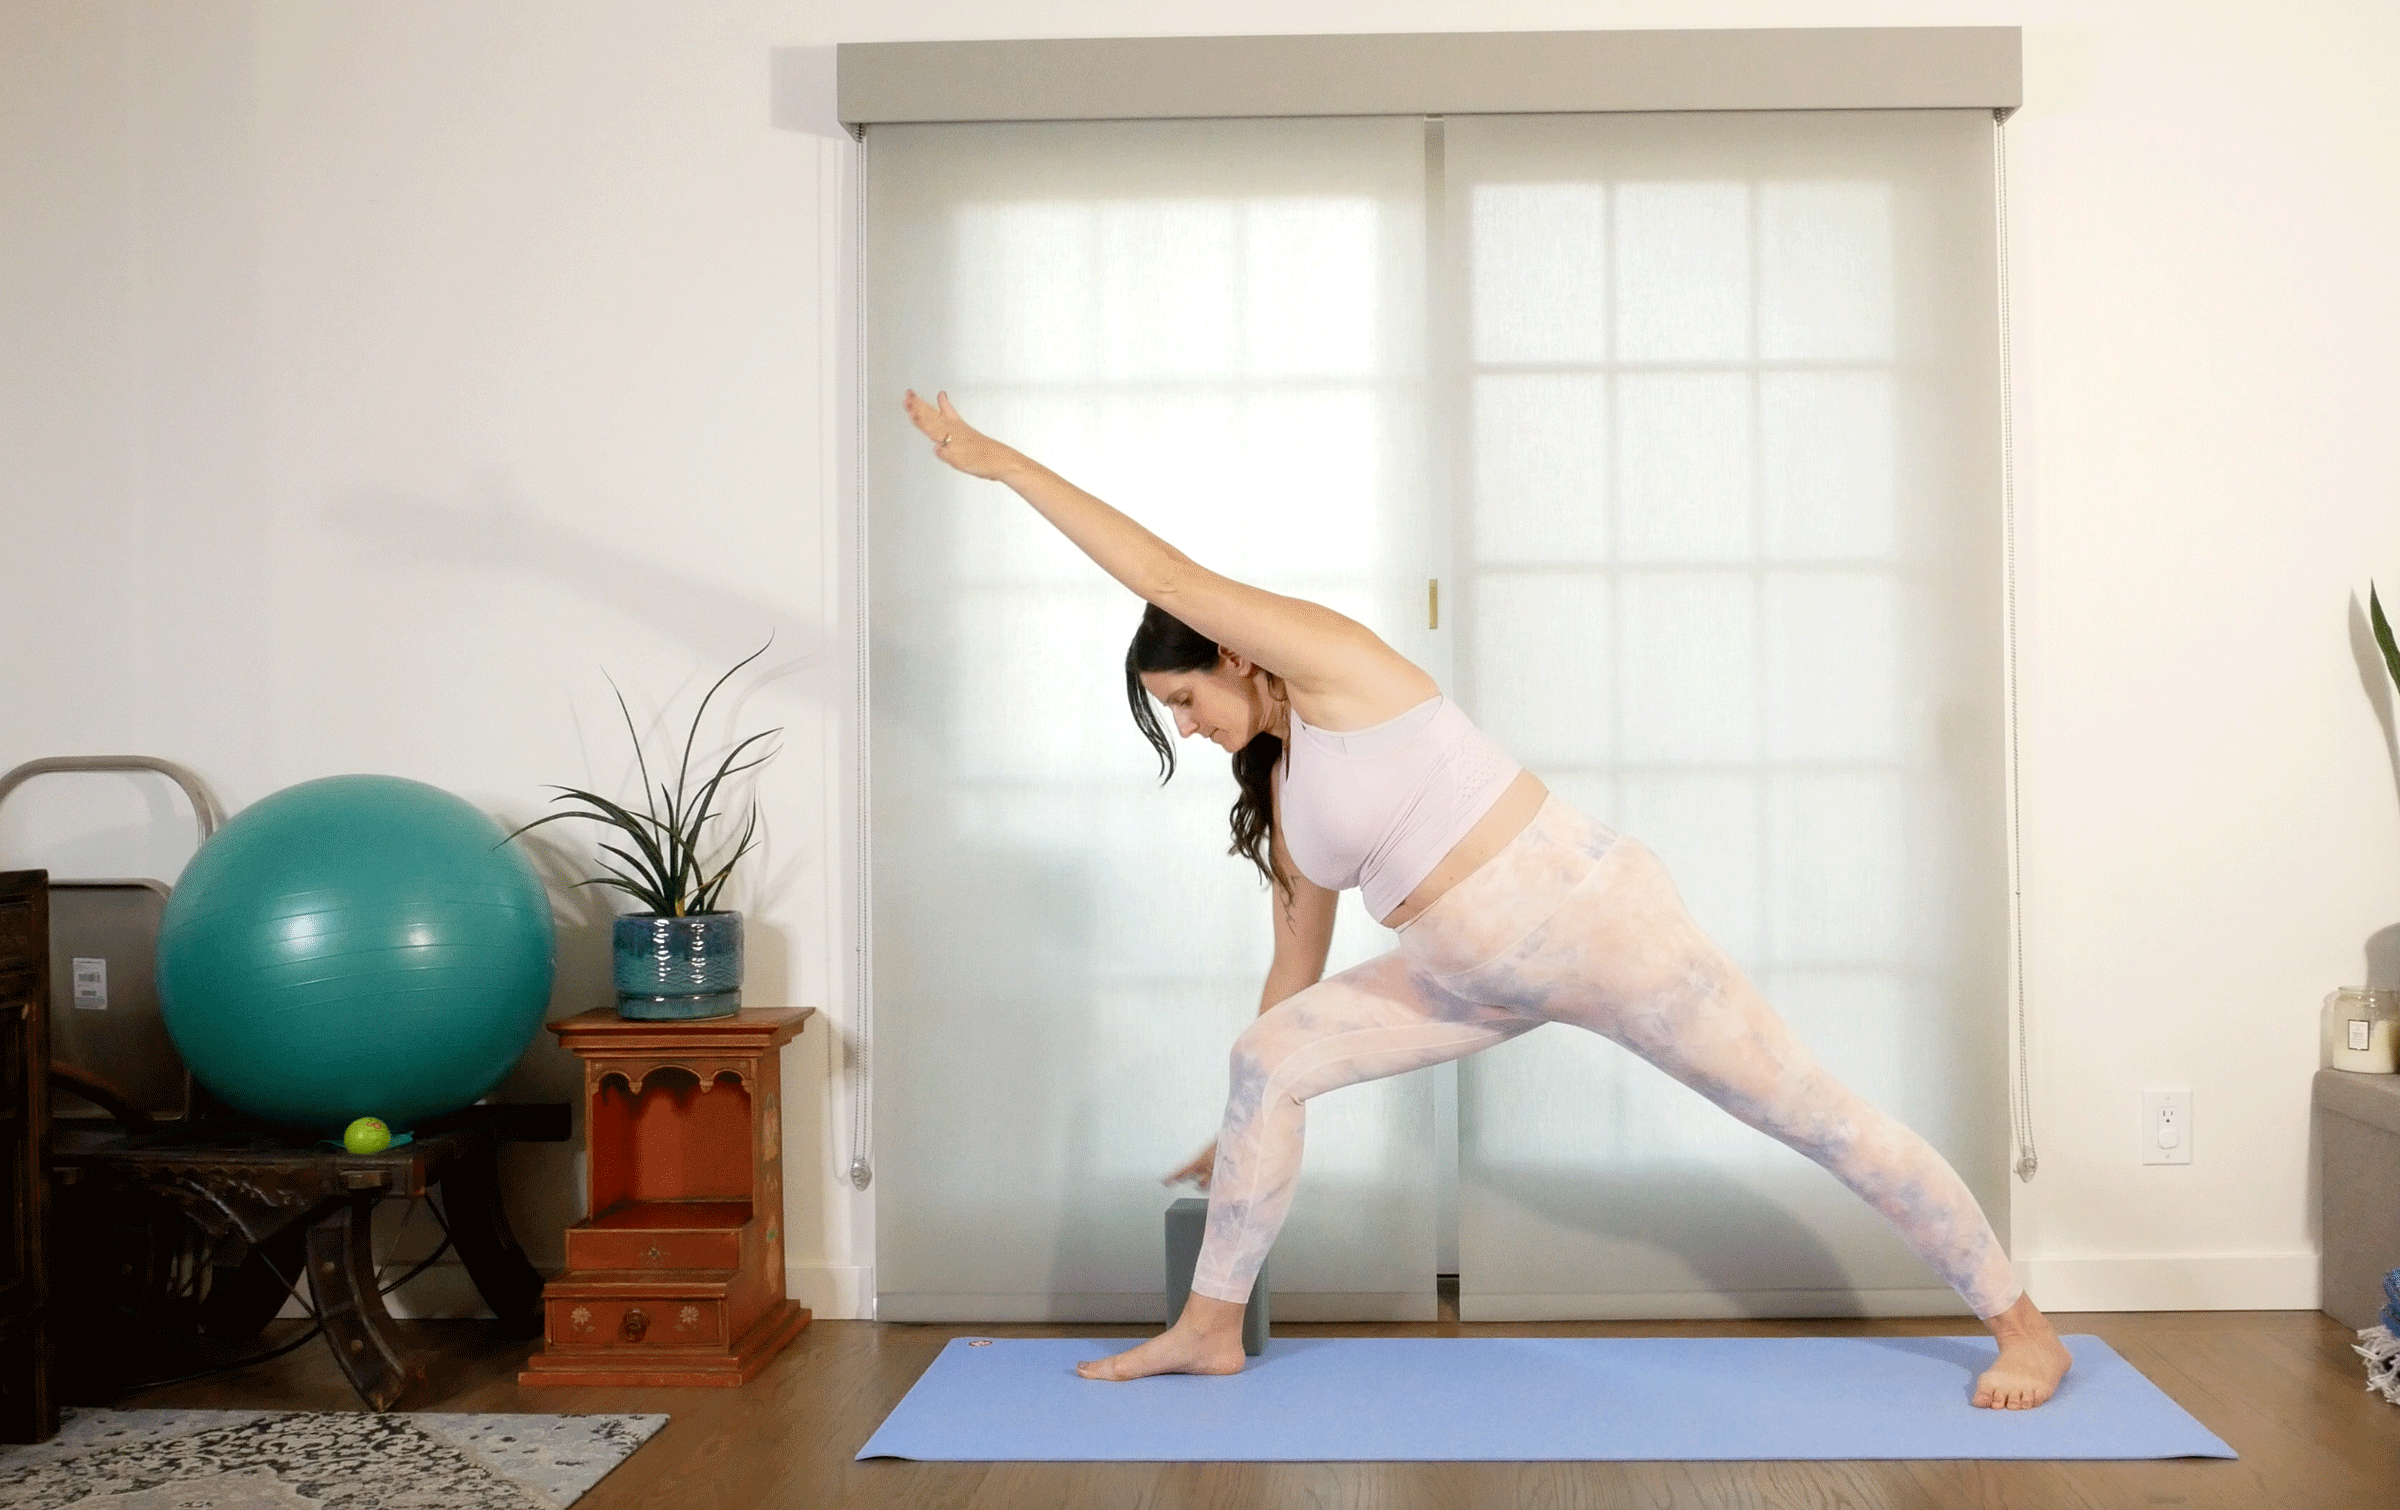
1. Hand on a block
In Ashtanga, you often hear the cue, “Get your palm flat to the floor, spine be darned.” Okay, no one has actually said that, but when you see most bodies practice Extended Side Angle, it seems implied. In my classes, it’s okay and encouraged to bring the floor to you, whether you need one block or three. If blocks can’t make the pose feel comfortable for you, keep reading.
2. Elbow on thigh
If placing your hand on the floor or a block, either inside or outside of your foot, isn’t comfortable, don’t bother! Instead, bend your elbow and rest your forearm on your thigh. I found this version to be especially helpful during pregnancy.
ADVERTISEMENT
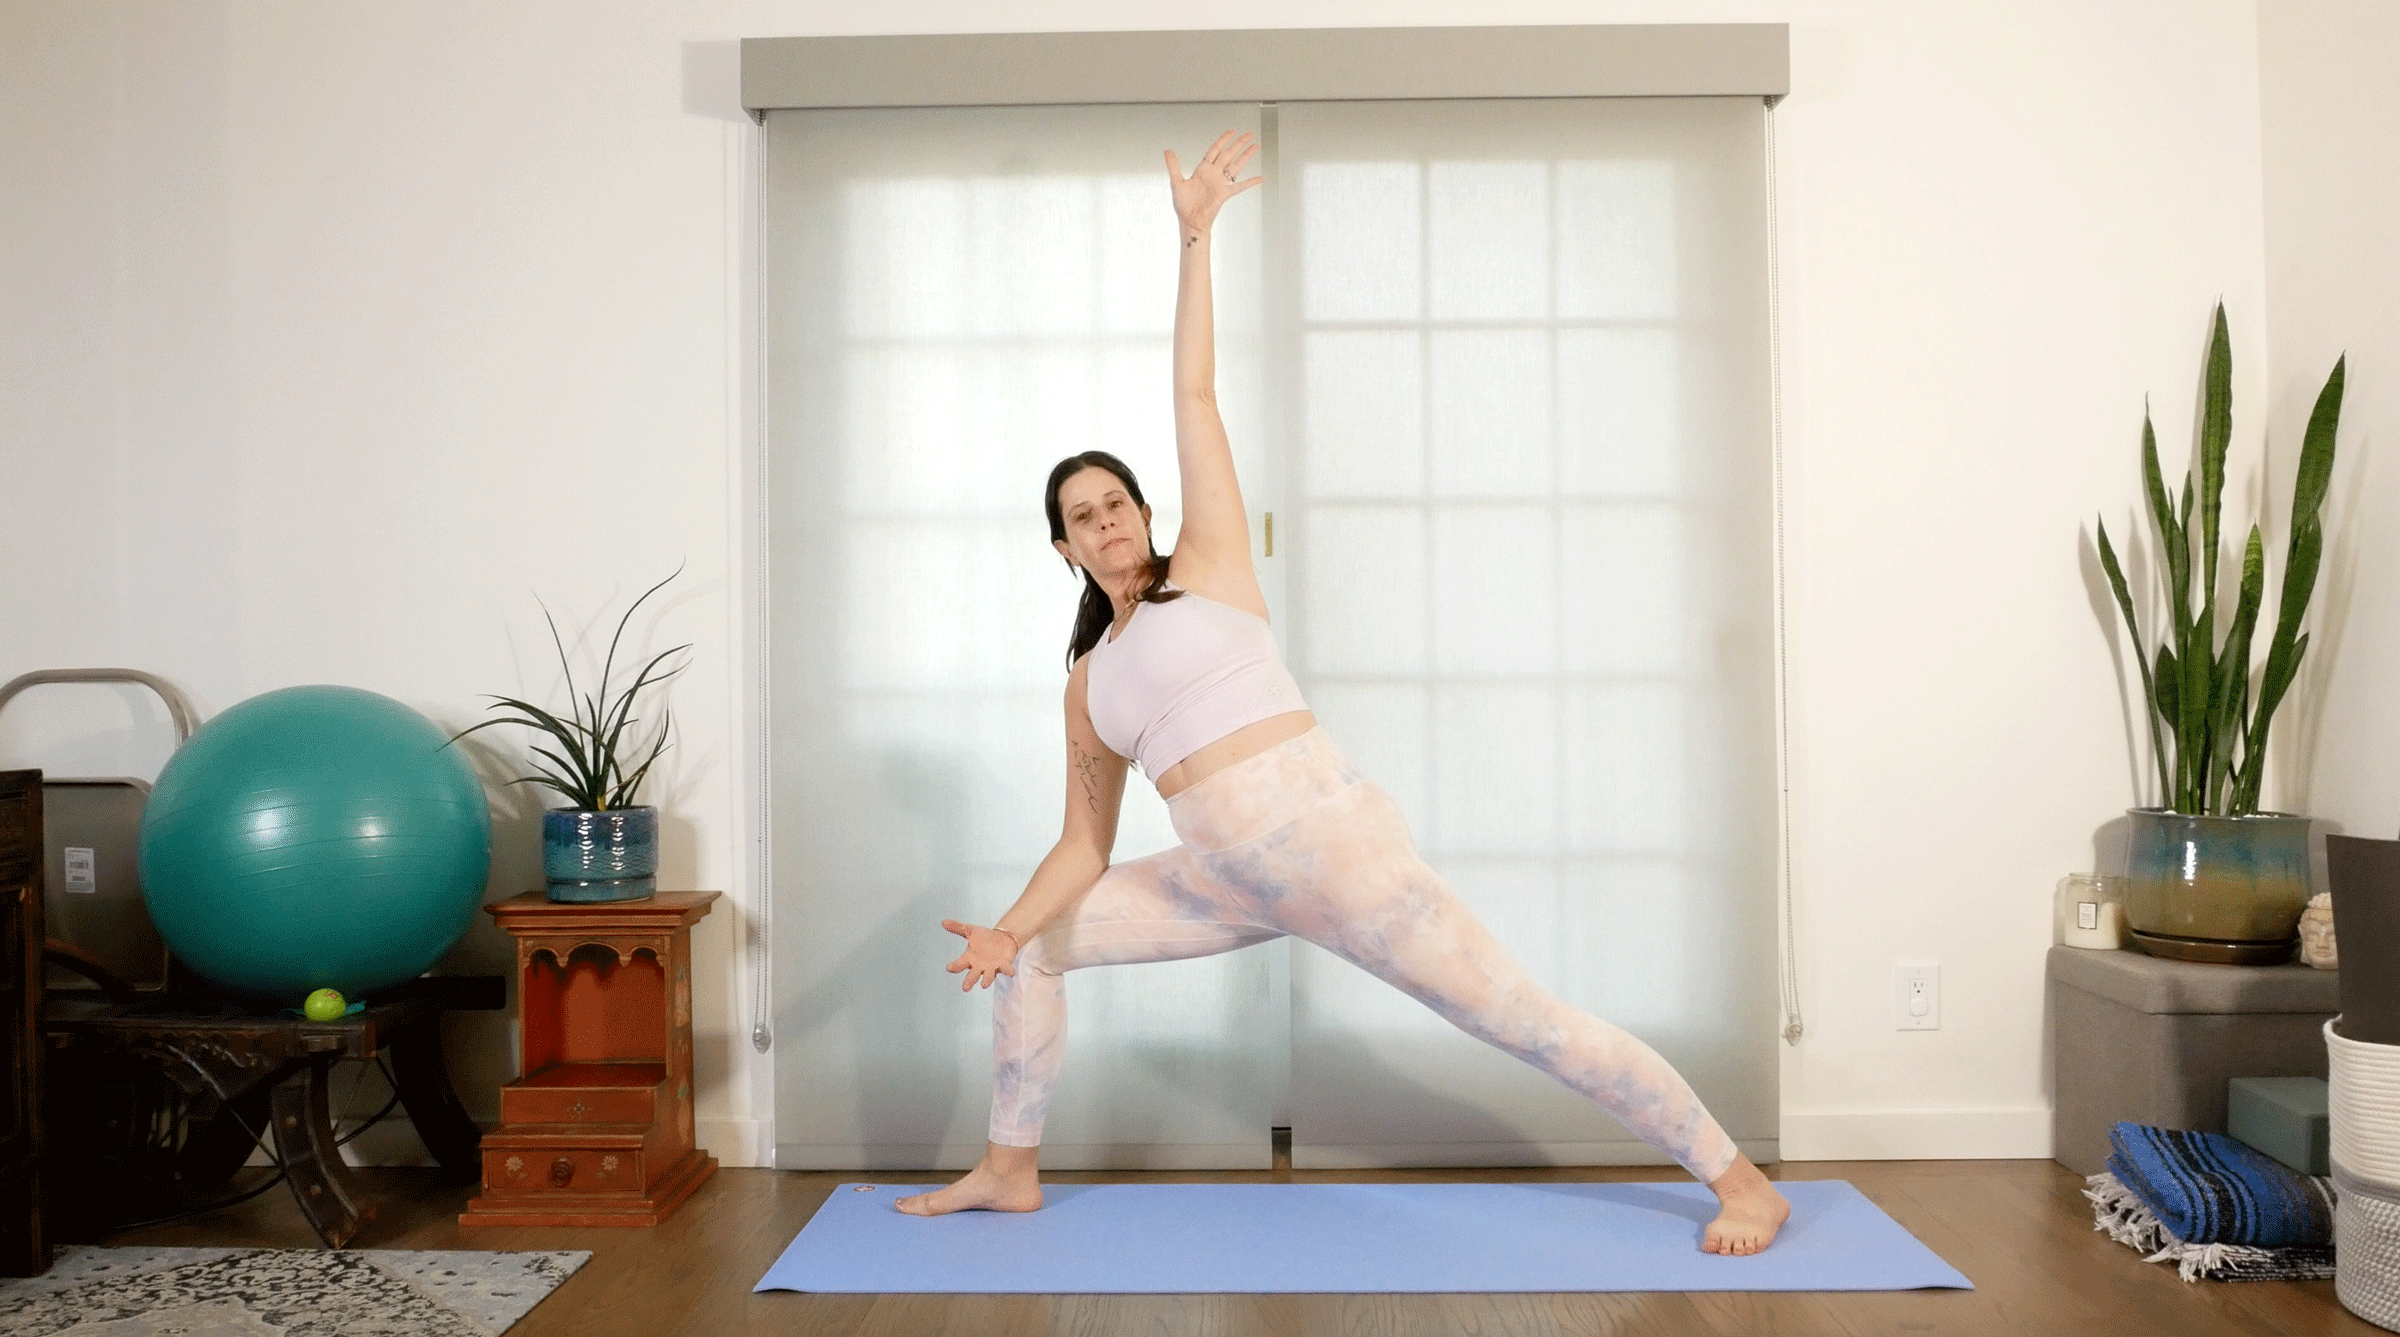
3. Hand on hip
When dealing with a shoulder injury, reaching your arm overhead, as taught in the traditional Extended Side Angle, or even straight toward the ceiling can be taxing or even impossible. Keeping that hand on your hip enables you to open your shoulder and chest without overtaxing the shoulder joint.
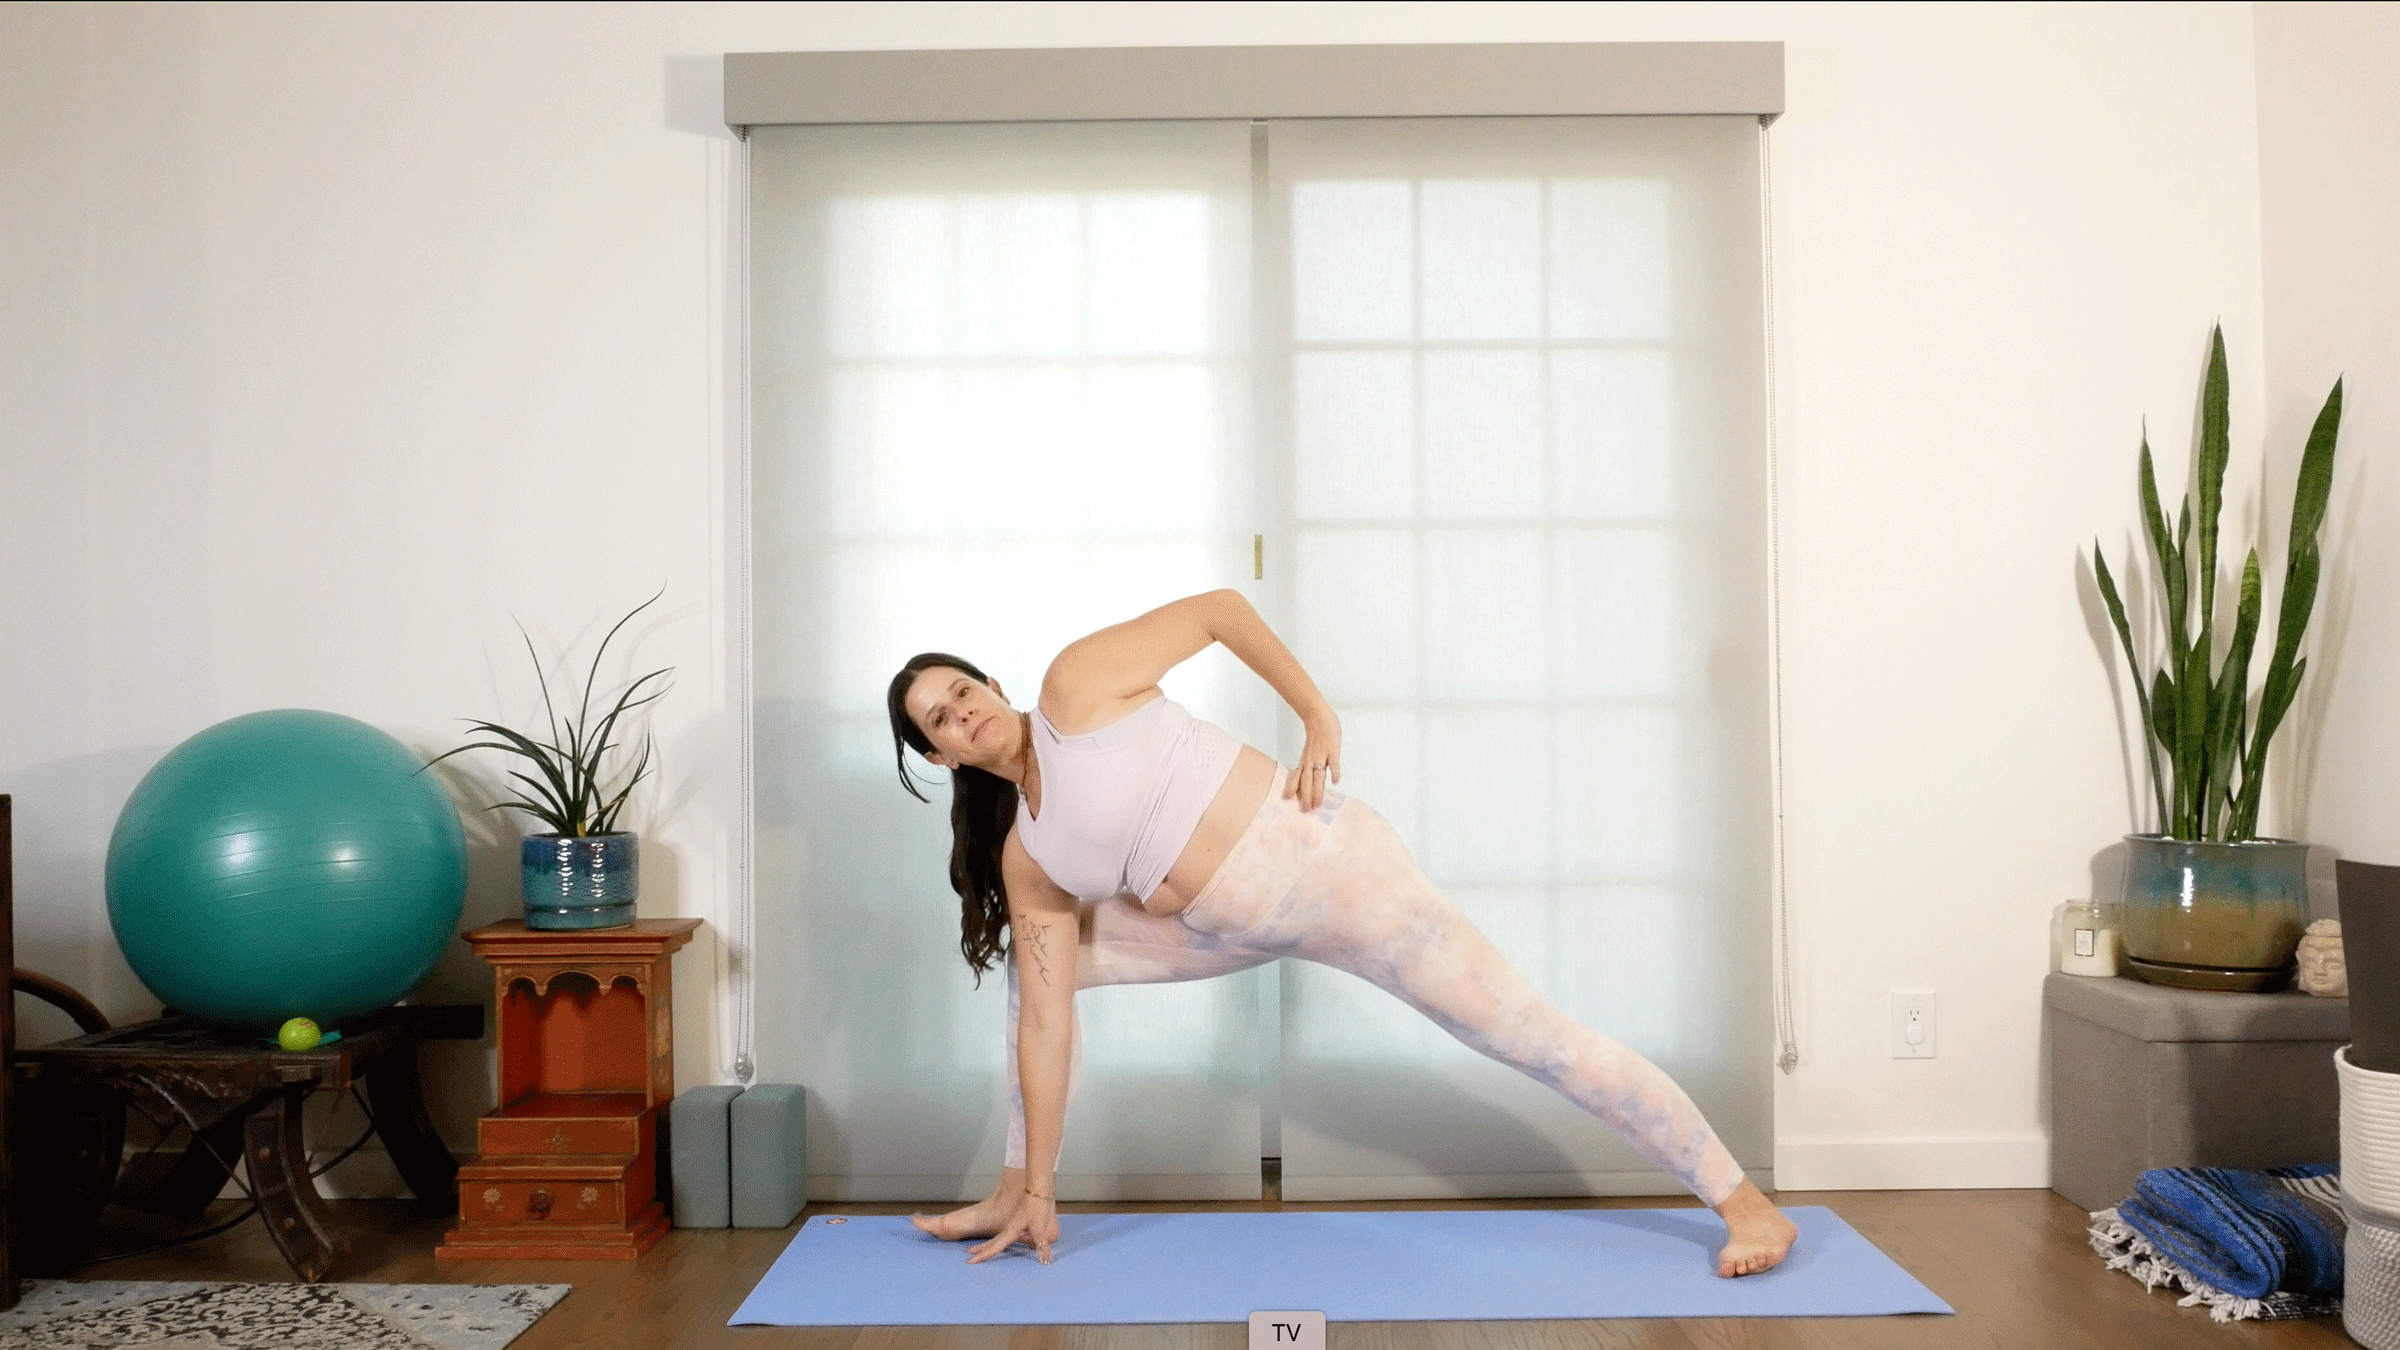
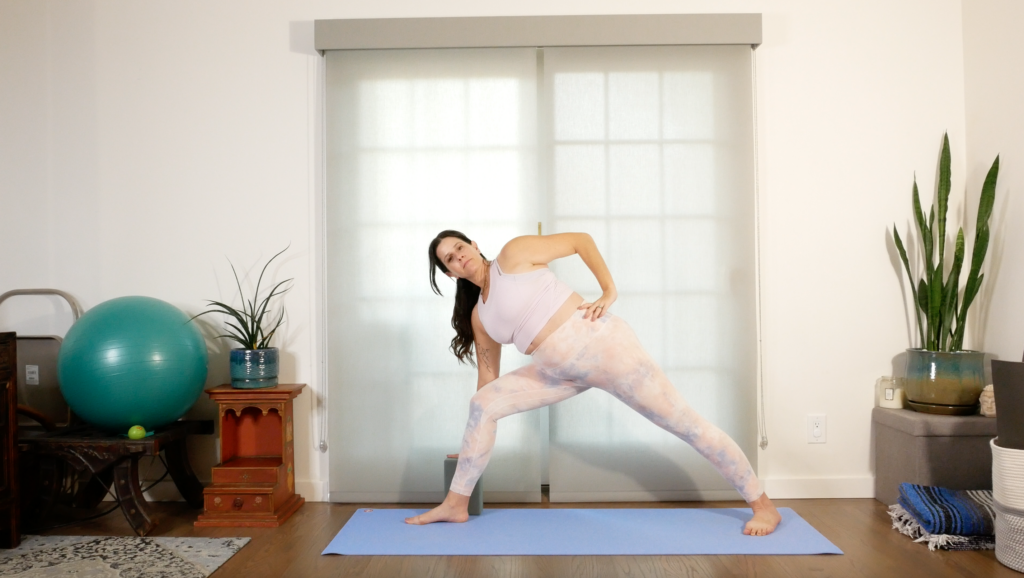
4. Half bind
A half bind in Extended Side Angle means you take one hand to the mat or a block alongside your front foot and reach the other arm behind your back and bending your elbow. The position of the top arm encourages your chest and top shoulder to open and lengthens the pectoralis muscles (and, some teachers would say, opens the lungs and heart). Though your top arm tends to get all the attention, remain vigilant of your bottom shoulder, as it can creep up close to the ear or, conversely, it can collapse a little. I like to think of my bottom arm being in Vasistasana (Side Plank) and I imagine trying to drag my palm toward the back of the mat to release the trapezius.

5. Full bind
Building on a half bind, clasp your hands with your left arm behind your back and your right arm reaching beneath your leg. Or simply try to clasp your left wrist with your right hand. The goal of most binds is not actually the clasp, but the consequent opening of the chest. If you find that you need to turn your chest toward the mat to clasp your hands, or that you’re straining to connect your hands, instead grab a strap or towel to connect your hands. (I honestly believe that full binds without props are accessible only to those people whose arms happen to be sufficiently long enough to reach.)
ADVERTISEMENT
6. Interlaced fingers
For even deeper shoulder-opening potential in this pose, try interlacing your hands behind your back (or holding a strap or a towel with your hands) In Extended Side Angle. This variation is excellent at strengthening your legs as you’re relying solely on them to support your posture.
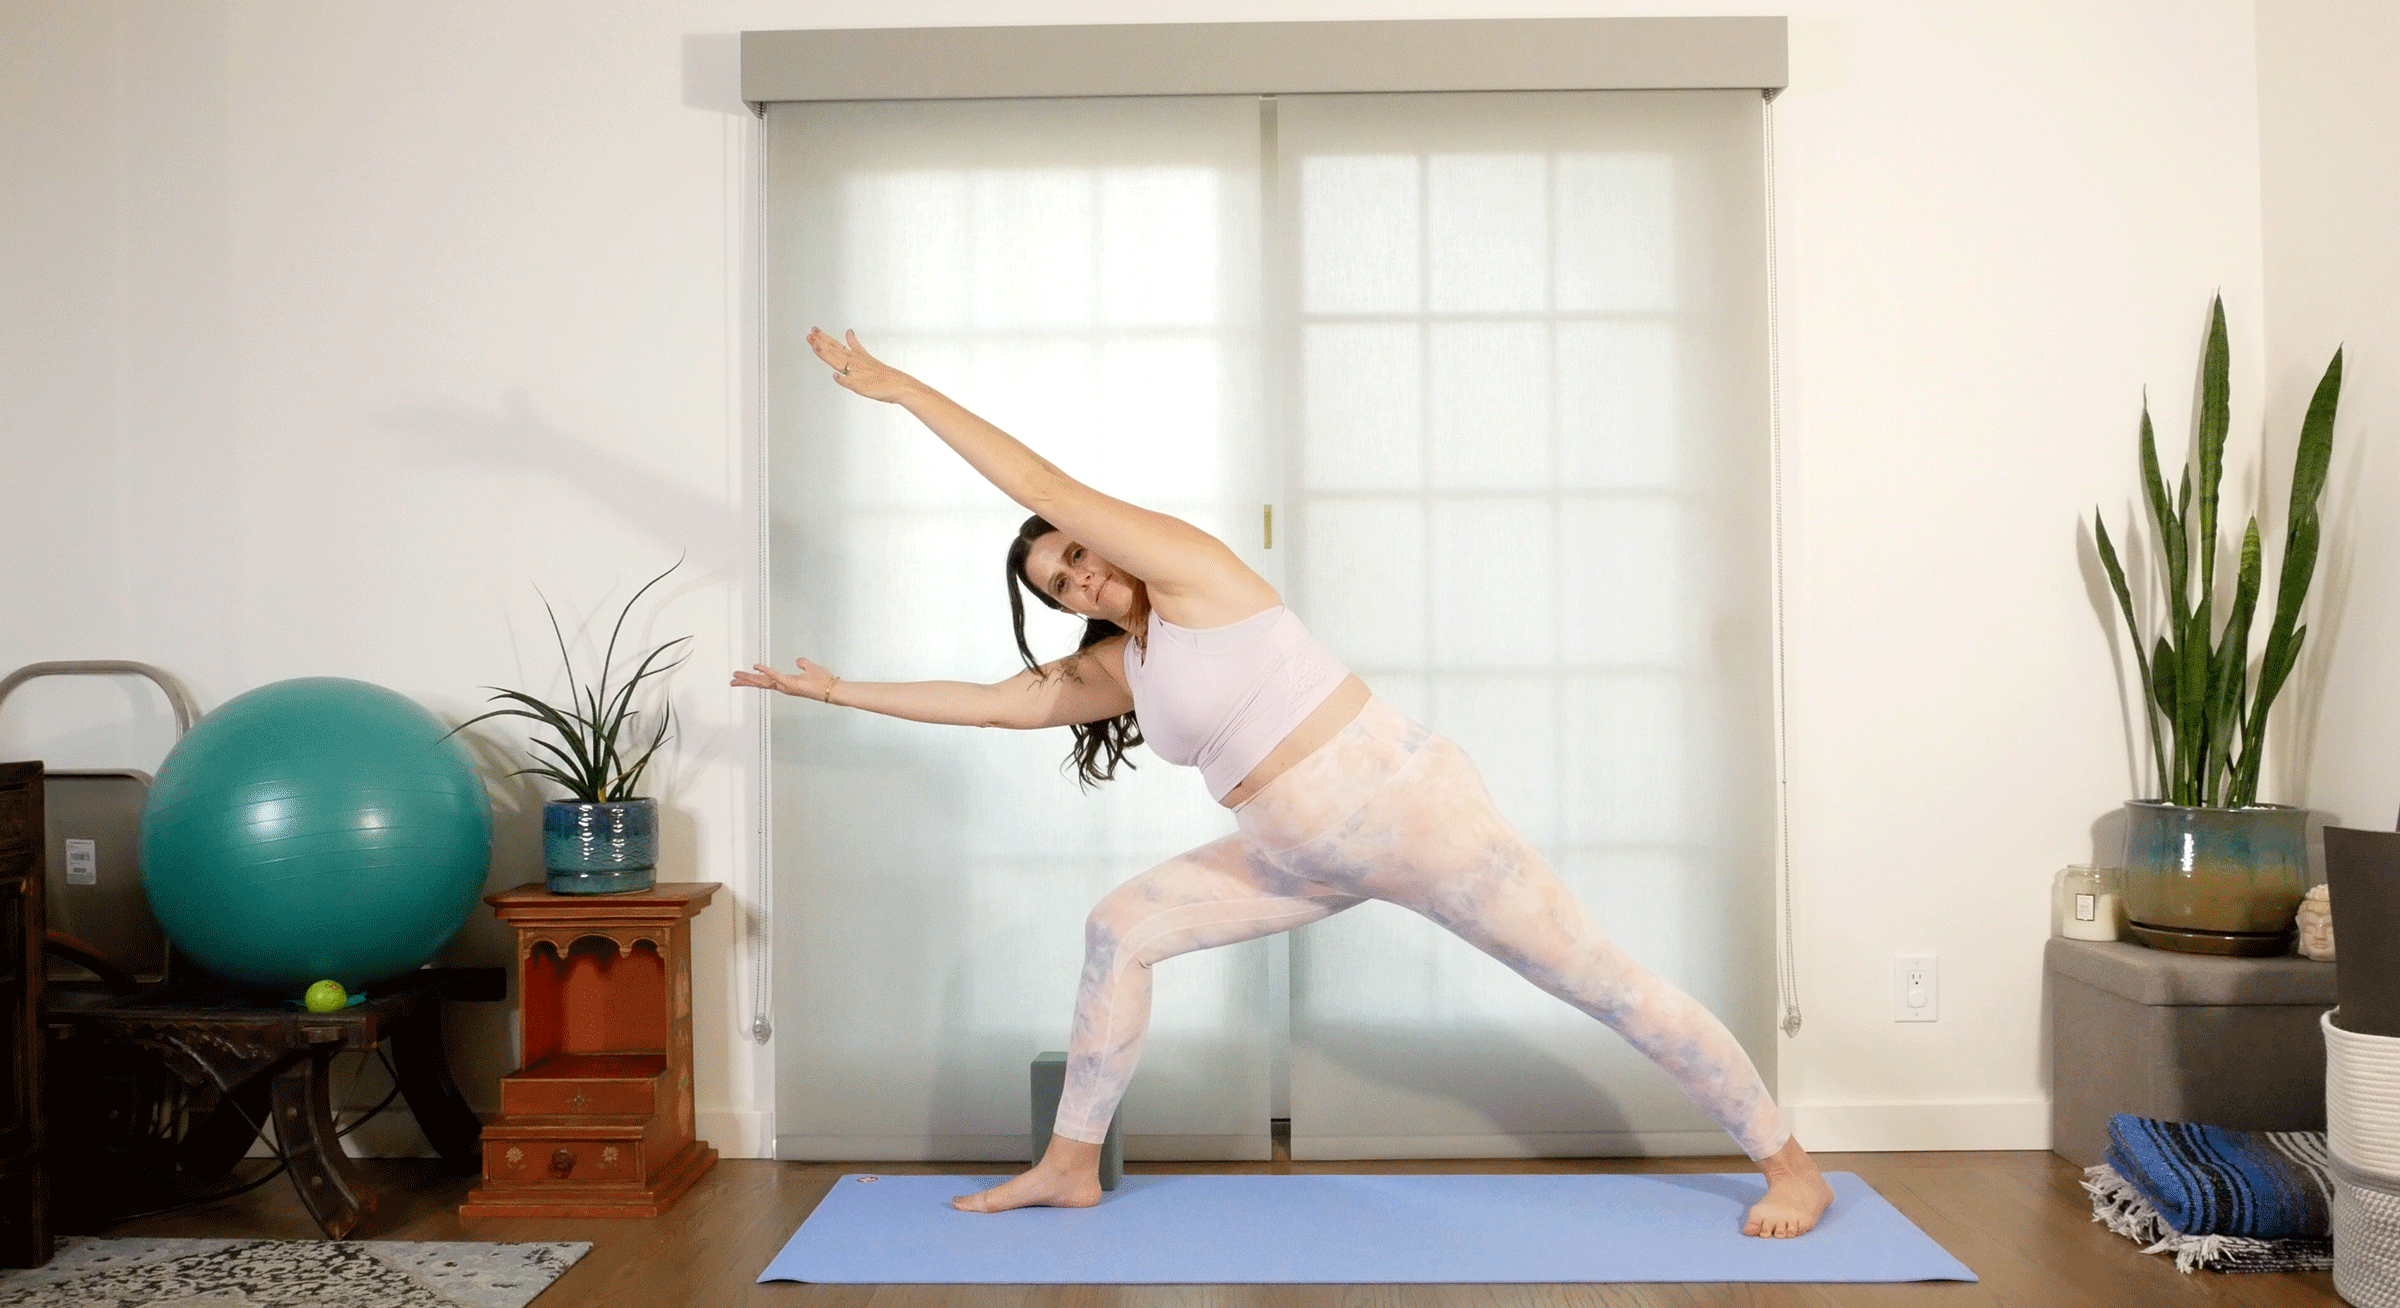
7. Both arms overhead
Look, ma, no hands! This version of Extended Side Angle is actually a stealth core strengthener as it requires trunk stability to laterally flex your pelvis while reaching both arms alongside your head. In this variation try to remain more upright with your torso, to maintain equal length in your spine, versus trying to get closer to your front thigh.
About our contributor
Sarah Ezrin is an author, world-renowned yoga educator, popular Instagram influencer, and mama based in the San Francisco Bay Area. Her willingness to be unabashedly honest and vulnerable along with her innate wisdom make her writing, yoga classes, and social media great sources of healing and inner peace for many people. Sarah is changing the world, teaching self-love one person at a time. She is also the author of The Yoga of Parenting. You can follow her on Instagram at @sarahezrinyoga and TikTok at @sarahezrin.