Published February 21, 2023 02:13PM
6 Ways to Practice Plank Pose
How to derive the benefits without the strain.

(Photo: Andrew McGonigle)
The first time most of us attempt Plank Pose, we’re barely able to resist gravity for more than a few seconds, if at all. Truth be told, many of us never hold it for very long. Since Plank is often used as a transition from one yoga pose to another, we tend to take that as permission to rush through it. And that’s where we shortchange ourselves.
Essentially the top of a push-up, Plank challenges our shoulders, hip flexors, and core musculature (the rectus abdominis, obliques, and transversus abdominis) as we resist gravity. That effort is not for nothing. Research indicates Plank can be exceptionally efficient at enhancing muscular strength, endurance, stability, even cardiopulmonary fitness when practiced regularly. It can also facilitate concentration, resilience, and proprioception, or an awareness of your body position in space.
What’s not always explained in a vinyasa or beginner’s yoga class is that there are several alternate approaches to the pose that minimize the strain on your wrists and shoulders yet still allow you to benefit—and strengthen your way toward its traditional expression.
ADVERTISEMENT
6 Ways to Practice Plank Pose
Preparation
Before you practice Plank, warm up with poses that require the same muscular engagement and structural alignment but in less challenging postures. This allows you to develop an awareness and memory of what it feels like to hold your body in alignment without needing to also resist gravity at the same time.
Start with Tadasana (Mountain Pose). It may seem overly simple but it’s essentially the same lengthening—and resulting muscle engagement—as Plank Pose with a different relationship to gravity. Sink your weight into your heels and reach the top of your head toward the ceiling.
Also, Adho Mukha Svanasana (Downward-Facing Dog Pose) prepares your arms and shoulders for the strain of Plank. Navasana (Boat Pose) engages the same abdominal muscles essential to keep your hips from sagging in Plank.
ADVERTISEMENT
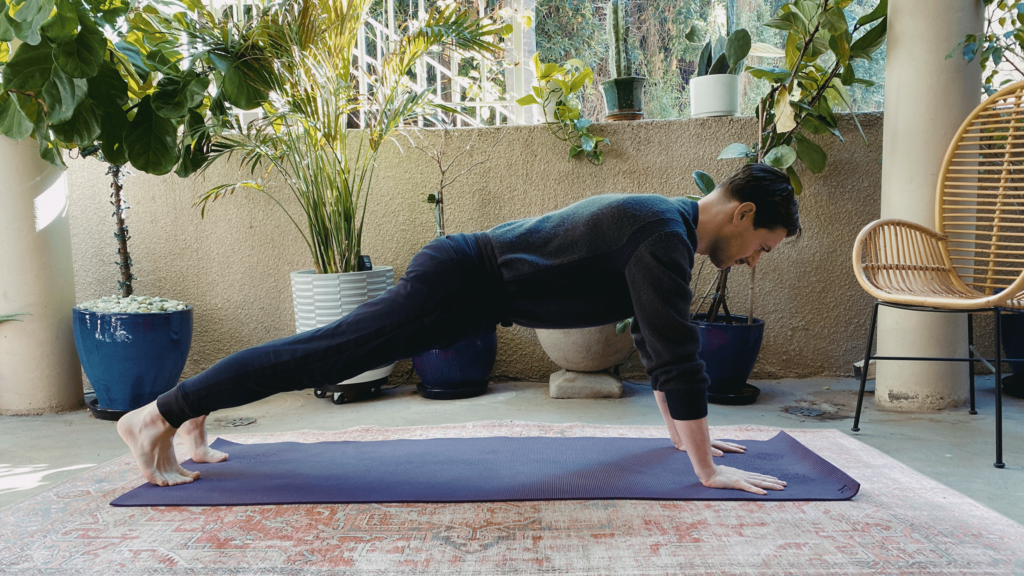
1. Plank Pose with hands slightly in front of shoulders
This version lessens the strain on your wrists, but it makes your shoulders work harder. To stay in position, you’ll rely less on the skeletal support of your shoulders being stacked directly over your wrists and more on muscular activation.
Begin on hands and knees with your wrists positioned a couple inches in front of your shoulders. Place your hands at least shoulder-width apart. Press your hands into the mat and feel your shoulder blades draw slightly apart. Continue this action as you inch your knees a little away from your hands, tuck your toes, and lift your knees to straighten your legs.
ADVERTISEMENT
Reach your heels toward the wall behind you and the top of your head toward the wall in front as you create a straight line. Hug your legs toward one another. Keep your gaze between your hands.
Tip
If it’s more comfortable for you, place your hands slightly wider than shoulder-distance apart. Positioning your hands slightly wider than your shoulders accommodates the fact that your forearms naturally veer awry from your shoulders.
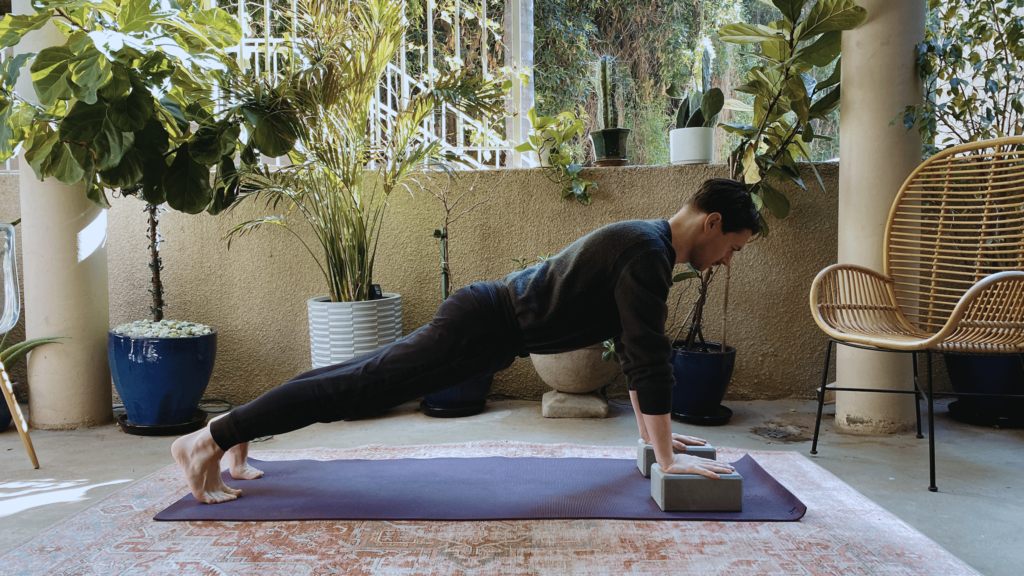
2. Plank Pose with hands on blocks
This variation shifts your center of gravity back slightly, reducing the load on your wrists, making it helpful for anyone with wrist sensitivity.
ADVERTISEMENT
Begin on hands and knees with your hands on two blocks at their lowest height. Position your wrists below your shoulders and your hands at least shoulder-width apart. Press your hands onto the blocks, slide your knees back a little, tuck your toes, and lift your knees off the mat to straighten your legs. Hug your legs together. Reach your heels toward the back of the room and reach the crown of your head toward the front of the room. Aim to create a straight line from the back of your head to the back of your pelvis and to the back of your heels. Look between your hands.
Tip
If your elbows easily hyperextend in this position (bowing slightly beyond straight), try bending your elbows slightly and trying to hug your hands toward each other without moving them.
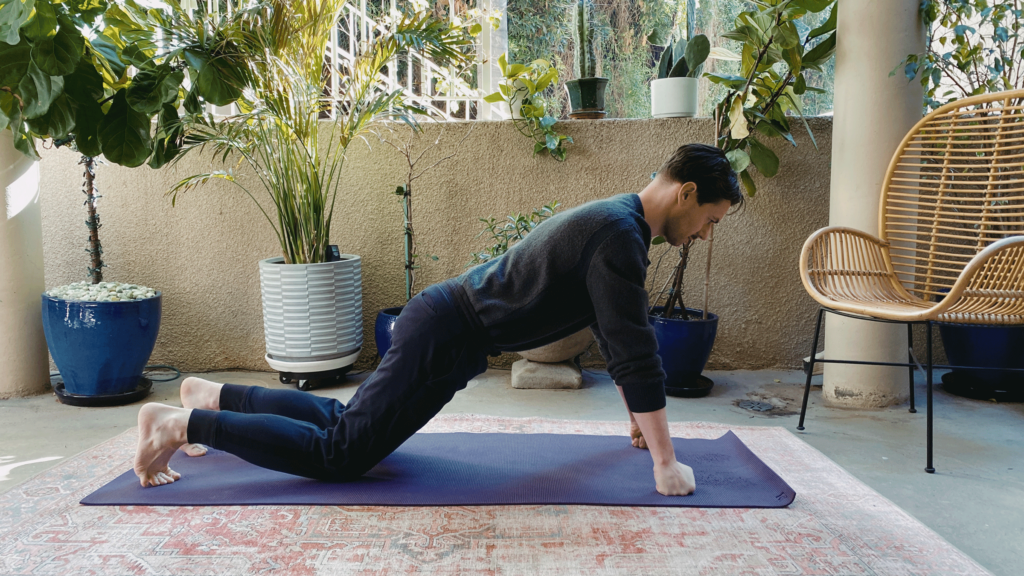
3. Plank Pose with knees down
This variation of Plank significantly reduces the load on the wrists and shoulders and can work well for someone who has wrist sensitivity or is working with a wrist or shoulder injury.
ADVERTISEMENT
Begin in Tabletop with your wrists below your shoulders. You also have the option to place your hands in fists if this feels more comfortable. Press your hands into the mat and step your knees back about a foot further away from the blocks. Aim to create a straight line from the back of your head to the back of your pelvis. Hug your legs together and reach your tailbone toward the back of the room and reach the crown of your head toward the front of the room. Look toward the place on the mat between your hands.
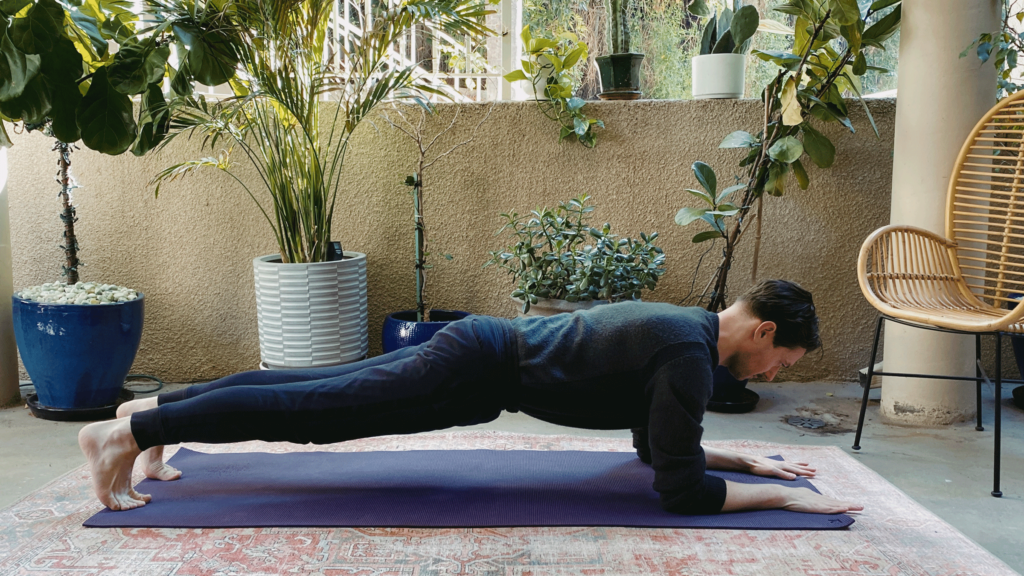
4. Forearm Plank Pose
This variation makes the core work harder because of the shift in the center of gravity. But keeping your forearms in contact with the mat reduces the load going directly through the wrists or the shoulders and can therefore work well for someone who has wrist sensitivity or is working with a wrist or shoulder injury.
Begin on hands and knees. Lower your elbows to the mat, positioning them beneath your shoulders and shoulder-width apart. Press the palms of your hands into the mat or clasp your hands and press your pinky fingers into the mat. Step your knees back away from your elbows, tuck your toes, and lift your knees off the mat until your legs are straight. Aim to create a straight line from the back of your head to your heels. Hug your legs together and reach your heels back as you reach the crown of your head forward. Look toward the place on the mat between your forearms.
ADVERTISEMENT
Tip
If you’re a teacher, you don’t need to cue students to engage their core in Plank. An engaged core is what is holding them in the position. Instead, invite your students to notice that their core is engaged in the position.
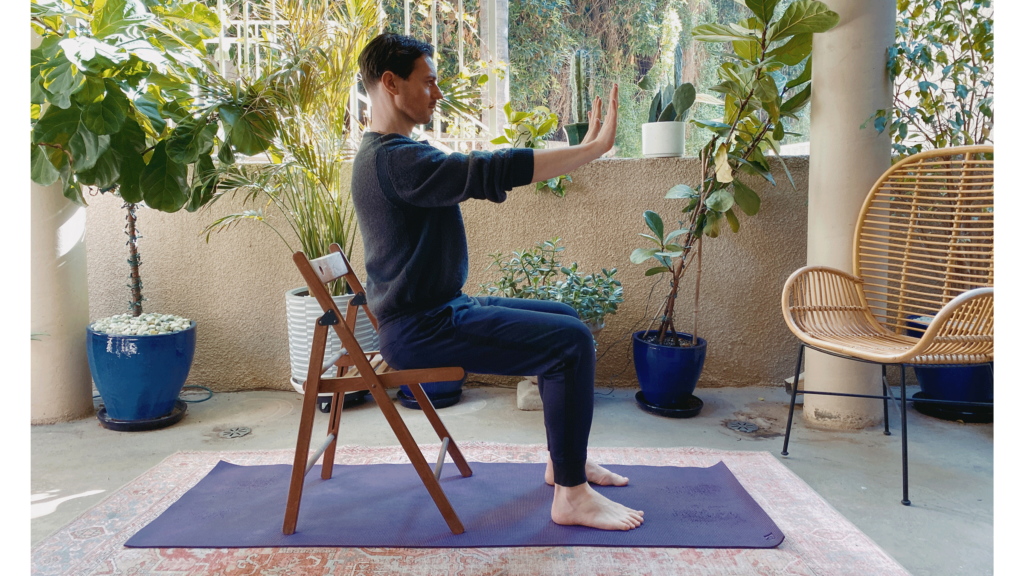
5. Plank Pose in a Chair
This variation of the pose can be ideal for anyone who wants to experience the actions of the pose without bearing weight on the shoulders and wrists.
Sit in the chair with your feet roughly under your knees. Reach your arms in front of you with your hands at least shoulder-width apart and imagine that you are pressing the palms of your hands into a wall. Notice your shoulder blades draw apart slightly and your core engage. Hug your legs together and aim to create a straight line from the back of your head to the back of your pelvis. Look at a fixed point in front of you between your hands.
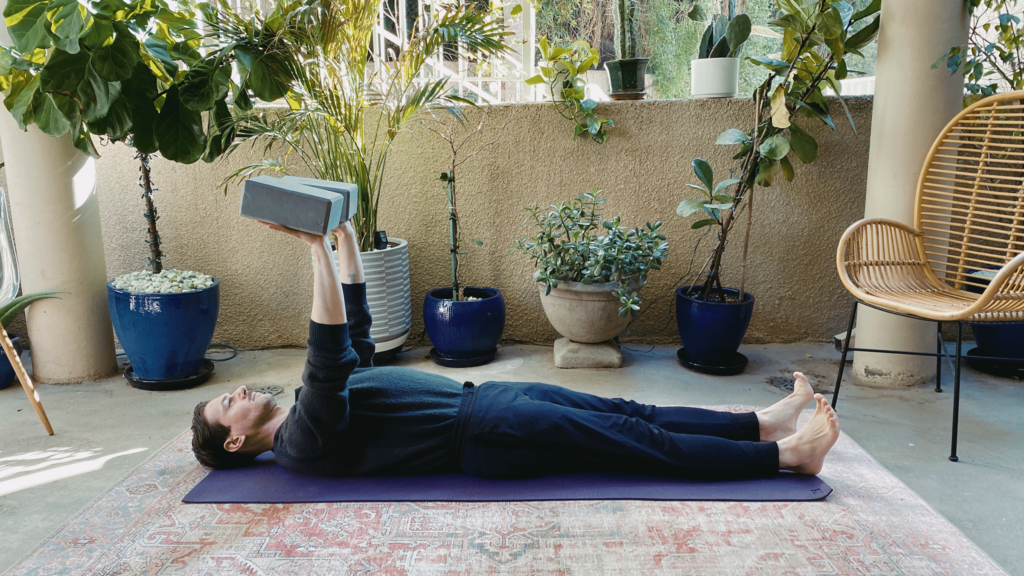
6. Plank Pose on Your Back
This is another variation of the pose for anyone who wants to experience the actions of the pose without bearing weight on the shoulders and wrists. It’s also helpful for anyone who wants to experience the pose from a different perspective.
ADVERTISEMENT
Lie on your back with your legs together and reach your arms toward the ceiling with your hands at least shoulder-width apart. Imagine that you are pressing the ceiling away with the palms of your hands and notice your shoulder blades draw apart slightly. You have the option to hold a block on each palm of your hand. Hug your legs together and look at a fixed point on the ceiling between your hands.
About Our Contributor
Andrew McGonigle has studied anatomy for more than 20 years. After initially studying to become a doctor, he moved away from Western medicine to become a yoga and anatomy teacher. He shares his knowledge of the body and the ways it moves in yoga teacher training courses throughout the world and leads his own Yoga Anatomy Online Course. His second book is The Physiology of Yoga. To learn more about Andrew, check out doctor-yogi.com or follow him on Instagram @doctoryogi.