Updated January 20, 2025 09:28PM
3 Ways to Prep for Salamba Sirsasana II
Strengthen your arms and upper back in these prep poses for Salamba Sirsasana II.
PREVIOUS STEP IN YOGAPEDIA 3 Steps to Modify Prasarita Padottanasana (Wide-Legged Standing Forward Bend)
NEXT STEP IN YOGAPEDIA Challenge Pose: Salamba Sirsasana II
SEE ALL ENTRIES IN YOGAPEDIA
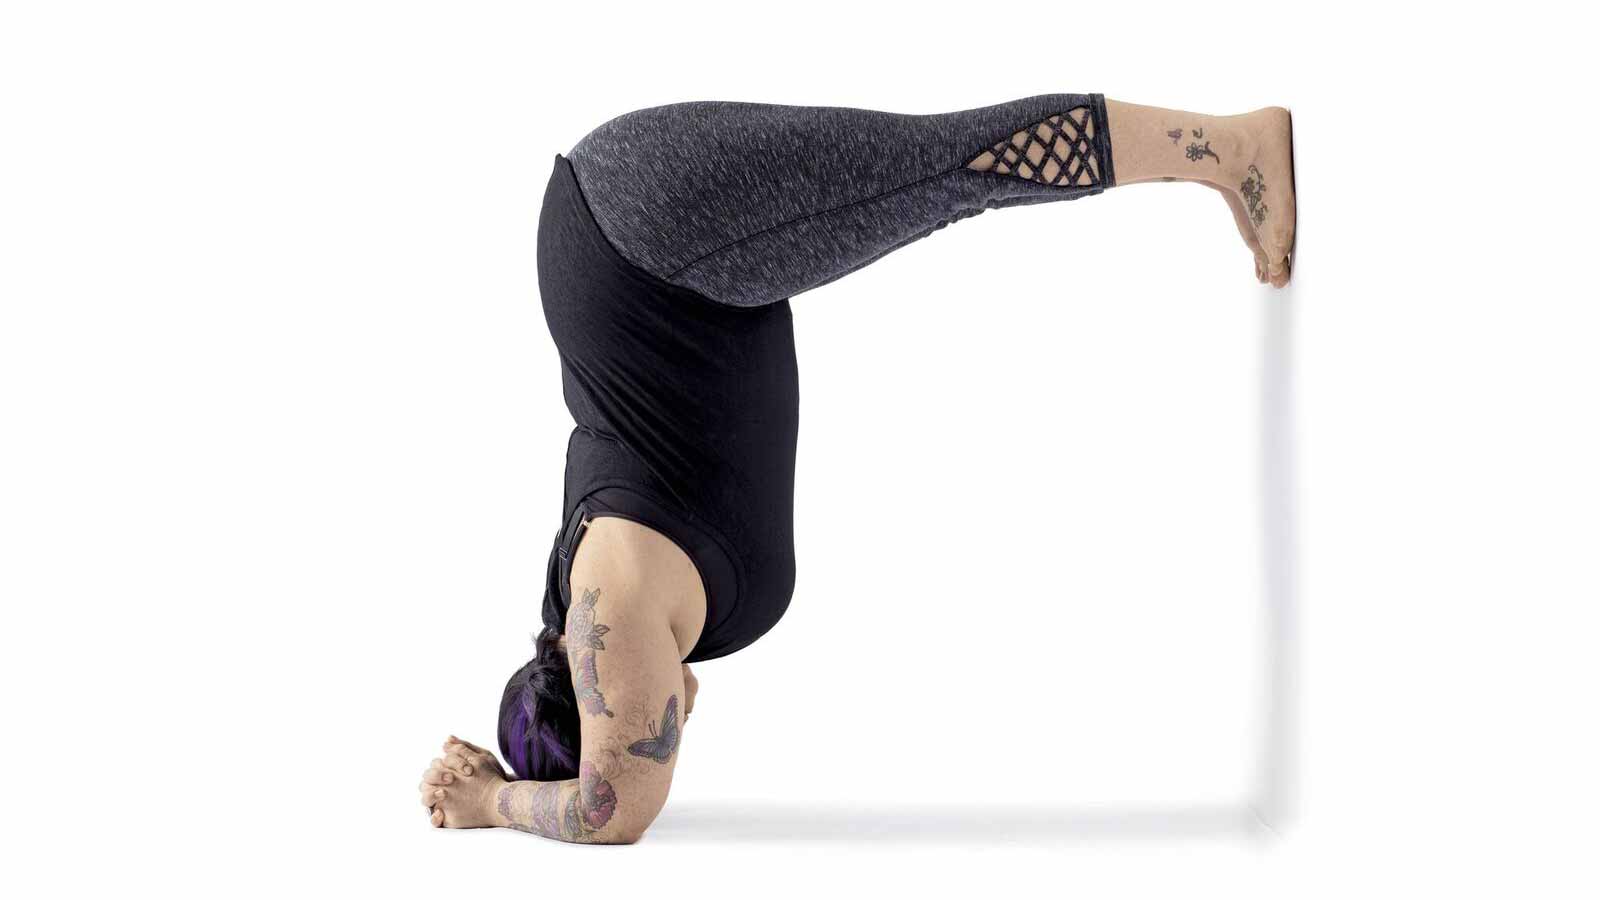
Dolphin Pose variation at a wall

BENEFITS Opens and engages your shoulders, strengthens your upper back, stretches your hamstrings, improves digestion, calms your mind
INSTRUCTION Sit on the floor with your back against a wall and your legs out in front of you. Place a block on the floor next to each ankle (the blocks are just placeholders) to help you gauge the distance you’ll need for the pose. Come to your hands and knees with your heels on the wall and toes on the floor. Come down to your forearms with your elbows in the same line as the blocks—no wider than your shoulders. To make sure your elbows are the correct distance apart, clasp each of your hands on the opposite elbow. Bring your forearms forward again. This time, clasp your hands together to create a triangle shape with your arms. At the same time, isometrically (using a muscular action without actual movement) squeeze your elbows toward one another. On an exhalation, lift your knees, hips, and thighs. Straighten your legs into a forearm variation of Adho Mukha Svanasana (Downward-Facing Dog Pose). It will feel short, and that is OK: You are on the right track. On an inhalation, start to walk your feet up the wall until they reach hip height. Root your forearms into the floor and move the tops of your shoulders over your elbows. Keep your shoulders where they are as you vigorously press your heart toward the wall and move your tailbone toward the ceiling, which will pull your belly in and up and prevent your rib cage from collapsing. Lengthen your spine and resist the urge
to round your lower back. Let your head be heavy and hang down, keeping it off the floor and off your hands. Hold for up to 10 breaths. On your last exhalation, step one foot down at a time, and rest for a few breaths in Child’s Pose to avoid getting dizzy.
See also 4 Steps to Master Dolphin Pose
ADVERTISEMENT
Upavistha Konasana (Wide-Angle Seated Forward Bend)

BENEFITS Strengthens your lower back, lengthens your spine, opens your hips and groins, stretches your hamstrings
INSTRUCTION Sit on your mat so that your pelvis tips slightly toward the floor in front of you. Widen your legs up to a 90-degree angle. Flex your feet and toes, bringing your second toes in line with the center of your kneecaps. Keep your feet active and press your thighbones into the floor as you draw your kneecaps back toward your thighs and spin your kneecaps slightly toward your pinkie toes. This will help keep your kneecaps upright so you can avoid straining the backs of your knees. Press your heels down and isometrically drag them toward each other. Take a deep breath in and reach your arms up to the sky, lengthening your torso. Exhale, and hinge at your hips to fold your torso heavily toward the floor without moving your feet forward or backward. Bring your hands to the floor and stretch them out in front of you, lowering your torso and head toward the mat. Tip your groins forward while keeping your sitting bones connected to the mat or blanket to help maintain a natural curve in your lower back. Lengthen your torso, and keep your toes upright. Hold for 5–10 breaths.
See also Set All Ego Aside in This Seated Forward Bend
ADVERTISEMENT
Plank Pose variation

BENEFITS Strengthens your arms, legs, wrists, shoulders, and back; engages
your core; promotes healthy bones; builds self-confidence
INSTRUCTION Come to your hands and knees. Spread your fingers wide and walk your knees slightly behind your hips. Root your fingertips firmly into the earth. On an exhalation, stretch your legs straight back behind you so that you resemble a plank. Lift your thighs, waistline, and head. Draw your tailbone toward your heels. Avoid dipping your lower back toward the floor or rounding it up toward the ceiling. (You will know your back is in the right place when you feel your core engage.) Your neck should be in line with your entire torso. Maintain this line as you imagine that your arms are straws drinking energy from the earth—with energy moving up your fingers to your wrists, elbows, and shoulders. Squeeze your feet toward each other as if there were a block between your heels. Make sure your arms are perpendicular to the floor and your shoulders are over your wrists. Press evenly into your hands, and imagine that your thighs are moving slightly up toward the ceiling. Look down at the floor. Inhale, and shift to your tiptoes. Imagine that the top of your yoga mat is a cliff and you are peering over the edge of it. Isometrically drag your thumbs toward each other and your hands toward your feet to further engage your core. Hold for 3–5 breaths.
See also Anatomy 101: Can You Safely Jump Back to Plank?
See also Strengthen Your Shoulder Muscles + Improve Shoulderstand
About our Pro
Teacher and model Jenny Brill focuses on alignment-based hatha yoga, with an emphasis on humor. She’ll make you sweat up a storm and laugh out loud at the same time. A native of Los Angeles, she’s taught yoga for more than 25 years and is a regular contributor to several teacher-training programs. Her authenticity, energy, and mastery of fine-tuning alignment has created a strong community of devoted and fearless yogis.