
Heading out the door? Read this article on the new Outside+ app available now on iOS devices for members! Download the app.
You know when you’re trying to balance in a yoga pose like Tree or Crow and feel yourself wobbling? Chances are you assume you’re doing something wrong.
You’re not.
Your feet contain 26 bones and more than 100 muscles, tendons, and ligaments each. Together they take part in an intricate interplay of subtle involuntary movements that maintain your balance each moment you’re standing. You also have 27 bones and more than 30 muscles in each hand that do the same when you’re practicing an arm balance or inversion. You literally can not be perfectly still when you’re in a yoga balance pose. It’s physiologically impossible.
This orchestration of nuanced shifts in your muscles, tendons, and ligaments takes place largely unconsciously. Practicing poses that challenge your balance can bring your conscious awareness to the slightest sway in your stance and how your body corrects itself. It can also help you learn how the tiniest intentional shift can cause you to regain your balance instead of falling.
With practice, you can bring self-awareness to how you show up to these postures. Learning how to accept the uncertainty of the moment with as much grace as you can muster, rather than tensing and telling yourself you’re in trouble, can help you understand the delicate balance between effort and ease that applies to any situation, in yoga as well as in life.
4 Ways You Can Navigate Unsteadiness in Any Balancing Pose
The long-term physical benefits of balance are well documented. According to a recent study from the British Journal of Sports and Medicine, an ability to stand on one leg for 10 seconds in later life reduces the risk of death from any cause within the next decade.
One possible reason for this is the improved muscular strength and bone density that comes from supporting your body weight. Another is an enhanced awareness of your body in space, known as proprioception, which contributes to steadiness.
The psychological benefits are less studied. Anecdotally, you may have noticed that when you challenge yourself to attempt a balancing pose, over time you become more confident and better able to overcome fear, which are helpful traits at any age and in any life situation.
There are ways you can enhance your ability to navigate those inevitable moments of instability.
1. Focus your attention on your breath
When you focus on your breath, it keeps your thoughts on the present moment. It’s much easier to maintain your balance when you keep your attention on the physical sensations you’re experiencing rather than allowing your thoughts to spiral around all the things that you don’t want to happen, like falling. This is what’s so magical about breathwork. Think of balancing as a sort of meditation.
2. Set your gaze on a fixed point
There are three primary sources of information your body juggles to maintain steadiness: your vestibular system (information from your inner ear), your visual system (input taken in through your eyes), and your proprioceptive system (awareness of your place in space). Resting your sight on a set focal point, or drishti, minimizes sensory input and peripheral distractions. Focus on a fixed object (such as a crack on the wall) rather than something that could move (the person in front of you). Closing your eyes, however, can actually make it more difficult to balance.
Tip
When you’re upside down in an arm balance, it can be incredibly helpful to place a small object, such as a ring, on the mat. Hold your focus on that object.
3. Grip with your fingers, not with your toes
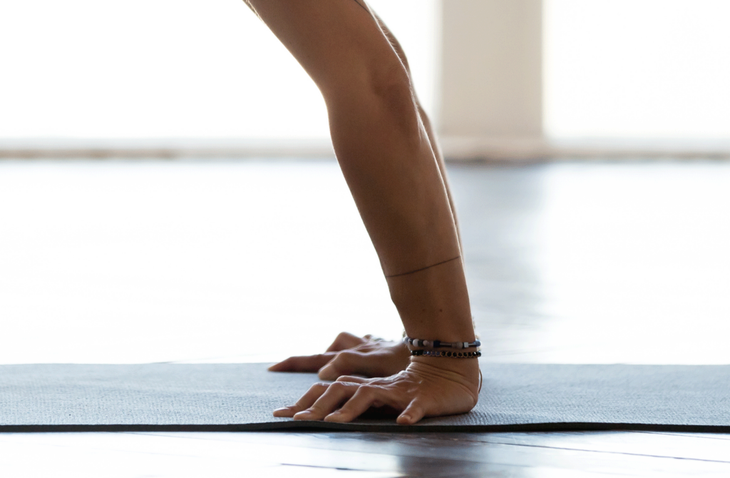
In a standing balance, you want to ground down through the “corners” of each foot, namely the ball of the big toe, the ball of the little toe, and the inner and outer heel. This will give you a stable base for your standing balance pose. If you grip with your toes, it will shift the balance and usually drive more of your weight into your outer foot, which increases your likelihood of falling.
But in an arm balance, you want to press your fingertips into the mat. Imagine that you’re outside practicing yoga in the grass and that you can actually hug the ground with your hands. This squeezing action helps build strength in your hands, moves the distribution of weight away from your wrists, and your fingertips to become your brakes when you’re balancing.
4. Practice, practice, practice
Each time you attempt a yoga balance pose, you afford your body the chance to practice coordinating the micromovements of different contributing muscles and systems. With practice, we learn. Try, try again.
Don’t be surprised if an inversion or arm balance such as Handstand or Crow takes longer to learn than Tree Pose. You aren’t accustomed to bearing weight on your hands, which makes standing balancing poses much more accessible than any pose that requires balancing on your hands.
When you can grin or laugh even as you’re exerting effort, you reduce tension in your body, which in turn creates less interference with your unconscious muscular movements. Perhaps you can let this lesson translate to how you approach challenging situations outside of your yoga practice.
How to Maintain Your Poise in Common Yoga Balance Poses
Practicing any pose can help you better understand how to allow yourself to waver a little, in yoga and otherwise. Here are insights into how to navigate common yoga balance poses, with lessons that apply to most standing balancing poses as well as arm balances and inversions.
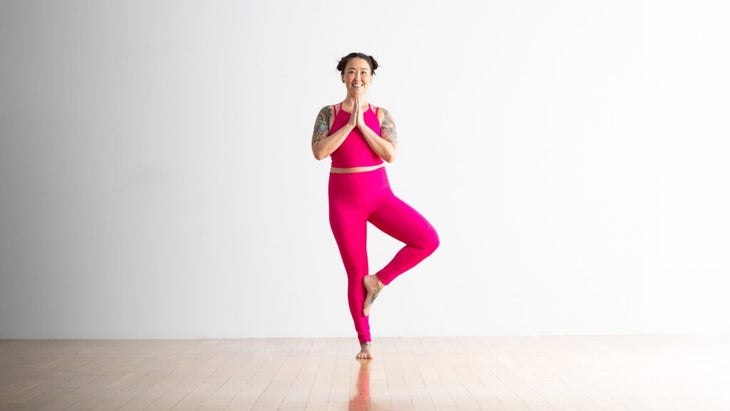
How to Stay Balanced in Tree Pose
Start standing with your feet hip-distance apart. Look down at them to ensure your toes are pointed forward and your feet are parallel. Lift all ten toes, spread them apart, and then lower them to the mat. Try to feel that you are evenly grounding yourself through all “corners” of your feet. Don’t grip with your toes. This is Tadasana (Mountain Pose).
Shift your weight into your left foot. Lift your right foot and bring your foot to your ankle, your calf, or take your right hand to your ankle and place your foot against your inner left thigh. Squeeze your standing leg into your right foot and squeeze your foot into your leg. Keep your hips facing forward and stacked beneath your shoulders as you bring your hands either to your hips or in prayer position at your chest. Keep your gaze focused on a fixed point in front of you. Bring your attention to your breath.
Now bring your awareness to your left foot. Notice how the distribution of weight is shifting slightly. Can you feel the different muscles working as you remain balanced? Can you feel how it’s almost like surfing?
Tips
If you feel a little unsteady, stand within arm’s reach of a wall or table so you can steady yourself as needed. Stand with your straight leg closest to the wall.
If you want to challenge yourself more, slowly lift your arms alongside your ears, reaching your fingertips toward the ceiling. Stay here or slowly shift your gaze toward the ceiling or close your eyes. Attempt to maintain your balance for as long as you can and continue to practice until you can hold it for a minute on each side.
Repeat on the other side.
RELATED: How to Practice Tree Pose
How to Stay Balanced in Handstand
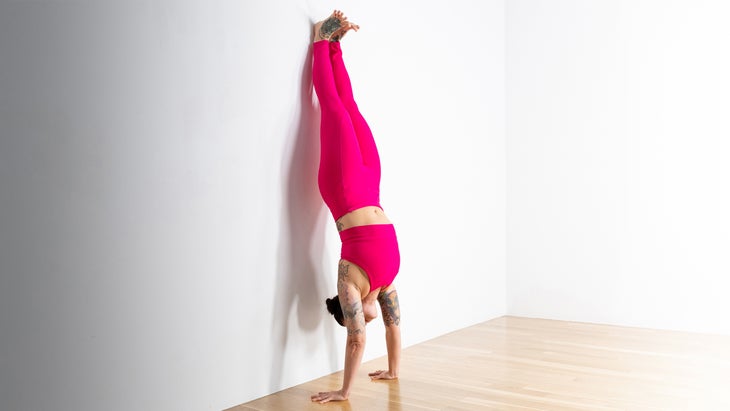
Before you attempt Handstand, practice longish holds in poses such as Down Dog and Plank to strengthen the muscles in your hands, wrists, and forearms. These will also familiarize you with the sensations of supporting yourself on your hands. When you feel ready to try Handstand, you can still experience all the subtle movements required to hold the pose by using the wall as support.
Place the short side of the mat against a wall. Face the wall and come onto hands and knees. Place your fingertips one hand distance away from the wall and your hands outer-shoulder distance apart. Bring the creases of your wrists parallel to the short side of the mat. Squeeze your fingertips into the mat.
Shift your gaze slightly forward. Start in Down Dog and walk your feet slightly forward until your shoulders shift toward the wall and are stacked directly above your wrists. Set your gaze at the space between your thumbs. Step one of your feet about a third of the way to your hands. Push off your front foot to lift your back leg up and toward the wall. Sometimes it takes a few kicks for your foot to touch the wall. Let both heels rest against the wall. Imagine there’s magnetic energy between your legs as you squeeze them together. Flex your feet and reach your heels toward the ceiling.
As you’re finding your handstand, keep your arms straight and think “hips over shoulders.” (Sometimes people just swing their legs but without moving the hips.
Press down through your hand and squeeze your fingertips into the mat. There should be some movement happening in your hands (and perhaps elsewhere) to maintain balance in the posture. Always make sure to come down before you feel like you might fall out of the pose. But if you’re up there and feeling strong, try to take one foot away from the wall just a little and test your balance. After a few breaths, come out and rest in Child’s Pose.
RELATED: How to Practice Handstand
About Our Contributor
Claire Mark has been practicing yoga and meditation since 1996 and teaching since 1999. She considers herself a yoga “mutt”; her teaching is influenced by Jivamukti, Ashtanga, Anusara, Vinyasa, Iyengar and many other styles and teachers. Claire is the co-founder of Chill Chicago, a meditation studio in Chicago’s River North.