Published June 20, 2013 05:07PM
Seated in the Self: 5 Steps to Lotus Pose
Look within and listen to your body's cues to find your path to Lotus Pose.

(Photo: Christopher Dougherty)
Padmasana (Lotus Pose) is one of the most widely recognized poses in yoga, perhaps because it is thought to be the ultimate pose for long periods of seated meditation. One of the reasons that Lotus became such a venerated pose for meditation may surprise you: If you drift off to sleep while meditating, you won’t fall over.
And so, even though Lotus is an incredibly grounding and stabilizing pose that is worthy of your efforts, you should know before you read any further that you don’t have to be able to do this posture in order to meditate or do yoga. In fact, Lotus is an advanced pose, one that puts such an extreme demand on your joints that it’s not for everyone.
To achieve full Lotus, both thighs must rotate externally in the hip sockets and flex to 90 degrees. You must also be able to deeply flex your knees while activating your ankles and feet to stabilize them. The hip is a ball-and-socket joint with a circular range of motion that varies greatly from person to person. So some people will be able to do Lotus, and some won’t.
ADVERTISEMENT
Whether Lotus Pose is in your future or not, making a pilgrimage toward it can be deeply fulfilling. A pilgrimage is a journey to a sacred site for healing, giving thanks, or divine connection. Demanding the same clarity of intention and steady devotion, the journey toward Padmasana is a metaphorical one that offers the deep satisfaction of connecting to the intuitive self within.
As you travel on this path, it’s important that you become aware of the sensations in all of the preparatory poses. If you feel gentle stretching in your hips, take that as a good sign. If you feel pulling or burning sensations in your knees or ankles, take heed. Move step by step toward Padmasana consciously. In the sequence that follows, you can choose between two distinct paths—one that ends with the full Lotus Pose and another that offers slightly less demanding poses to ensure that you open your hips slowly and keep your knees safe.
Making the pilgrimage toward Padmasana regularly over time will open your hips, even if you never arrive at the final pose. You will also know yourself more intimately and find that committing to a goal, no matter how distant, is a worthy endeavor.
5 Steps to Lotus Pose
Before You Begin
Stand tall in Tadasana (Mountain Pose) and establish yourself in your breath. Move through a few rounds of Surya Namaskar (Sun Salutation) then practice Virabhadrasana II (Warrior Pose II) and Utthita Trikonasana (Extended Triangle Pose). Fold forward for a long Prasarita Padottanasana (Wide-Legged Standing Forward Bend), then return to Tadasana. Your journey continues with Thread the Needle, which will give you a good indication as to which path to choose for today’s practice.

ADVERTISEMENT
Thread the Needle
Consider this pose—which stretches your outer hip muscles—to be the first step on your journey toward Padmasana. You may find as you hold it for a couple of minutes that you are able to fold more deeply. Or, if you’re having a day where you cannot fold forward very far, or if there’s discomfort in your knee, choose the alternative route of moving toward Sukhasana instead.
Stand with your back to a wall, and step your feet forward about the length of your thigh. Lean your bottom against the wall, and place your outer right ankle just above your left knee. Flex your right foot. Begin to slide down the wall, bending your left knee until your knee stacks over your heel and your thigh is parallel to the floor. Begin to fold your torso forward over your thighs, moving from your hip sockets rather than rounding your spine, until you feel a nice stretch in your right outer hip. Place your fingertips on the floor or on blocks for balance.
ADVERTISEMENT
Breathe slowly and deeply here, going as deep as your hips allow for now. Look under your right shin (toward the wall) to see whether one of your hips has dipped lower than the other and adjust them so they are even—it will intensify the stretch and keep your lower back happy. Push your two sitting bones into the wall and elongate from there through the crown of your head. Keep your right foot flexed fully. Hold for 8 to 10 breaths, and repeat on the second side.
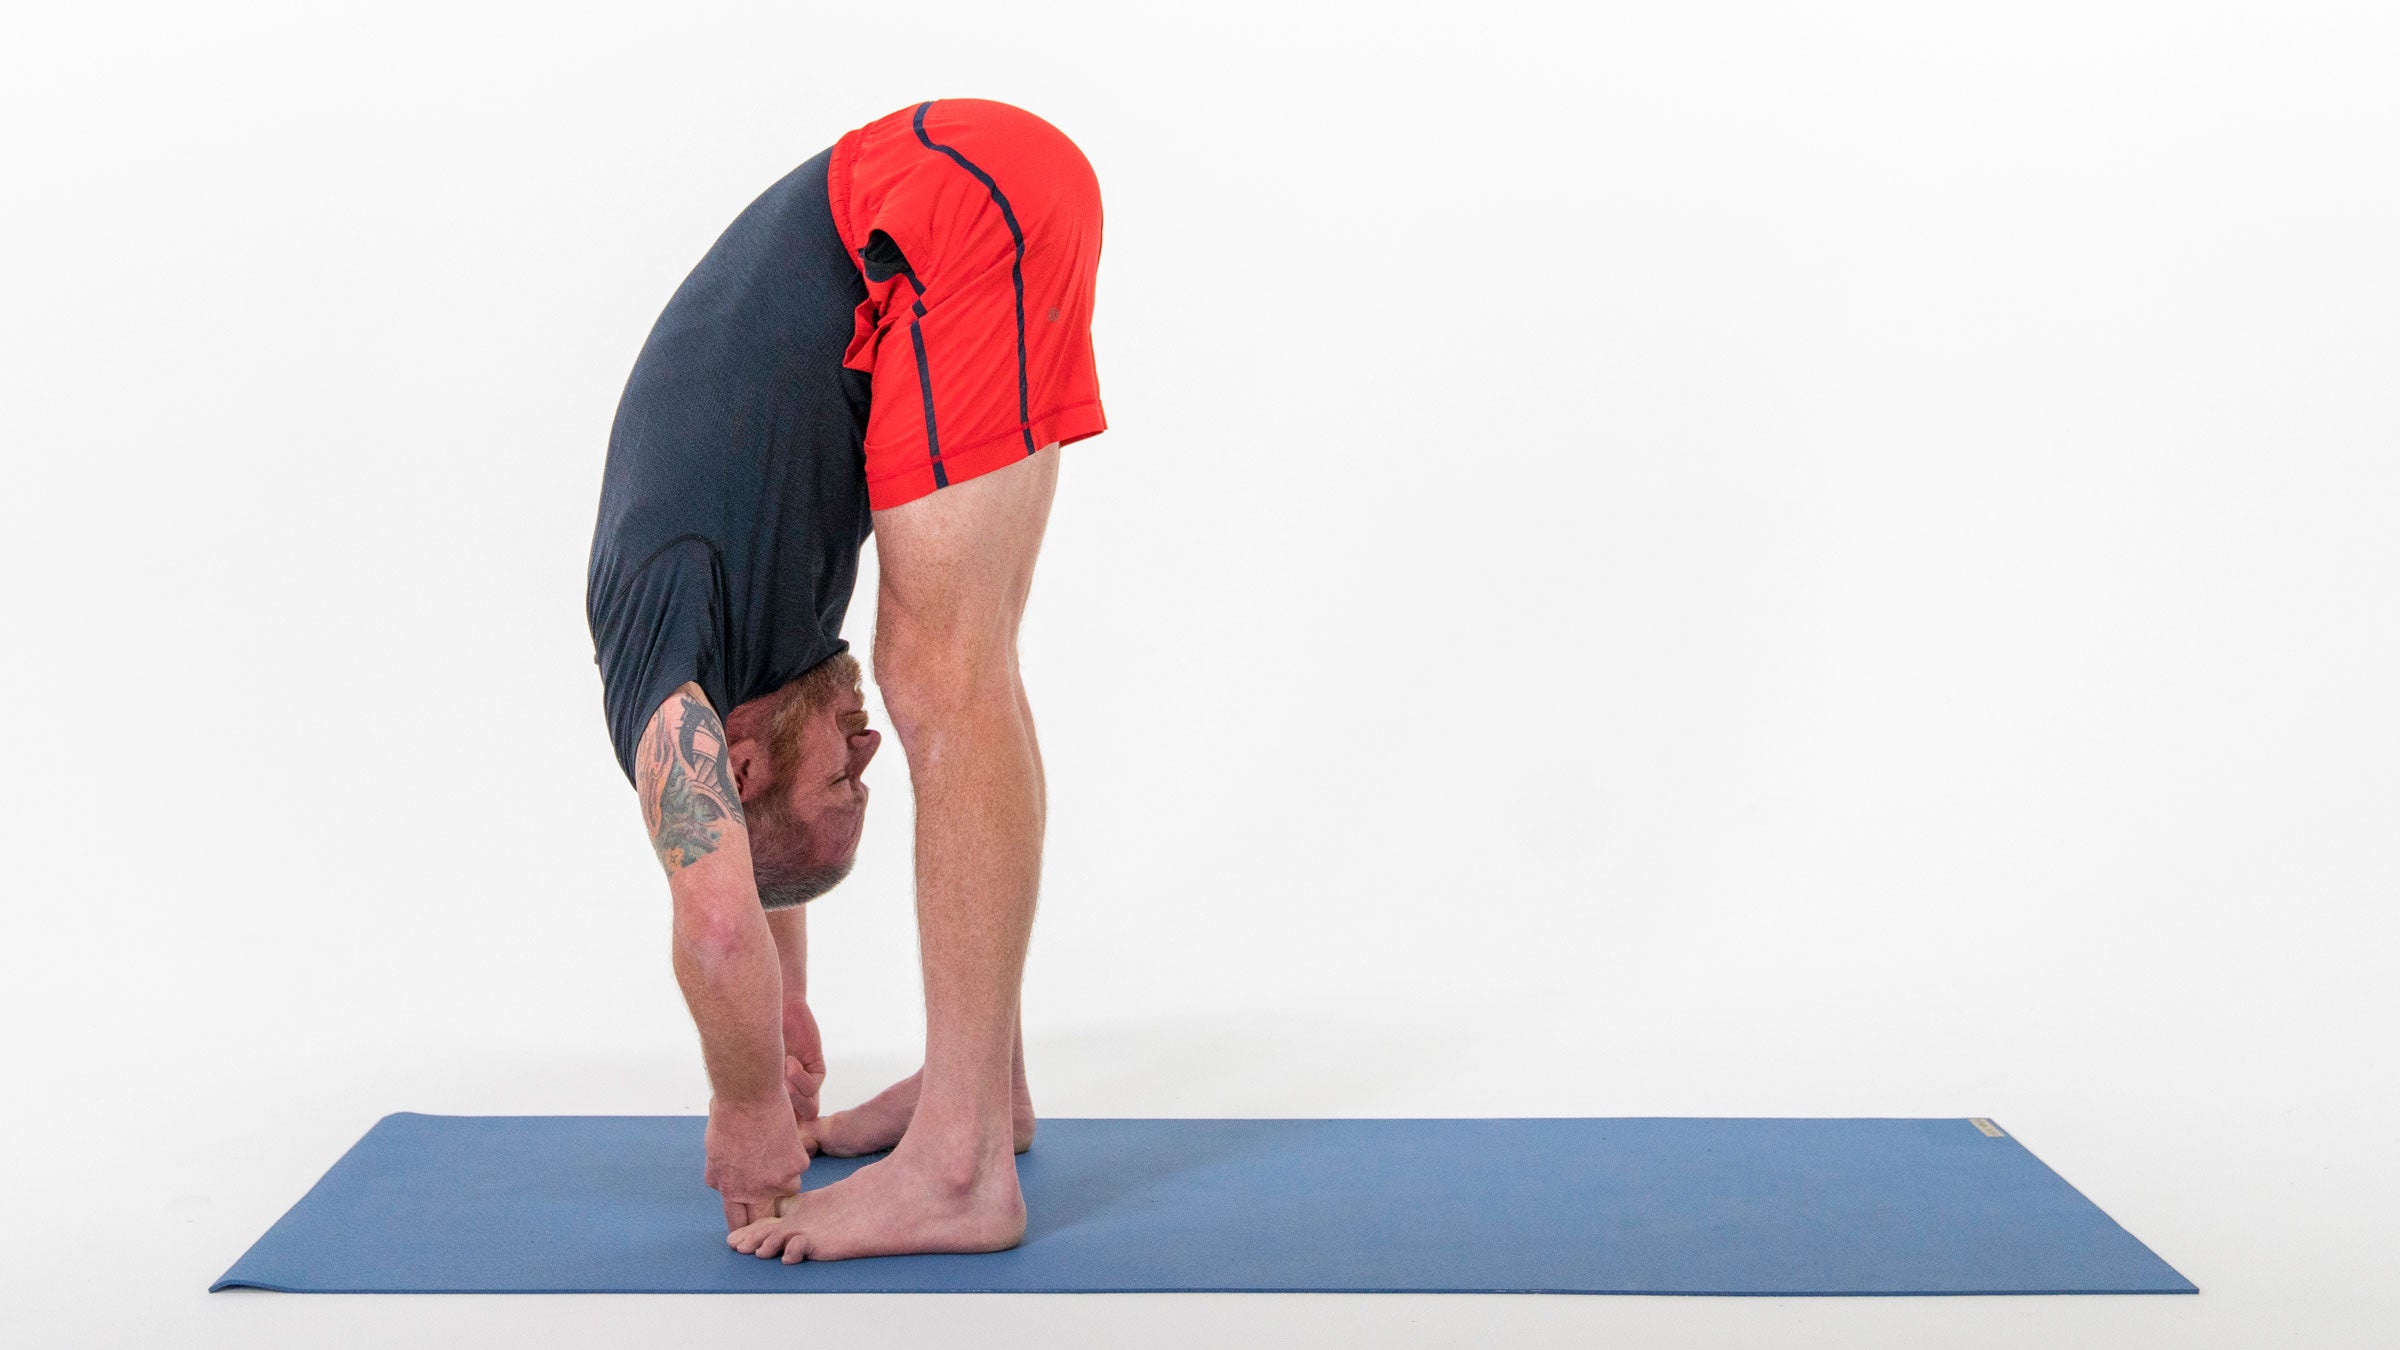
Uttanasana (Standing Forward Bend), Variation
Continue to stretch your outer hips as you release your hamstrings. Stand in Tadasana with your feet hip-width apart and your hands on your hips. Shift your weight onto your right heel and turn your whole leg outward from the hip about 45 degrees, then place your foot down. See that your middle toe lines up with the center of your ankle and knee. Repeat with your left leg.
Resist the urge to turn out your feet too far. Inhale, elongate up from your hips through your chest, and gaze upward. Exhale and fold forward, keeping your spine long. Come onto your fingertips and lengthen your spine as you inhale. Then exhale and fold forward. If it’s appropriate for your body, bend your elbows and bring your hands to the floor. If your back rounds, stay on your fingertips or place your hands on blocks.
Press evenly through the mounds of all your toes and your inner and outer heels. Lift the arches of your feet and zip your inner leg muscles all the way up. Keeping your kneecaps lifted, roll your outer thighs back and toward each other behind you. Hug your inner thighs in toward each other, moving your sitting bones closer together. Breathe here for 8 to 10 cycles, then inhale, lengthen your spine. Exhale, placing hands to hips, and inhale to rise.

Baddha Konasana (Bound Angle Pose)
Open your inner thighs while activating your external rotators. Bend your knees, and press the soles of your feet together into Baddha Konasana. Draw your feet as close to your groin as you can. (If you’re unable to sit upright, sit on a folded blanket.) Feel free to stay here and breathe if you have knee issues or tight hips. Otherwise, slide your hands under your feet and open the soles up to the sky, keeping the outer edges pressing together. Inhale and elongate your spine. Exhale and fold forward from your hips.
ADVERTISEMENT
Keep pressing your feet together as you roll your outer thighs under you and toward the ground. Keep your spine long instead of rounded: Send your pubic bone back and your top sternum forward.
Take 8 to 10 breaths. Inhale, lengthen your spine further forward, and bring your torso upright. Use your hands to bring your knees together, then release your legs straight onto the floor.
Ardha Baddha Padmottanasana (Bound Half-Lotus Forward Bend)
Slowly and mindfully approach Half Lotus. Begin in Dandasana. Bring your right knee in toward your chest, then rotate your thigh outward from the hip, bringing your shin across your body. Hold your ankle from underneath, flexing your foot to stabilize your knee. Bring your heel toward your navel, then down and across to your inner left groin.
Use your left hand to roll the muscle on the top of your left thigh outward to make a little space for your foot. Place your foot there, feeling how the external rotation originates from your right hip socket—not your knee. Finally, roll your left thigh back in until your left knee and toes face straight up.
If your hips or knee won’t allow this yet, try sitting on a blanket or placing the sole of your right foot against the inner left thigh in Janu Sirsasana (Head-of-the-Knee Pose).
If you’re in Half Lotus, reach your right hand around your back and hold on to your right big toe. Ground your thighbones, inhale as you lengthen your spine, and exhale as you fold forward, holding your left foot with your left hand. Try to keep your torso long and even: Roll your left waist up and lift your right shoulder blade onto your back. Draw both shoulders down your back. Inhale, pulling your chest forward, and exhale as you nestle your chin out along your shin. Take five breaths, lengthen to come up, and change to your second side.
ADVERTISEMENT
Padmasana (Lotus Pose)
Step carefully into the temple of full Lotus Pose.You’ve arrived at the temple steps. Continue slowly and reverently, honoring your body and the journey you’ve made thus far. Bend your right knee, then rotate it outward from the hip. Roll your left thigh open and, while supporting your right ankle with your hands, begin to draw your right ankle into your groin. Keep your left leg rotated open and bend your left knee, bringing your heel in toward your navel. Slide your hands under your left ankle and lift the ankle just high enough so you can slide it up and over your right leg, and snuggle the heel in tight. Press both heels into your belly and create the action of bringing your knees closer to each other. Press the outer edges of your feet down onto your thighs, lifting the outer ankles and eliminating pressure between the shins.
Sit tall, placing your hands into Jnana Mudra (Wisdom Seal). Straighten your arms with the backs of your hands on your knees, join the index finger and thumb on each hand, and extend the other fingers, keeping them together. This mudra invites calm, knowledge, and expansiveness. Pause here for a few breaths, then slowly and mindfully do the other side.
ADVERTISEMENT
If you feel yourself straining or forcing at any point, take it as a sign that full Lotus is not a wise choice for you today. Instead, cross your right shin in front of your left, come into Sukhasana (Easy Pose), and place your hands in Jnana Mudra. Know that your journey, too, has been steady, deep, and complete.
Whether your pilgrimage ends in Padmasana today or ever is not really the point of this practice. Yoga practice is a pilgrimage. Show up each day with a clear intention, reverently moving forward, honestly and patiently accepting your own path, just as it is—just as you are.