Published June 20, 2017 09:00PM
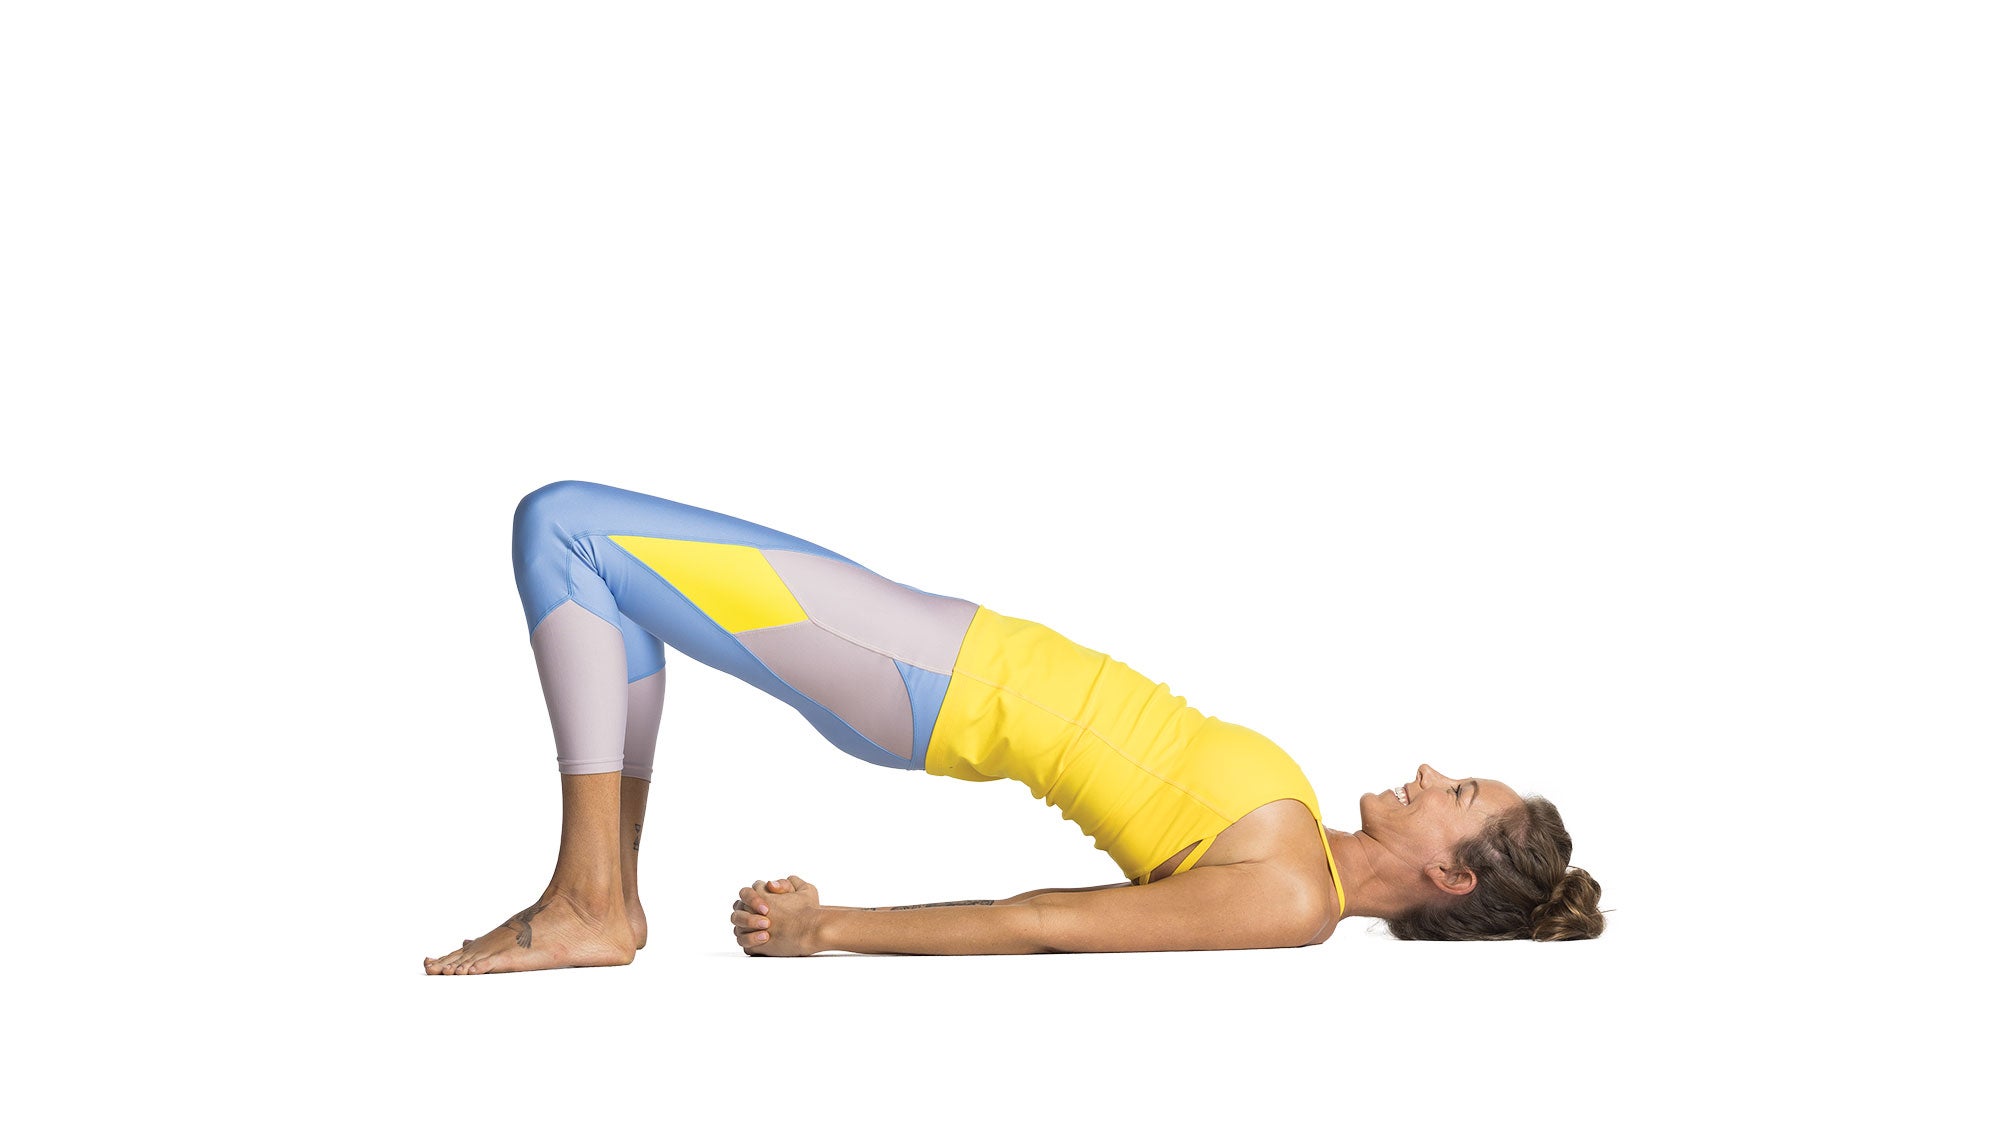
6 Steps to Master Bridge Pose
Opens your shoulders and chest in Setu Bandha Sarvangasana.
Next in YOGAPEDIA 3 Ways to Modify Bridge Pose
SEE ALL ENTRIES IN YOGAPEDIA
Setu Bandha Sarvangasana
setu = bridge · bandha = building or lock · sarva = all · anga = limbs · asana = pose
Benefits
Opens your shoulders and chest; strengthens your back, glutes, and hamstrings; stretches your hip flexors and thighs; increases flexibility of your spine; calms your mind
Instruction
1. Lie on your back with your knees bent, feet flat, hip-width apart, heels directly below your knees. Leave your upper arms on the floor and bend your elbows alongside your ribs, pointing your forearms and fingers toward the ceiling. Turn your palms to face one another.
2. Press your elbows and shoulder heads down into the floor, lift your chest, and bring your shoulder blades onto your upper back, wrapping your outer arms toward the floor. Keep your gaze straight up.
ADVERTISEMENT
3. Press into your feet and slowly send your knees forward, wrapping your outer hips toward the ceiling; then lift your buttocks away from the floor. Lengthen your tailbone toward the backs of your knees.
4. Straighten your elbows and interlace your fingers underneath you, drawing your shoulder blades deeper into your upper back, keeping the tops of your shoulders in line with the base of your neck.
5. Gently press the center of the back of your head into the floor. Broaden your collarbones and lift your chest, bringing your sternum toward your chin. Lightly reach your chin away from your chest, keeping space between the back of your neck and the floor. Simultaneously extend out through your knees as you lift your sternum. Take a few rounds of breath here.
6. To release, unlace your fingers and slowly lower your torso back to the floor.
See also Calming Backbend: Chatush Padasana
ADVERTISEMENT
Avoid These Common Mistakes

Don’t let your feet turn out, which closes off the space in your low back. Instead, keep the outer edges of your feet parallel to the outer edges of your mat.

Don’t clench your butt cheeks or push your inner groins toward the ceiling, which strains the low back. Instead, hug your inner knees toward one another and release your inner thighs down toward the floor before lightly lengthening your tailbone toward the
backs of your knees.
See also Learn to Backbend Better: Locust Pose
About Our Pro
Teacher and model Meagan McCrary is a yoga teacher in Los Angeles and author of Pick Your Yoga Practice: Exploring and Understanding Different Styles of Yoga. To learn more, go to meaganmccrary.com.