Between the Lines: Parsvottanasana

When you look at someone folding into a pose like Parsvottanasana (Intense Side Stretch), the main things you see are the surrender and the depth of the fold. What’s harder to notice is what’s happening behind the scenes. In order to experience that depth, that sense of complete freedom in Parsvottanasana, you first have to create boundaries through alignment. Once you set up a steady outer structure, you create the conditions for a vast inner spaciousness, which then frees you to fold, lengthen, spread, or soften more deeply into the pose.
It might sound surprising that setting up boundaries can help facilitate freedom, but that is the precise approach that Patanjali outlines in his eight limbs of classical ashtanga yoga. The eighth limb is samadhi, or union, which is thought to be the ultimate experience of yogic freedom. But before you approach samadhi, you must first practice the seven limbs that precede it. And the very first of those limbs is yama, which means “control” or “restraint.” A group of ethical precepts, the yamas ask you to hold firm in your resolve as you practice ahimsa (nonharming), satya (honesty), and asteya (not stealing), among other things. These boundaries help to guide your behavior and your thoughts as you progress down the path toward samadhi. They help to provide an outer structure that leads you toward the ultimate goal of yoga—freedom.
Similarly, building a firm foundation with alignment in Parsvottanasana will teach you how to cultivate a sense of freedom. As you navigate the delicate balance of folding forward with your feet set up on a precariously narrow baseline, a common response is the fear of falling. But fear can cause you to lose the outer alignment and tense the inner body, actually pulling you out of the pose. The boundaries and structure of alignment and muscular action that you’ll establish through this sequence will allow you to release safely and deeply and to experience more freedom of movement in each pose. Ironically, it is the discipline of creating clear boundaries that can help set you free!
Benefits:
- Tones legs
- Improves balance
- Alleviates lower-back strain and asymmetries
Contraindications:
- Hamstring injury
- Pregnancy
Before You Begin
Lie on your back and take a moment to observe yourself in a supine variation of Tadasana (Mountain Pose). Work the muscles of your arms and legs to extend and support your limbs, and encourage softness to permeate the inner cavities of your body. Reach your arms overhead. On an inhalation, stretch your heels away from your hands and press your thighs toward the floor. On an exhalation, maintain the extension through your legs and arms, soften your abdomen, and allow your inner body to lengthen and spread toward the floor.
1. Supta Padangusthasana (Reclining Hand-to-Big-Toe Pose)
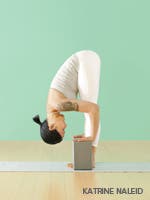
You’ll continue to soften and lengthen your abdomen and diaphragm in Supta Padangusthasana as you stretch your hamstrings. Start on the right side by grounding the upper left thigh and pressing the right hip away from your head and down toward the floor. These actions prepare the hamstrings for the strong stretch of Parsvottanasana while teaching you how to keep the right side of your torso long and the right and left sides of your pelvis steady and parallel to each other.
From the supine variation of Tadasana, extend your legs away from your torso and press the fronts of your thighs down. See if you can release the backs of both thighs to the floor without externally rotating your legs or turning your feet out to the sides. Bend your right knee toward your chest and hold the big toe with your index and middle fingers. You may have to turn the top of the left thigh inward so that the inner thigh remains down. The back of the top of your left thigh should feel as though it is spreading from the inner thigh toward the outer thigh.
Straighten your right leg toward the ceiling, pressing the front of your right thigh away from your chest. If your right leg doesn’t straighten, or if straightening the leg causes the right buttock to lift away from the floor, wrap a belt around the right foot and then straighten your leg. Pull the root of your right thigh down into the hip socket to ground the right side of your pelvis, and then lengthen the right side of the waist by shifting the right hip away from your head.
Reestablish the extension of your left leg and see if you can broaden and lengthen the back of your upper left thigh on the floor. Each time you move your right leg closer toward your torso, pull the right hip down toward the floor and away from your head. Hold the pose for up to two minutes as you create structure through the extension of your left leg. Keep creating length through the right side of your torso as you ground your right hip. Maintain the integrity of the outer boundaries of the pose and explore the feeling of fluid release and spaciousness that slowly comes to your belly and diaphragm. In time, you may feel your breath become smooth and your mind quiet.
To release, bend your right knee and extend both legs on the floor in the supine variation of Tadasana. Then take Supta Padangusthasana on the left side.
2. Adho Mukha Svanasana (Downward-Facing Dog Pose)
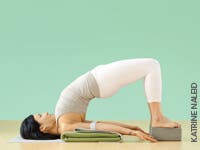
In Down Dog, you’ll press the front of your thighs toward the back of your legs. As you do this, focus on creating length along the inner edges of your legs and feet. This will bring life to the pelvis and encourage a full extension through your torso. Remember to soften your abdomen, chest, and neck.
Come onto your hands and knees and press up and back to Down Dog. Lift your heels so that the weight is on the balls of your toes. Spread the balls of the toes from the base of the big toe toward the base of the little toe. Then begin to lift your outer hips toward the ceiling.
Lengthen your arms by spreading the palms wide on the floor, firming the outer arms, and lifting the inner upper arms up into the shoulder sockets. Press the front of your thighs back. Then lift the front side of your thighs up as if you are pulling your thighbones into your hip sockets. From the extension in your arms and legs, lift your pelvis and hips higher. Now broaden the backs of your thighs by opening the area at the top of the hamstrings (just below the buttocks) up toward the ceiling and then out to the sides. You should feel the length of your inner legs here. Lift your hip sockets higher and observe how you have more space to lengthen your abdomen.
Maintain the height and width of the top of your hamstrings and start to lower your heels toward the floor. Keep the inner legs long and press the front of your thighs farther away from your torso. Lengthen your calves toward the heels and your heels toward the floor. As the heels descend, lengthen the inner edges of your feet from your inner arches toward the inner heels by reaching the heels straight back, away from your hands.
Continue here for one to two minutes. Without losing the length in your abdomen and chest, soften your neck and release your head. Observe how your brain becomes quiet. Keep the arms and legs straight and firm, lifting your hips upward. The entire outer structure of the pose should feel firm and fully extended so that the inner body can enjoy all the space you’ve created. Then release into Balasana (Child’s Pose).
3. Utthita Trikonasana (Extended Triangle Pose)
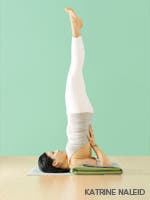
In Triangle Pose, the legs act as a firm foundation so that your upper body can unfold and turn toward the ceiling. From Child’s Pose, come to standing in Tadasana. Stretch your arms out in line with your shoulders, and step your feet apart so they’re underneath your hands. Turn your feet out to the right and align the right heel with the arch of your left foot.
Press the ball of your right big toe down, and turn the top of your right thigh out so that your kneecap faces the middle of your right foot. Pull the outer thigh up toward the hip and keep it firm. Although the entire thigh gets pulled upward, you should feel the muscular control of the action along the outer edge of your upper leg.
Ground the outside edge of your left heel into the floor and press the front of the left thigh back. Without losing the engagement of your feet and legs, extend your torso over the right leg and place your right hand on the floor or a block. Keep your outer right hip firm here as you press the left thigh back. The strength of your feet, legs, and outer right hip stabilizes the entire pose so that the front of your body can unfold as you open your chest toward the ceiling.
Move your shoulder blades in toward the back ribs to create firmness in your back body and to broaden your chest. Revolve the entire torso open from right to left. Resting on the wall of your back body, you have the freedom to open in the front like a blooming flower.
Hold the pose on the right side for up to a minute. Then press into your outer left heel and pull up with your left arm to stand up. Turn your feet to the left to take the second side.
4. Parsvottanasana (Intense Side Stretch), variation

Placing your hands on the floor in this variation of the full pose will help you to find the rotation of the back leg as well as develop softness and length in your abdomen and chest. This is your opportunity to practice all of the stabilizing and fluid actions of the classic version of Parsvottanasana without the fear of falling.
Stand with your feet wide apart and your hands on your hips. Turn your legs to the right, placing the heel of your right foot in line with the arch of your left foot. As you turn the right foot out, place your right kneecap in line with the middle of your right foot, and keep the ball of your right big toe grounded. Lift your left heel slightly, press into the ball of the left big toe, and then turn the top of your left front thigh inward. Lengthen the inner edge of the left foot from the arch back toward the inner heel as you lower the left heel to the floor.
Remain steady as you internally rotate your left thigh, turning the front of your pelvis to face forward. Straighten both legs and press the front of your thighs back, maintaining a forward-moving rotation in your outer left thigh.
With your hands on your hips, lift the sides of your chest and look up toward the ceiling. Shift weight into your left leg and press into the heel. On an exhalation, extend your torso over the right leg and place your hands on the floor. If you struggle to reach the floor or if your knees bend, place a block under each hand.
Keep the ball of the right big toe pressing down and pull the outer right thigh up. Bring attention to your left leg: Turn the top of the hamstrings (just below the buttocks) away from the right leg and lengthen the inner left thigh.
Keeping the alignment in your legs and hips, hold the pose for up to a minute. Move the skin of the left hip and outer thigh so that it flows like a stream of water over the muscle, forward and down toward the floor. See if you can soften your abdomen and chest so that you can lengthen the front of your torso deeper over your right leg. Release your head as you relax your neck. To come out of the pose, press down through the back of your left heel and, on an inhalation, stand up. Then, take your hands to your hips and turn your feet to the left to begin the second side.
5. Parsvottanasana (Intense Side Stretch)
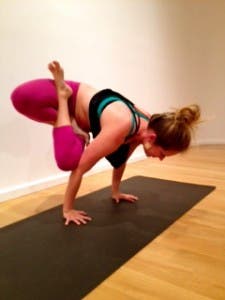
With practice, you may be able to create that outer firmness through alignment and access the inner softness even with your hands joined behind your back in the full pose. From Tadasana, bring your hands together in Reverse Prayer. If this causes discomfort in your elbows or wrists, simply hold your elbows behind your back.
Open and lift the sides of your chest as you roll the outer corners of your shoulders back and rotate your inner biceps out. Step your feet apart, turn your legs to the right, and align the heel of your right foot with the arch of your left foot. Press the base of your big toes into the floor and lengthen the inner edge of your left foot from the arch to the heel. The action in the left foot helps to lengthen the inner left leg and facilitates the internal rotation of the left thigh.
Roll the outer edge of your left thigh and hip forward as you spread the inner edge of the back thigh toward the outer edge. Avoid making your left outer leg rigid. Instead, let it flow forward as the inner leg lengthens. Lift your abdomen toward your chest and your chest toward the ceiling. Look up without arching your lower back. Take your shoulders back, broaden your chest, and lift your sternum. Press your weight into the left heel as you press the front of your thighs back. On an exhalation, lengthen the front of your torso over the right leg. As you extend forward, keep turning your left outer thigh and hip forward. Press down firmly on the ball of the right big toe and pull the outer edge of your right leg up and back.
You may notice that, in order to keep your balance, you are contracting the inner edge of your left foot and the left buttock. It’s possible that your abdomen and neck may have also become tense. All of this tightening can pull you out of the pose. Begin to clarify your alignment in order to create more space in your inner body and release that tension.
Bring firmness and stability to your legs and feet as you release deeper into the pose for up to a minute. Lift your outer right thigh and pull the right hip back and up. Lengthen the arch of your left foot and spread the left buttock away from the right. Roll the skin of your left outer hip and thigh forward and down. Now, start to release the left side of your waist down toward the floor and then rotate your abdomen toward the right leg. From here, your abdomen should soften and be free to extend and lengthen. Lengthen your chest and neck toward your right foot and release your head as you fold forward. To come out of the pose, press into the back of your left heel and use an inhalation to help you lift your torso back to standing. Turn your feet to the left, lift your chest, and repeat on the left side.
Finish
Finish your practice with Uttanasana (Standing Forward Bend) and then Savasana (Corpse Pose). In Savasana, allow the outermost layer of your body to spread and fully surrender your entire body to the floor. Let your limbs be loose and relaxed. Now that you’ve brought life and intelligence to your structural body through alignment, notice how you are able to access a deeper relaxation and perhaps even a glimpse of true freedom.
Listen: Click here to be guided through this practice.
Marla Apt is a certified senior Iyengar Yoga teacher based in Los Angeles.