Published August 28, 2007 04:20PM
Yoga Poses for Scoliosis
If your curved back has you twisted, here are some asanas that will help realign your spine.
(Photo: Huha Inc./Unsplash)
If you have been diagnosed with scoliosis—or simply notice imbalances in your back and your body—you can benefit from yoga’s physical postures, breathing techniques, and relaxation techniques. A regular practice may help create more symmetry in your body, redevelop structural alignment and reduce tension in your muscles.
Before you begin a yoga practice, it’s important to know how your spine curves. Your doctor—and an x-ray—can tell you whether it is an S curve or a C curve, where the curvature happens along your vertebrae, and how your ribs are shaped. Understanding your particular imbalances will help you make adjustments as you practice.
No matter what kind of curve you have, the most important part of your asana practice is lengthening your spine. Any movement that creates space between the vertebrae will create more evenness in the spine and ribs. Stretching your back can also release tension that may build up in the muscles that hold your erect. The breath is another important part of the expansion of your torso, so pay careful attention to your breathing in the poses.
ADVERTISEMENT
While yoga may not cure scoliosis, it can help lengthen the spine, strengthen the muscles, de-rotate spinal twisting, and re-align your posture. Addressing these spinal issues does not rely only on the physical (asana) part of yoga. It involves deep awareness of the mind and spirit as well. In the course of our lives, we encounter many hardships that, like our curved spines, may initially appear to be painful handicaps. In learning to take responsibility for healing our backs and to treat them with awareness and sensitivity, we also learn to respond this way to other emotional, mental, and physical traumas. Through yoga, we discover that the curved spine has a wisdom all its own. Its greatest power is its ability to teach us to live our lives with sensitivity, balance, and grace.
Opening Poses
As you begin your practice, it’s important to loosen your spine to prevent injury, particularly if your scoliosis is acute or severe. Be gentle and pay attention to your body and breath.
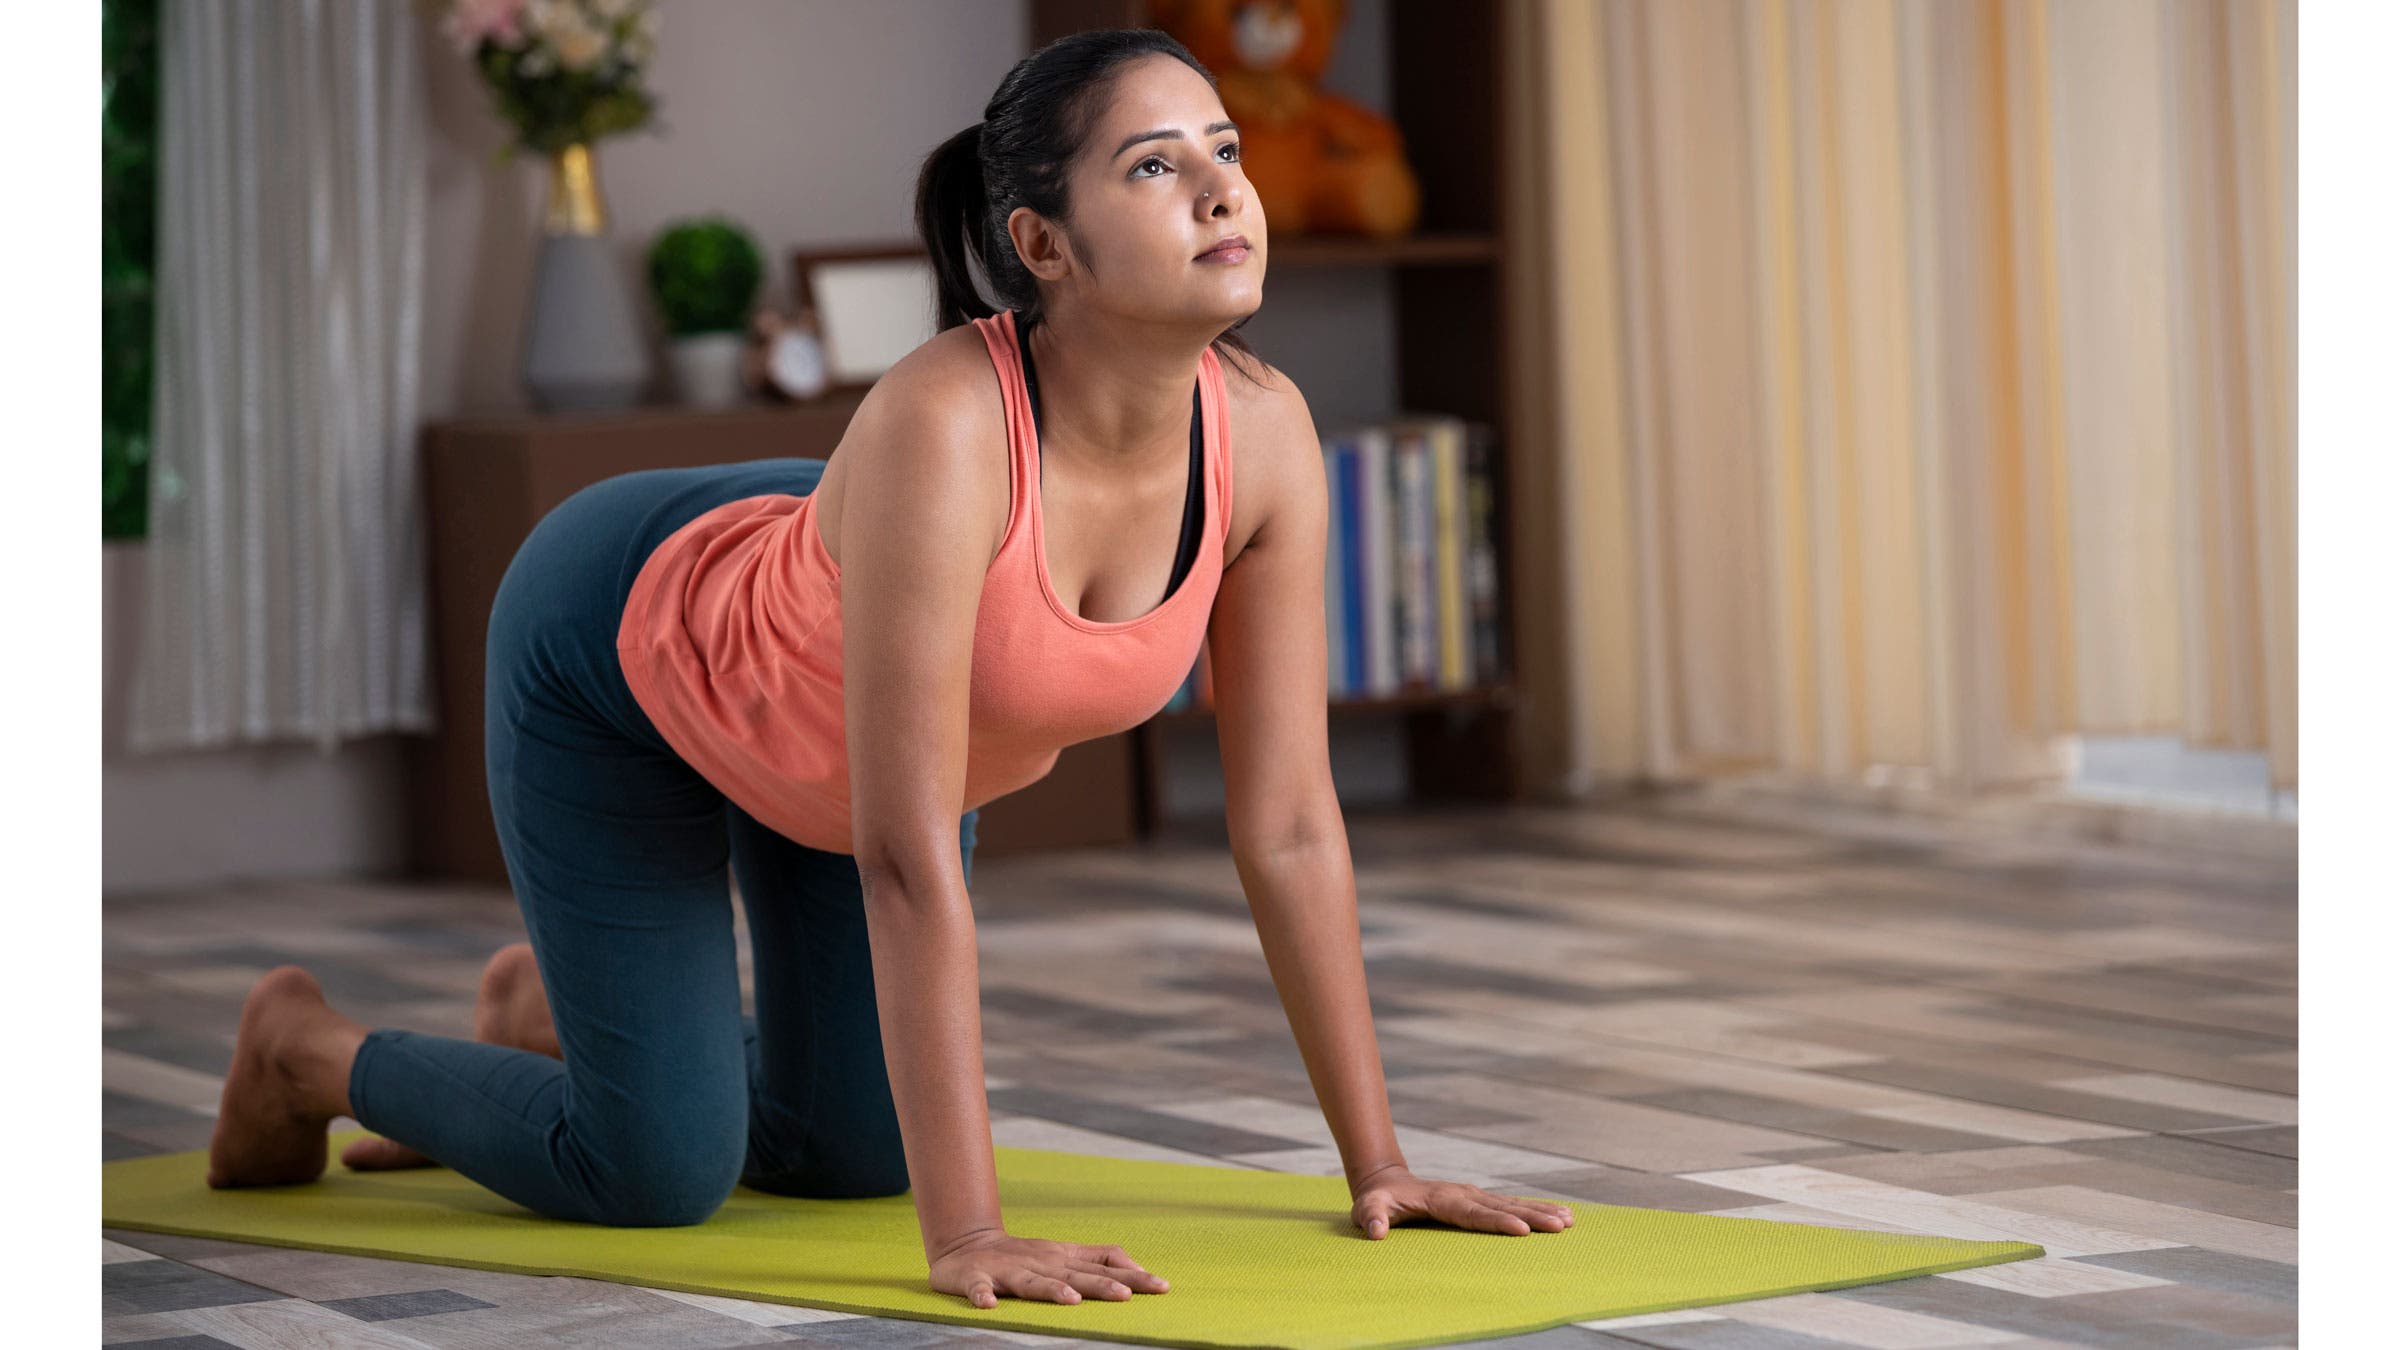
Marjyasana/Bitilasana (Cat/Cow Pose)
Kneel in Tabletop position with your hands below your shoulders and your knees below your hips. Inhaling, lift your head and tailbone, making the lower back concave. Exhale and tuck your tailbone, rounding the back and releasing the neck so that your head is down. Repeat at least 10 times, breathing with the movement.
Balasana (Child’s Pose)
After the exhalation in Cat/Cow Pose, walk your hands forward. Inhale deeply into your back, particularly the concave side where your ribs are compressed. Exhale and move the buttocks back halfway toward the heels. Inhale, and stretch the arms and the pelvis away from each other, with the upper back following the arms and the lower back following the pelvis. Breathe into this position, feeling the stretch of the intercostal muscles between the ribs, as well as the lengthening of your spine and back muscles. To help stretch the compressed ribs on the concave side, walk your arms toward the convex side, keeping them shoulder-width apart. Notice how this movement makes your back more even. Breath in this position for a minute, then move the buttocks all the way back to the heels and release your arms by your side. Relax your entire body.

ADVERTISEMENT
Standing Poses
With scoliosis, the emphasis of the stretch should be different on each side. When stretching toward the side that is more concave, emphasize lengthening the spine to open up the compressed ribs on the underside of the body and decrease the protrusion of the ribs on the opposite side. When stretching to the convex side, emphasize twisting to create more evenness on the sides of the back.
Trikonasana (Triangle Pose)
From Tadasana, separate the feet about one leg’s length. Turn the left toes out to 90 degrees and the right toes in to 45 degrees. Bend from the hips and and stretch your torso to the left. Reach the arms away from each other. Placing your left hand on the back of a chair helps to spread out the ribs on the concave side (the underside). Drop the right ribs in medially towards the spine so both sides of the body are parallel to the floor. Notice how dropping the right ribs spreads out the compressed left ribs. You can also press the right outer heel into a wall to give stability and strength to your stretch. To come out of the pose, reach your right hand toward the ceiling and allow lift yourself out of the pose.
It is also important to stretch to the opposite side to decrease the bulge in the back on the convex side of the spine. Place the left outer heel at the wall. Lengthen your body away from your hip as you did on the left side. Place your right hand on your leg and bring the heel of your left hand to the sacrum. Inhale and draw the right shoulder blade down from the ears and into the body, opening the chest. Exhale and twist from the navel, drawing the left elbow back to align the shoulders with each other. Let the neck and head follow.

ADVERTISEMENT
Ardha Chandrasana (Half Moon Pose)
Stand facing a wall, approximately six inches from the wall. Place a block or a chair at your left side. (If you are using a chair, make sure it is on a non-slip surface.) Turn your left foot parallel to the wall. Bend your right knee enough to reach the chair or block with your right hand, while you support yourself with your right hand on the wall. Push off with your right leg and lift your left leg straight out and up until it is parallel to the floor. Flex your foot and press your toes and the ball of your foot into the wall. Align the right hip, knee, and foot in a straight line, and press your right fingers and toes into the wall. Spread out the ribs on the concave side (the underside), lengthening your waist from your ship to your shoulder. Lengthen through your neck, back and right leg. To come out of the pose, slide the left leg down and return to standing.

Additional standing poses that are helpful for scoliosis:
Utthita Parsvakonasana (Extended Side Angle Pose), Virabhadrasana 1 (Warrior 1), and Parighasana (Gate Pose) are three excellent lateral stretches to do for scoliosis. Follow the same guidelines as Trikonasana. For intermediate students, try twisting standing poses Parivrtta Trikonasana (Revolved Triangle Pose), and Parivrtta Parsvakonasana (Revolved Side Angle Pose). Consult B.K.S. Iyengar’s Light on Yoga for guidance.
ADVERTISEMENT
Backbending Poses
The backward bends have been the most powerful poses in releasing my back tension. Backbending has given me freedom and mobility, particularly on the more developed right (convex) side of my back.
Passive Backbend Over a Bolster
With a scoliosis you may experience periodic muscle spasms. So even though backward bends are helpful, you should approach them with softness rather than force. In order to open up, the muscles in the back must learn to release rather than tighten, allowing the heart to open like a lotus blossom from the inside out. Beginning with passive backbends encourages this approach.
Roll a firm blanket into a cylinder or use a bolster. Place the prop across the end of your mat. Lie back on the prop so that your shoulder blades rest on the roll with your head and shoulders on the floor. Lift your breastbone. Bring your chin down toward the chest and lengthen the neck. Stretch your legs out, reaching through the heels to prevent lower-back compression. Now extend the arms straight overhead and rest them on the floor, if possible. Feel the breath evenly expanding the rib cage. Try to breathe into and expand the compressed side of the rib cage. If you feel the convex side of the back protruding onto the roll more than the concave side, place a small hand towel under the concave side so that the back touches the floor evenly. You may also do this passive backbend over the edge of your bed.
Salabhasana (Locust Pose)
This backbend is very important for scoliosis, because it strengthens the erector spinae muscles that run along your spine from the sacrum to the base of the scull. Locust also strengthens the hamstring muscles of the legs. Having strong muscles in these areas helps to ensure adequate support of the spinal column in all back bending poses.
ADVERTISEMENT
Lie face down and extend the arms out to the side, making a T-shape in line with the shoulders. On an exhalation, lift your head and upper chest off the floor, keeping your buttocks firm and your thighs pressed down strongly. Lengthen your arms out to your sides so your shoulder blades stretch away from the spine, keeping the hands below the level of the shoulder blades. Exhale as you release. Repeat three to five times.
Now reach your arms overhead and feel the muscles of your back lengthening away from the pelvis. Lift your arms and place your palms on the seat of a chair in front of you. Stretch the arms out once again and move the chair farther away to lengthen the spine. Gently lift the abdomen and floating ribs to support the front of the spine. Press down strongly with the palms on the chair as you press the thighs downward and lift the spine further. Exhale as you release. Repeat three to five times. You may also do this pose with the legs lifted as well as the arms.
As you become more advanced, you may wish to attempt more advanced backbends, such as Dhanurasana (Bow Pose), Ustrasana (Camel Pose), and Urdhva Dhanurasana (Upward Facing Bow Pose).
ADVERTISEMENT
Twists
Twists are very important for scoliosis because they help to counteract the rotation of the spine that is a characteristic of scoliosis. Always take caution to lengthen your spine before twisting.
Chair Twist
Sit on a chair with your right side to the back of the chair and your hands placed on each side of the back of the chair. Place your feet firmly on the floor, knees and ankles together. With an inhalation, lengthen the spine; with the exhalation, gently rotate from the navel, stretching the ribs away from the pelvis. Press with the right hand into the back of the chair to create more twist, and with the left fingers pull on the back of the chair, drawing the left shoulder blade away from the spine. Continue to breathe into the pose and twist further with each exhalation. With an exhalation, slowly release the pose. For a right thoracic scoliosis, emphasis should be put on twisting in this direction. Twist both ways twice, but stay longer on this side.
ADVERTISEMENT
As you progress you will be able to add several other seated twists that are beneficial to scoliosis, including Bharadvajasana (Bharadvaja’s Twist) , Marichyasana (Pose Dedicated to the Sage Marichi), and Ardha Matsyendrasana.
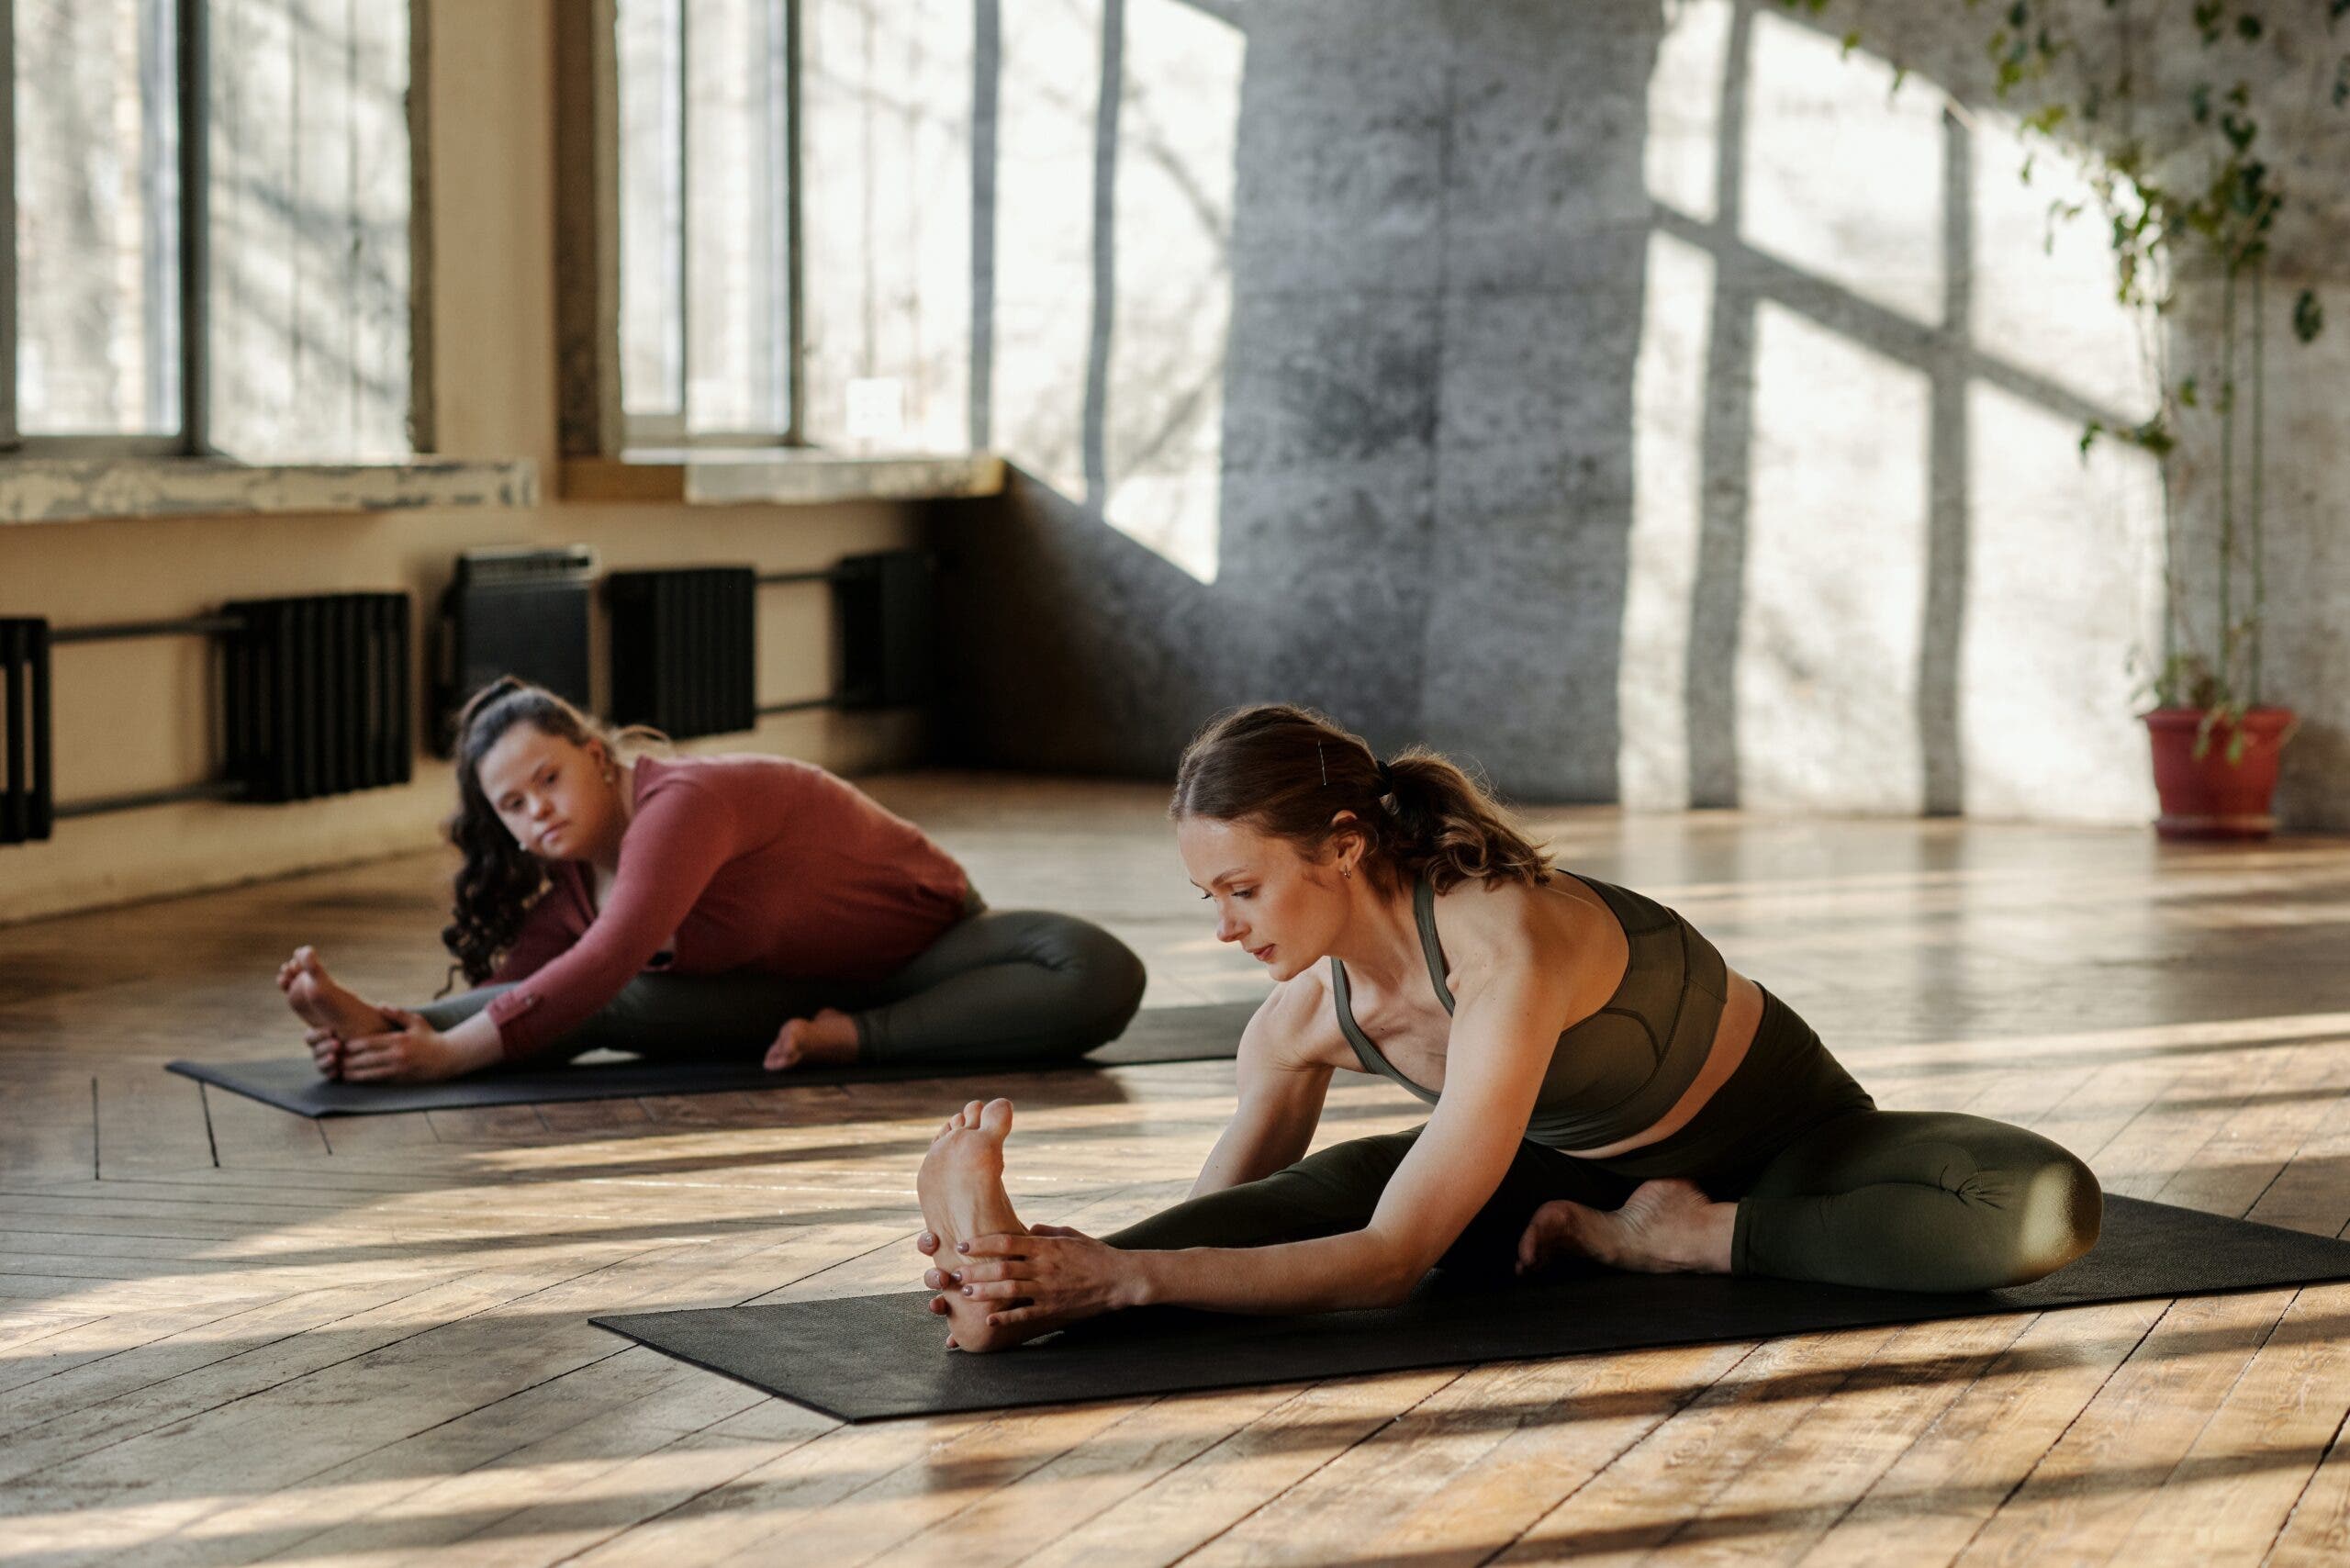
Forward Bends
Forward bends help you release deep tension in your back and shoulders. When you bend forward, you can feel your spine lengthening, and the longer you can stay in these poses, the deeper the release of your back and spine.
Janu Sirsasana (Head to Knee Pose)
Sit at the very edge of a folded blanket with both legs straight, and pull the flesh of the buttocks away from the sitting bones. Bend your right knee and bring your right heel into the right groin, letting the knee fall gently to the side. Lift and lengthen your spine, and draw the shoulder blades down and into the back, opening the chest, then fold forward from the hips over the left leg. This movement counteracts the tendency of people with scoliosis to hunch their backs and round their shoulders. To achieve this opening of your chest, you may pull on a tie or strap wrapped around the ball of your left foot. If you have a heavy sandbag, place it on the protruding (convex) side of the spine. If you can come farther forward, place a bolster or blanket across your straight leg and rest your forehead on it. Repeat on the opposite side.
Paschimottanasana (Seated Forward Bend) and other seated forward bends can also be practiced in a similar fashion, with the aid of a chair, a sandbag, and a bolster.
ADVERTISEMENT
Inversions
Even in a healthy spine, the continual pull of gravity can compress the intervertebral discs and eventually cause nerve damage or disc herniation. In a spine with scoliosis, the problem is even more pronounced. You will tend to feel the uneven pressure of gravity constantly, but you may not understand how to create alignment to alleviate it. Inversions free your body to experience alignment without the usual distortions caused by gravity. As a result, it is often easier to feel aligned when you are upside down than while standing on your feet. The inversions also develop strength in the back and arms; increase circulation to the vertebrae, brain, and other organs, and encourage lymphatic circulation and venous blood return.
Ardha Adho Mukha Vrksasana (Half Handstand)
Handstand is generally one of the first inversions students learn. It helps to develop arm and shoulder strength, preparing you for other inversions such as Headstand. By learning to lift up in Handstand, you also learn to lengthen the spine against gravitational force, a movement that is particularly important for those with scoliosis. If you are new to Handstand and afraid to try it, Ardha Adho Mukha Vrksasana (Half Handstand) is an alternative that can help you build your confidence and strength. To warm up, do Adho Mukha Svanasana (Downward-Facing Dog Pose) with the heels at the wall. Lift the right leg and extend through the heel with the ball of the foot pressing against the wall. Reverse, bringing the right leg down and lifting the left leg. This movement helps build upper body strength, often lacking in practitioners with scoliosis; it also teaches you to lengthen both sides of the body evenly, despite the distortion in your spine.
Rest in Child’s Pose. Now go back into Adho Mukha Svanasana and lift both legs onto the wall, hip-width apart and parallel to one another. The feet should be no higher than hip level, and your arms, shoulders, and torso should be in a straight line. Press actively into the wall with your heels. Spread your shoulder blades away from each other and draw them down away from your ears. Press into your palms, draw your elbows in, and keep your arms straight. If this is difficult, use belt around the arms, just above the elbows.
Salamba Sarvangasana (Shoulderstand)
Shoulderstand releases the chronic tension in the neck and shoulders so common among people with scoliosis. If you are a beginner, you should have as much support as possible to encourage the chest to open and to prevent the weight of the body from descending on the neck and shoulders.
ADVERTISEMENT
Begin by using a chair, a bolster, and the wall. Place the back of your chair approximately one foot from the wall. Put a nonslip mat and thin blanket on the seat of the chair and a blanket over the back. Set a bolster or several blankets on the floor in front of the chair and a folded towel in front of the blankets to go under your head. Sit in the chair facing the wall and roll backwards into the pose, bringing your shoulders onto the bolster and head on the floor. Hold on to the chair’s back legs and lift your legs, resting your feet against the wall. If your chin is higher than your forehead, place a folded towel under your head. Relax the eyes, turning them inward and down toward the chest. Stay in the pose for 5 to 10 minutes. To come out of the pose, slide the chair away and lower your buttocks to the floor.

As you progress, begin to do Shoulderstand at the wall without the chair and bolster. Place four blankets at the wall folded so they are long and wide enough to accommodate your entire torso; lie on the blankets with your buttocks close to the wall, your shoulders at the top edge of the blankets, and your legs stretched up the wall. Bend your knees, press your feet into the wall, and lift your buttocks, shifting your weight onto your shoulders. Reach your hands underneath your body, and roll your shoulders under, and interlace your fingers with the elbows straight out and roll the shoulders under. Support your back with your hands and lift up through your knees. Straighten one leg at a time, until you are strong enough to straighten both legs and balance. If you get tired, stretch your legs back to the wall, keeping them straight. Hold for one minute; gradually increase to 5 to 10 minutes. To come out, release the hands from the back, and continue to extend through the heels as you slide to the floor, pressing the tailbone toward the wall.
ADVERTISEMENT
As your practice progresses, you might wish to try Pinchamayurasana (Forearm Balance). When your arms, shoulders, and back have been strengthened through regular inversion practice, you may be ready to practice Salamba Sirsasana (Headstand).
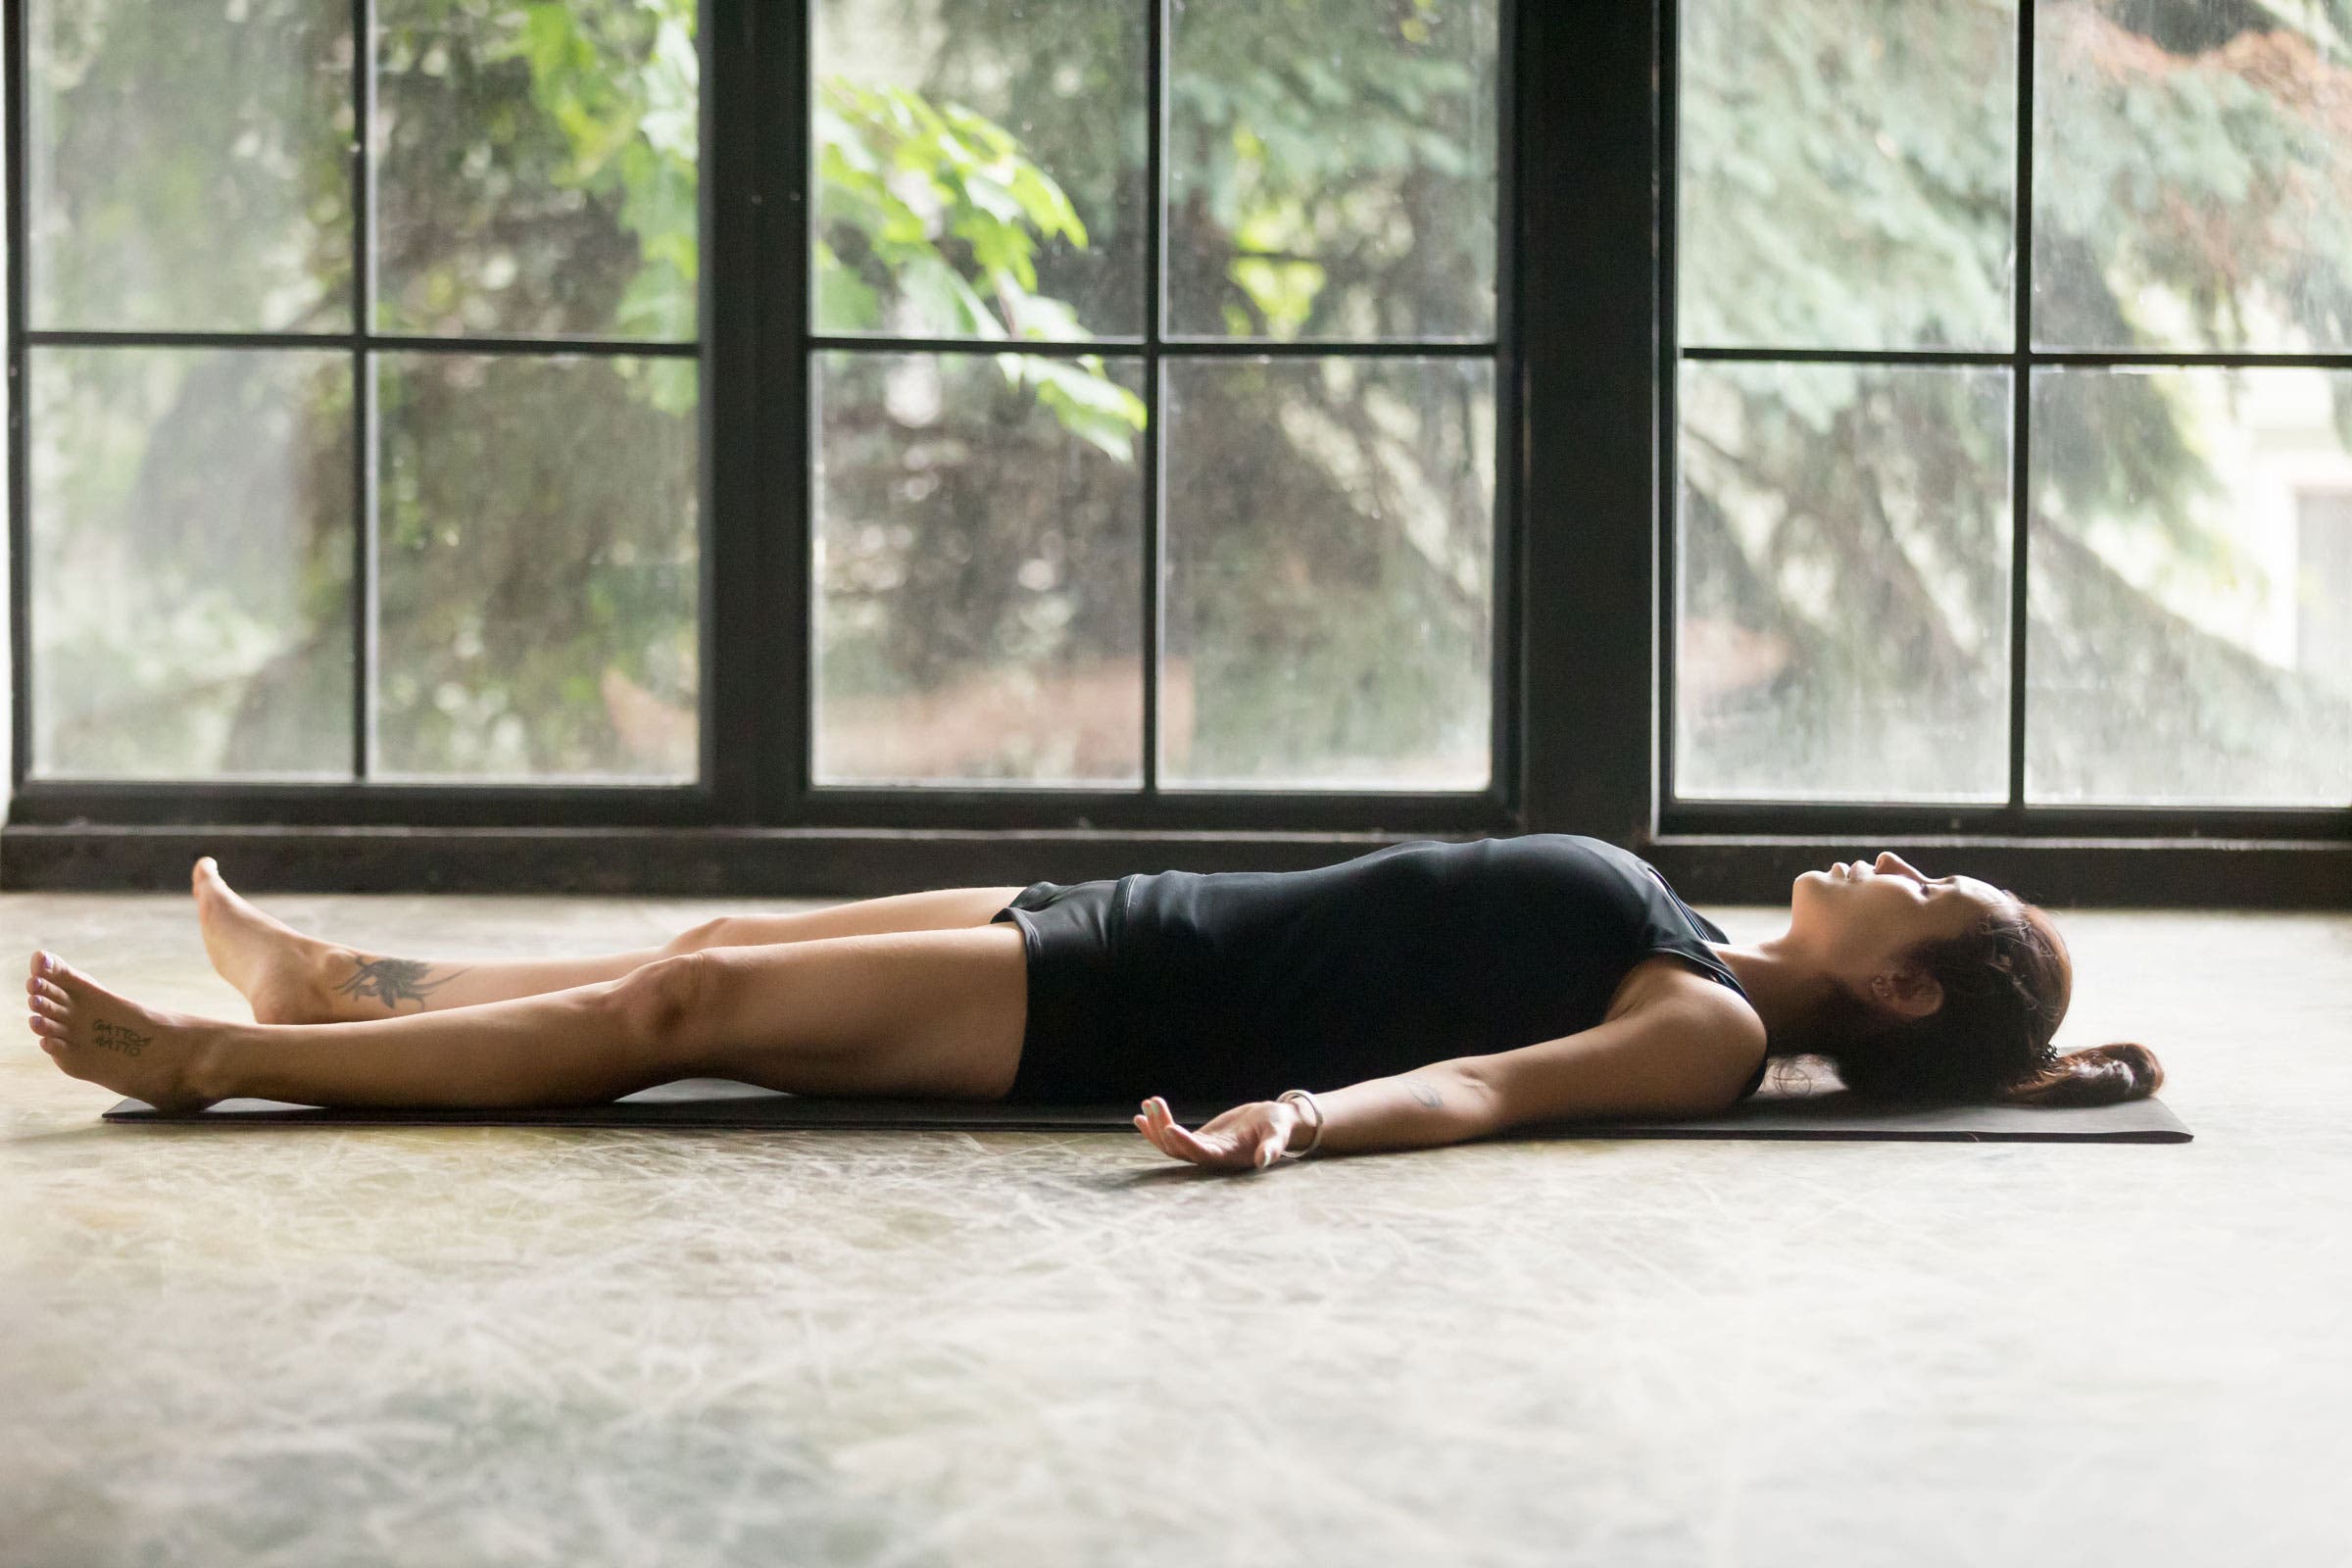
Resting Poses
Relaxation is crucial to allow the body, mind, and spirit to receive the fruits of the practice. Especially for scoliosis sufferers, relaxation can be difficult because the muscles have been clenched to support the uneven spine.
Savasana (Corpse Pose) with Breathing Awareness
Lie down on your back on the floor, stretching both sides of the body evenly. If your back is uneven due to the scoliosis, place a small towel under the concave part of your back. Close your eyes and breath deeply, becoming especially aware of the spine and expanding both sides of the rib cage evenly. Move your awareness through your body, noticing and releasing any areas of tension. Stay in the pose at least 10 minutes. As your body relaxes in Savasana, your mind becomes quiet, and true healing can take place.
ADVERTISEMENT
BONUS
Three-Part Bar Stretch
This pose may be done at a dance bar or at home on a porch railing, sink, or wherever you can grab onto something and pull.
- Grab onto the bar with hands shoulder-distance apart and walk the feet back until the spine is parallel to the floor and the feet are directly under the hips. Now bring the heels forward to the position where the toes were and hang backwards, bending from the hips and stretching the buttocks away from the bar. Keep the neck in line with the spine, not allowing the chin to lift up. Feel the entire spine being lengthened by the pull.
- Bring the feet in a few inches toward the bar and bend the knees into a right angle, with the thighs parallel to the floor and the knees directly above the heels. Continue to stretch the buttocks down and backwards. This particularly stretches the mid-back below and to the sides of the shoulder blades.
- Walk the feet forward a few inches farther to allow the heels to remain on the floor. Let the buttocks move down toward the floor in a squat. Now pull back, keeping the buttocks down, and feel the lower spine being stretched.