Published May 9, 2012 02:41PM
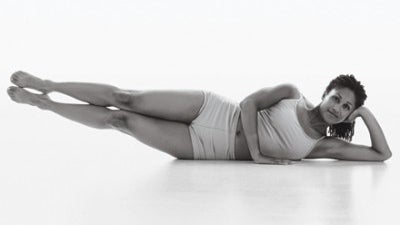
Why You Should Add Weights to Your Practice
To stave off muscle loss, support flexible joints, or add oomph to tough poses, a little strength training can go a long way.
Small but mighty is an apt description of yoga teacher Amy Ippoliti. When you see the petite powerhouse effortlessly rock deep backbends and arm balances, it’s hard to imagine that just over a year ago she suffered a shoulder injury that interfered with her regular practice. Clearly, her highly developed body awareness and her consistent yoga practice were important in her healing. But her full recovery, she says, required open-mindedness: After months of trying to heal the injury through yoga, she did what some yogis deem blasphemous—she hired a personal trainer.
She’s more than glad she did. The cross-training healed her injury and gave her the stability to do her favorite poses without pain. “I started to become someone who felt like it was great to bring in other disciplines,” she says. “Not only was I getting toned up again, I was starting to see significant improvement in my injuries. Strengthening my back muscles specifically helped my shoulder.” Although Ippoliti had always believed that her yoga practice could—and should—be a cure-all for everything, she’s now a believer in opening up to different modalities when it serves her. “I can still do my yoga practice traditionally. I’ve been enhanced by going to the gym, and I’m able to do my yoga practice even better.”
Other yogis see the benefits of combining traditional yoga practice with weight training to create a healthy, balanced regimen. Bo Forbes, a therapeutic vinyasa teacher in Boston, has been combining yoga and weight training for more than a decade in her work with professional athletes. Using her method, Functional Integrated Yoga, Forbes teaches athletes traditional yoga classes on the mat and then incorporates aspects of the yoga practice into their routines in the gym. Watching the athletes both on the mat and in their teams’ training rooms has helped Forbes troubleshoot injuries and create more ease and body awareness in her athletes. “For me, weight training isn’t just about building brute strength. It’s about building self-awareness,” she says.
ADVERTISEMENT
Forbes points out that it’s the students who seem like the yoga “naturals”—those who are flexible to the point of being hypermobile—who become injured. It’s these students who need to build strength and awareness, especially around their joints, so that they don’t unconsciously push themselves too far into a pose and create an injury. Weight training can be an efficient way for bendy types to build strength and bolster muscle awareness so that they’re working from a place of integration in the body, tapping into equal amounts of flexibility and strength in their poses. “I’m always looking for integrated flexibility. I think that flexibility without strength is out of balance, and strength without flexibility is, too.”
Stave Off Muscle Loss
Weight training combined with yoga practice can also be a great way to maintain strength as you age. Countless studies show that a lack of exercise can lead to muscle mass decline beginning at age 40. If you stay sedentary, by the age of 70 you could lose about 30 percent of your muscle mass. Lifting weights two to three times per week builds muscle and bone density and helps with balance. And although doing yoga regularly can bring similar benefits, it’s important to introduce your body to new challenges from time to time to avoid hitting a plateau.
As Ippoliti can attest, adding just a little bit of weight training to your routine will give you extra oomph in your poses, especially if you are naturally flexible and struggle to build strength. “I started to feel extra-powerful in my Chaturangas, and my stamina in standing poses improved,” she says. She also noticed, for the first time, that her hamstrings were weak. All of these factors renewed her motivation to do poses she’d stopped doing and got her out of some of her own home-practice ruts.
ADVERTISEMENT
If the idea of going to the gym sounds torturously boring, or if you feel like you’re cheating on your yoga practice, you can try Forbes’s approach by bringing aspects of your yoga practice into the weight room. Conscious Ujjayi Pranayama (Victorious Breath) is her No.1 focus. “I integrate the principles of vinyasa into weightlifting,” she says. “There’s a time to inhale and a time to exhale. If you’re doing a biceps curl, you inhale to prepare; then you exhale as you curl your arm toward you. Take another breath in, and then exhale again as you lower your arm slowly.” Along with breathwork, Forbes teaches two of the bandhas, or locks—Uddiyana Bandha (Upward Abdominal Lock) and Mula Bandha (Root Lock)—to help awaken the deep core muscles so that they can support the spine. She started incorporating this subtle abdominal work in the weight room after noticing that many weightlifters work on the superficial muscles of the back and abdominals, which can tax the back in the long run. (If you’ve never done the locks, it’s easiest to start with Uddiyana.) Finally, Forbes encourages her students to bring all of their knowledge about bodily alignment with them when they lift weights. Ippoliti agrees that the body awareness that yogis bring to the table helps them at the gym. “Your body awareness as a yogi is really going to be an asset in how you progress,” she says.
Ippoliti still hits the gym regularly with her personal trainer because she believes that weight training keeps her body in balance and enhances her yoga practice. She points out that, these days, yoga is being mixed with all sorts of disciplines, from hooping to golf to music and dance. From her point of view, these are all ways that yoga is evolving and remaining relevant to what’s happening in the world around us. She brings up the point that 5,000 years ago, yogis didn’t sit at computers all day long. In her mind, if there’s a way to address that type of modern physical challenge efficiently and to ensure you’re not bringing bad postural habits to the yoga mat, then what’s to argue about? “We’re cross-pollinating these disciplines. Why not? It adds so much flavor and goodness to the whole practice,” she says. “For me, it’s about how you can find an alignment between staying true to the tradition of yoga while being open and flexible to trying other avenues that can help you improve and evolve.”
Yoga Sequence by Bo Forbes
Standing Poses: Gain Strength, Get Grounded

If you’re flexible in your hips, hamstrings, and inner groins, you’re able to get into most standing poses readily. But you might “sink into” these poses and strain your feet, knees, and hips as well as your lower back. By adding a few simple leg and core exercises twice a week, you’ll build strength in your core and legs, which will help you create and maintain intelligent alignment.
Lunges With Kettlebells
How to: Start in Tadasana (Mountain Pose), holding a kettlebell in each hand. Inhale fully. On a long exhalation, step your right foot forward into a lunge until your front thigh and shin form a right angle. Keep your front knee in line with the outer edge of your front hip. Your back heel will lift, and you’ll bend your back knee. Inhale fully. Exhale and use your core body to bring the right leg to Tadasana. Repeat with the left leg. That’s 1 rep. Do 10-12 reps to complete a set. Work up to 3 sets.
Target: Quadriceps and hamstrings
Protective Actions: If you feel strain in your knees, try the lunge without weights and see that your knee doesn’t extend beyond your front ankle or lean toward the midline of your body. As you step forward, lift your pubic bone and engage your lower belly to support your lower back.
*For all of these exercises, begin with 2-pound weights and work up to 8 pounds.
ADVERTISEMENT
Navasana With Free Weights
How to: Sit with your knees bent and your feet flat on the floor. Hold a infree weight in each hand, close to your chest. Cross your ankles and flex your feet. Inhale fully. Exhale, draw your heels toward your buttocks, and squeeze your knees together. Lift your lower back away from the floor and keep your entire spine long. Either stay as you are or lift your heels off the floor. For more of a challenge, reach your arms in front of you. Hold for 8 deep breaths. On an exhalation, change the cross of your ankles and hold for another 8 breaths.
Targets: Rectus abdominus
Protective Actions: If you feel lower-back strain, add blankets under your sitting bones or rest part of your spine against a wall.
ADVERTISEMENT
Counterpose: Foam Roller on the Quads
A great counterpose for these exercises (and for standing poses) is to relax your quadriceps muscles by rolling them on a foam roller.
How to: Come to Plank on your forearms and place a foam roller underneath the meatiest part of your right leg. Note that muscular development is different for everyone here, so you may want to experiment until you find the placement that feels best to you. Roll up and down, and side to side, breathing slowly and deeply. Use a deep nasal breath and emphasize the exhalation for optimum release.
Target: Quadriceps
Protective Actions: Make sure that the roller is under your quadriceps muscle and not too close to your knee. Press down lightly with your forearms so that your shoulders don’t hunch during the pose. If the pressure is too intense, place a folded towel over the foam roller.
ADVERTISEMENT
Put It All Together
The next time you take a standing pose, you can tap into your increased leg strength and core awareness. Think about creating a suctioning action from the soles of the feet to lightly firm your foundation. As you draw deeper into the pose, your quadriceps will engage more readily. You’ll be able to stay longer and monitor your alignment more attentively. Keep lifting your pubic bone up toward your heart and engaging Uddiyana Bandha to protect your lower back and give it length.
Arm Balances: Achieving Power and Lift-Off

In order to truly achieve a sense of power and lift-off in arm balances, you need strength in your core and your arms. If you’re naturally flexible, you might be able to perch easily in an arm balance by stacking your bones. But working this way can put pressure on your joints. The exercises on the next page can help give you the extra oomph you need to feel light and integrated.
Plank With Kettlebells
How to: Come onto hands and knees holding onto two kettlebells. See that your wrists are directly underneath your shoulders and the knees are a few inches behind your hips. Tuck your toes and lift your knees off the floor to come into Plank Pose. (You can also try it with your knees down for the first week or so.) Inhale, and on the exhalation draw the kettlebell up toward the ceiling. Hold at the top for a second. Inhale, and on the next exhalation return to Plank. Repeat with the other arm. That’s 1 rep. Do 8 full reps.
Targets: Abdominal muscles, (transverse abdominus, rectus abdominus, internal and external obliques), shoulders (deltoids), and arms (biceps).
Protective Actions: If you have trouble controlling the ascent or descent of the kettlebells, or if you feel any strain on your joints, try a lighter weight. Avoid lifting your hips too high or overarching your neck. Engage Uddiyana Bandha to protect your lower back. Create a long, straight line from the back of your head all the way down to your heels.
ADVERTISEMENT
Shoulder Press With Free Weights
How to: Sit tall, either on a weight bench or on the front edge of a chair. Hold a weight in each hand, just above your shoulders, palms facing forward. Inhale fully. Exhale and raise your arms straight up to meet at the top. Inhale and hold. Exhale and slowly lower your arms to the starting position. Repeat this 8-10 times.
Targets: Upper trapezius, deltoids, biceps, and triceps
Protective Actions: Draw your shoulder blades down your back. Engage your abdominal muscles to keep your spine long. Avoid looking up at the weights and keep your gaze straight forward. If you have to arch your back to lift the weight, try a lighter weight. If you’ve had rotator cuff injuries in the past, press your arms straight up toward the ceiling without having them meet at the top.
ADVERTISEMENT
Counterpose: Scapula Hang
Scapula Hang effectively opens the front of the shoulders, the chest, and the neck. Use it as a counterpose for these exercises and for arm balances.
How to: Lie on a block so that the long bottom edge rests just under your shoulder blades.
If the block creates too much pressure, you can use a folded blanket instead. Otherwise, hold a second block in your hands; then exhale and slowly draw your arms toward the floor behind you. If you move slowly, you’ll be able to sense signals from your rotator cuff muscles that indicate when you’ve gone far enough. Either hold the block in place at that point or rest your forearms on your forehead. Breathe deeply, holding for 2 minutes or more.
ADVERTISEMENT
When you are ready to come out, release the block, tuck your chin, press your forearms into the mat, and lift your spine off the block. Lie back with your knees bent, giving your body time to absorb the pose.
Targets: Upper thoracic spine, shoulders, and chest
Protective Actions: Make sure that the block is under your upper spine, not your waist. If your neck feels hyperextended, nudge the block a little lower. If the feeling continues, place a folded blanket under your head to lift it up.
Put It All Together
The next time you try an arm balance, you can use your newly developed strength to make the pose more integrated and effortless. Take Bakasana (Crane Pose), for example. In Bakasana, press your hands down into the floor; at the same time, create a suctioning action so the energy lifts away from your hands. Round your upper back, and hug your arms in toward each other as you knit your core up and in. As you breathe smoothly, use this new height to see if you can straighten your arms.
ADVERTISEMENT
Going Up: Uddiyana Bandha
Uddiyana Bandha (Upward Abdominal Lock) is often taught as the action of taking the “navel to the spine.” The secret to true Uddiyana Bandha, however, is found in its name, which translates from Sanskrit as “upward flying seal, or lift.”
To create this upward flying seal, place your hands on your lower abdomen, palm over palm. Draw your pubic bone up toward your heart. (This action will also tuck your tailbone, but initiating it from the pubic bone will help engage your deep, intrinsic abdominal muscles.) Begin Ujjayi breath, inhaling and exhaling for several rounds. The diaphragm lifts when you exhale, making more space for Uddiyana Bandha to engage more strongly. With each successive exhalation, draw your deep, intrinsic abdominals toward your spine a little, but mostly up toward the ceiling, creating the “upward flying” action.
ADVERTISEMENT
Now, we’ll add a rhythmic interplay, or vinyasa, between Uddiyana Bandha and the breath. As you inhale, keep about 30 percent of Uddiyana Bandha; as you exhale, engage it about 90 percent, and draw those muscles up toward your lower ribs.
Each time you exhale while lifting weights, engage Uddiyana Bandha strongly to support your spine. You’ll build strength faster and with more integrity, and you’ll protect yourself from the most common weightlifter’s ailment: lower-back pain and injury.