Updated March 24, 2025 06:41PM
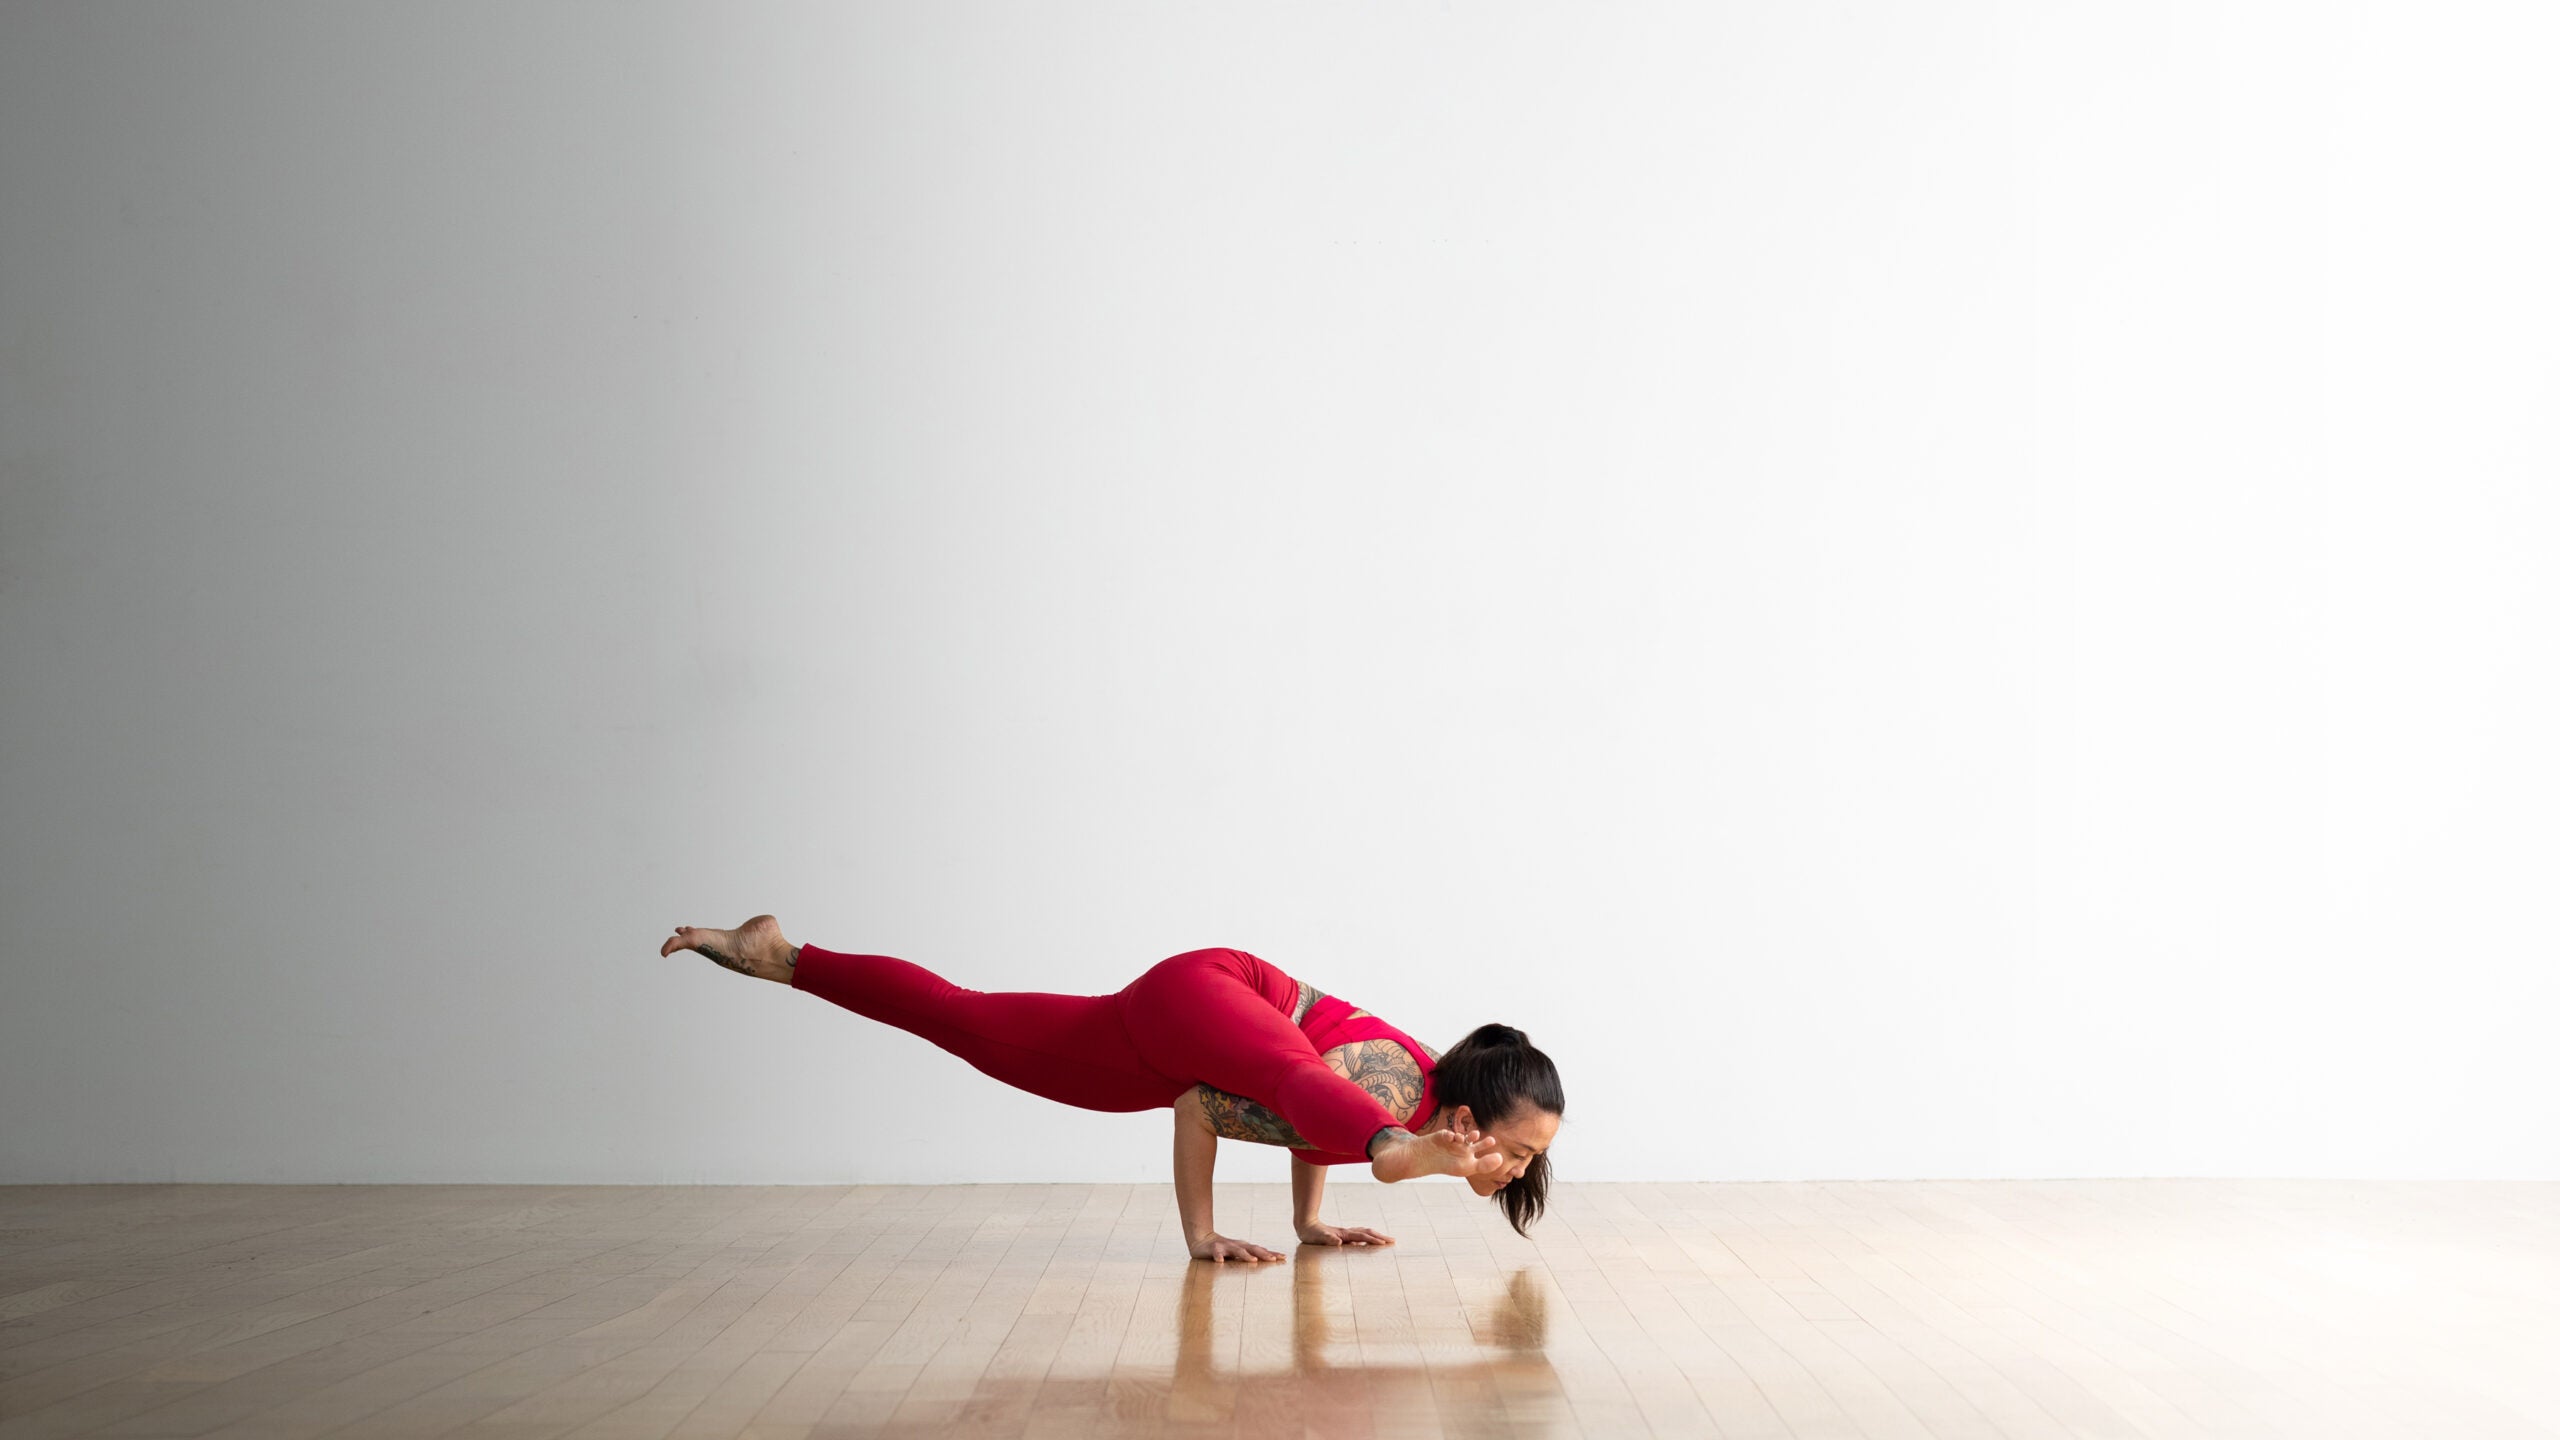
Pose Dedicated to the Sage Koundinya II
Pose Dedicated to the Sage Koundinya II tones the belly and spine, strengthens the arms and wrists, and gives your self-confidence a big boost.
(Photo: Andrew Clark. Clothing: Calia )
This pose sounds complicated—and it is, sort of, but only at first. From Plank Pose, you lean your body weight forward and bring your torso parallel to the ground. Maybe the hardest part is bringing the knee to the triceps and holding it there. Then you make a shelf for your body by bending your elbows, and the knee stacks on the triceps long enough for you to lengthen the leg while you extend the other leg back behind you. Next thing you know, you’ve lifted off into flight. Whew! It takes power and courage to try this pose. You will use arm and core strength, hip and hamstring flexibility and a twist in the lower sacrum and spine—all at the same time. Be brave and keep trying because once you figure out where your body parts go, the asana gets easier. You’ll create muscle memory with repeat attempts. You may get Flying Splits one day, and you may not. Either way, be inspired by your efforts to try new things that most people are afraid of!
Sanskrit Name
Eka Pada Koundinyanasana II
AYE-kah PAH-dah Kown-din-YAH-sah-nah
Pose Dedicated to the Sage Koundinya II: Step-by-Step Instructions
- Start in Adho Mukha Svanasana, hands shoulder width apart. Step your left foot far forward, past the outside of your left arm, and place it on the floor well in front of your left hand. Alternately, you may start in a plank pose.
- Bend your left elbow and twist your torso to the right, dropping the left shoulder and the whole left side of the torso as low as possible on your inner left thigh. Pressing your thigh toward your torso, slide your left upper arm and shoulder as far as you can underneath the back of the left thigh just above the knee. Place the back of your thigh as high up as possible on the upper arm.
- Keeping your weight centered approximately between your hands, start to creep your left foot forward along the floor so more and more of the weight of the leg comes onto the arm; let the left foot naturally move a little to the left as you do this. When you can’t walk the foot any farther forward without lifting it off the floor, straighten the knee as much as you can, powerfully reaching the foot forward and out to the left side.
- Bending both elbows, shift your weight far forward between your hands until you can lift your back leg. Lift strongly until that leg is parallel to the floor; then, keeping the knee extended, press straight back through the ball of your foot.
- Lift your chest until your torso is parallel to the floor, pressing strongly down through your inner hands to help maintain this position.
- Lift your head and look forward, keeping your eyes and forehead soft. Breathe evenly. Hold the pose for 20 seconds or longer, then step back into Adho Mukha Svanasana. Repeat it on the other side for the same length of time.
ADVERTISEMENT
Variations
Koundinyasana on blocks

Place two blocks under your shoulders. When you lean forward into the pose, allow the blocks to hold some of your upper body weight.
Koundinyasana prep from Forearm Plank

From Plank Pose, step your left foot forward, aligned with, but on the outside of your hand position. Bend your elbows and lower down to Forearm Plank.
Standing Koundinyasana with a chair

Practicing from a standing position, you can still approximate the twist and the hip stretch of Koundinyasana. Stand facing the front of a chair; lift one leg and rest your foot on the seat. Take a gentle twist in the direction of that leg, placing your opposite hand on your thigh for leverage.
ADVERTISEMENT
Pose Information
Benefits
- Strengthens the arms and wrists
- Tones the belly and spine
Contraindications and Cautions
- Any wrist or lower back injury
Beginner’s Tip
Support one or both of your legs on a bolster and/or chair seat to secure your balance.
- If your hamstrings don’t let you straighten your leg all the way, try this pose with the front knee bent. Bring the right knee to the right triceps, and keep the leg bent as you make a shelf with your elbows and lift your torso forward and your back leg up.
- A trick to getting into the pose when you first start trying is to use both elbows equally. Starting on the right side, bring the right knee to the right triceps, and bend your elbows to make a shelf for your torso. At the same time, bring your left forearm and elbow into the left ribcage—your arm can actually help hold your body up. This variation also has the benefit of helping you lift the back leg. One day, after much practice, you may not need to use the left arm as a shelf anymore.
- Sometimes the back leg just won’t lift off of the mat. Do the pose with the front right knee to the right triceps (lengthened or bent), make the shelf with the elbows as usual to hold up the torso. But keep the back foot on the ground with the toe tucked and the shin and knee will hover a few inches from the ground.
Teaching Tips
There are two ways to do Flying Splits. One is with momentum, and one is without it. Teach both! Come into Koundinyasana II from Downward-Facing Dog. Then try to come into the pose from Lizard, which is much more challenging for most students. Here’s how: In Lizard on the right side, shimmy the right shoulder under the knee. Begin to lean forward while straightening the right leg any amount. Hold the torso up with your elbows. Lift the back leg. It’s okay to grunt here—that show of effort probably means you’re doing it correctly.
ADVERTISEMENT
Once Koundinyasna II becomes easier, try jumping back into Chaturanga from it. Do it on the right side by leaning forward with your chest and hopping your right and left legs back to Chaturanga at the same time. Keep the elbows bent the whole time to protect your shoulders.
Preparatory and Counter Poses
Preparatory Poses
- Supta Padangusthasana
- Chaturanga Dandasana
- Upavistha Konasana
Follow-up Poses
- Uttanasana
- Adho Mukha Svanasana