Master Sleeping Pigeon Pose in 4 Steps


NEXT STEP IN YOGAPEDIAModify Sleeping Pigeon Pose to Balance Body + Mind
SEE ALL ENTRIES IN YOGAPEDIA
Eka Pada Rajakapotasana
eka = one · pada = leg or foot · raja = king · kapota = pigeon · asana = pose
One-Legged King Pigeon Pose, forward bend variation; a.k.a. Sleeping Pigeon Pose
Benefits
Provides the external rotation and flexion that your hips need to remain agile; releases tension in your hips from sitting all day.
Instruction
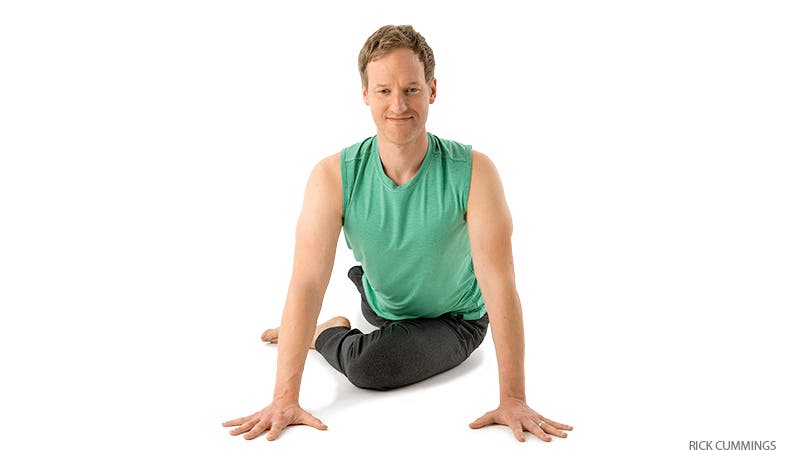
1. Come to all fours with your hands below your shoulders, knees below your hips. Bring your left knee to touch your left wrist. Keep your left thigh parallel to the side of your mat and inch your left foot forward until it’s just in front of your right hip. If your hips allow, walk your left foot closer to the front of your mat to create a more intense stretch.
2. Slide your right leg toward the back of your mat and lower both hips toward the floor. As you lower your pelvis, be sure that your hips don’t spill to the left. Look over your shoulder and make sure your back leg is extended straight. Press the top of your back foot into the floor to more deeply stretch your hip flexors. Stay here, with your arms straight and your hands alongside your hips, for 2 to 4 breaths, letting your hips settle toward the floor and observing the sensations in your lower body.
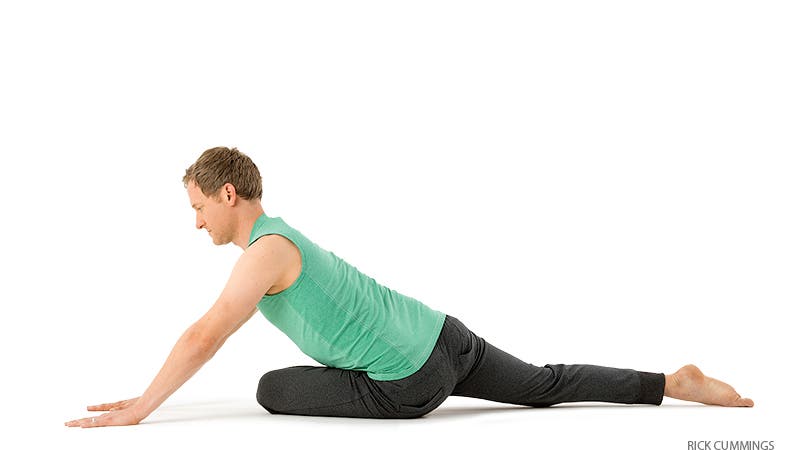
3. Walk your arms forward so that they’re at a 45-degree angle to the floor—roughly the same angle as Adho Mukha Svanasana (Downward-Facing Dog Pose). Press your hands firmly into the floor as if pushing away the ground. Complement this action by rooting down through your front shin and the top of your back foot. Feel how this increases the opening in your front hip and back thigh. Take 2 to 4 deep breaths.
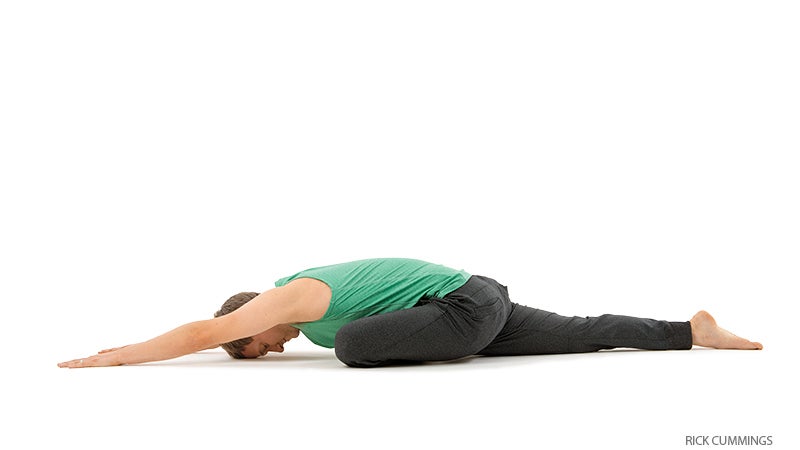
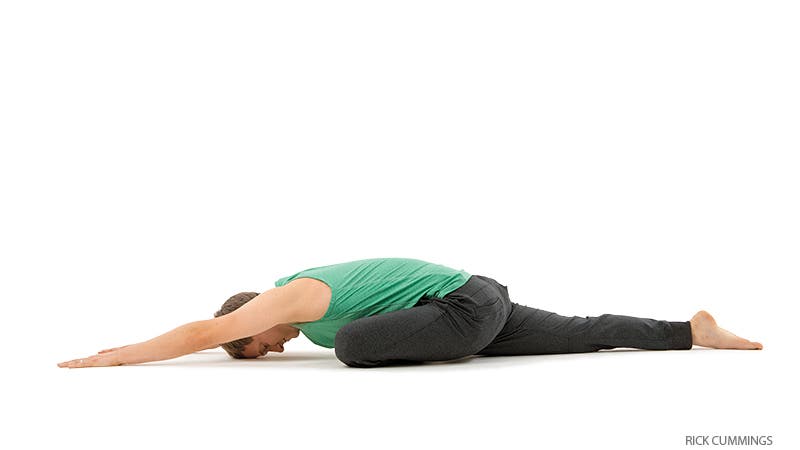
4. Continue to deepen the posture by walking your arms forward until your forehead rests on the floor. You’ll stretch your outer hip more deeply by keeping your elbows off the ground. Continue to root down through your front shin and back foot. Breathe into the sensations that are rumbling in your hips; relax your eyes, jaw, and throat. Take 3 to 4 breaths, release, and repeat on the other side.
See alsoAnatomy 101: Understand Your Hips to Build Stability
Avoid These Common Mistakes

Don’t tilt your pelvis toward your front leg. This will negate the desired stretch.

Don’t angle your knee toward the center of your mat; your hips will become uneven and you’ll again lose the stretch.
See alsoOpen Your Hips in Pigeon Pose (Eka Pada Rajakapotasana)
About Our Pro

San Francisco–based instructor and model Jason Crandell has 20 years of teaching experience. His classes integrate elements of power yoga, anatomical precision, and mindfulness. Crandell has taught on many teacher-training faculties and leads trainings globally. He is a contributing editor at Yoga Journal, where he has authored more than 25 articles, a podcast series, and four full-length DVDs. Find more of his teachings at jasonyoga.com.