Heading out the door? Read this article on the new Outside+ app available now on iOS devices for members! Download the app.
Standing. Walking. Running. Hiking. Biking. What do these activities have in common? They require strong legs. But strength is most effective when it’s balanced with flexibility. You’ll develop both by practicing yoga for your legs.
How Yoga Helps Build Strong Legs
When you think of building strong legs, you most likely think about the quadriceps and the hamstrings, but your glutes, calves, hips, knees and ankles all play a role in supporting your lower body. As it so happens, many yoga poses are strength-building postures for these and surrounding muscles, from beginner-friendly Mountain Pose to the more challenging Pyramid Pose.
One-legged standing poses such as Extended-Hand-to-Big-Toe Pose stretch one leg while employing the strength of the other, so you balance the contraction and extension of your leg muscles. These types of poses also help improve your balance, a skill that helps prevent injury on the yoga mat and in everyday life.
11 Yoga Poses for Strong Legs
Practice one or two postures throughout the day to fire up your leg muscles or all of them for a leg-strengthening sequence.
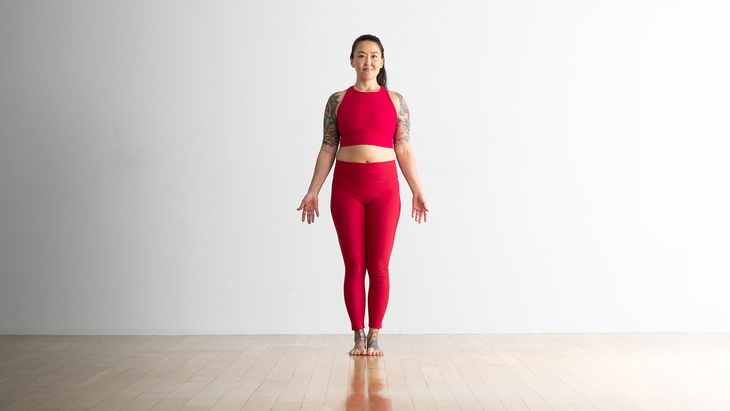
1. Mountain Pose
Start the sequence by warming up your lower body in Mountain Pose.
How to:
- Stand tall and press your feet into the mat with your arms by your sides. Draw your shoulders away from your ears in Mountain Pose.
- Lift up onto the balls of your feet and back down a few times to activate your ankles and warm up your lower body.
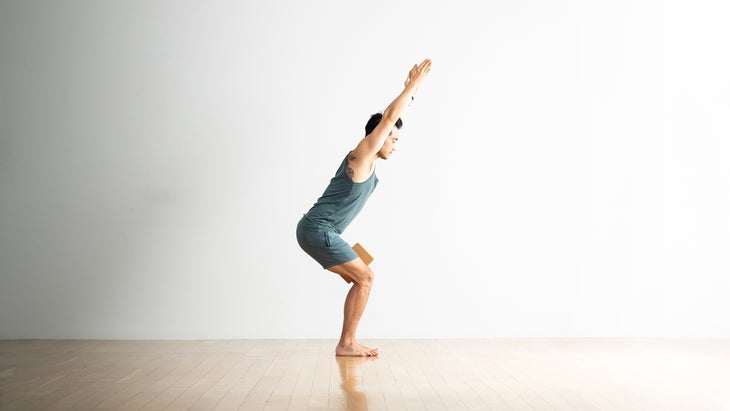
2. Chair Pose (Utkatasana)
As you bend your knees toward a sitting position, you’ll feel your quads activate. To intensify the legwork, lift one leg a couple inches off the mat.
How to:
- Stand tall. Inhale as you reach your arms overhead. Turn your palms to face inward or join them in prayer position (anjali mudra).
- Exhale and bend your knees deeply as if you’re about to sit in a chair. Push your feet into the mat and draw your shoulders down away from your ears in Chair Pose. For an added challenge, place a block between your thighs and squeeze it to engage the adductor muscles. Breathe here for 30 seconds to 1 minute. To come out of this pose, inhale as you straighten your knees and return to standing. Exhale and release your arms to your sides.
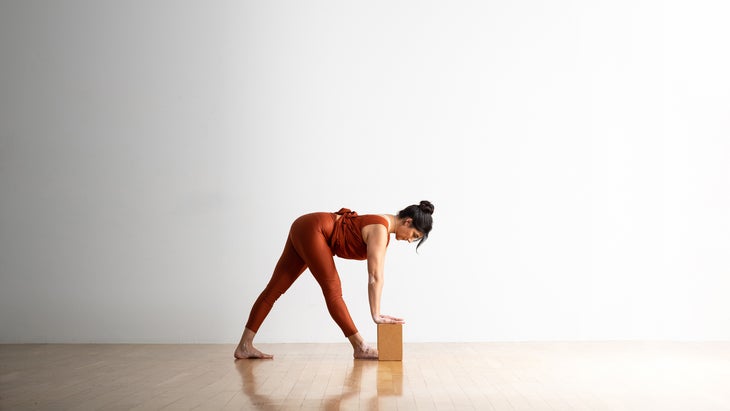
3. Pyramid Pose (Parsvottanasana)
This posture engages your quads and stretches your hamstrings. Its narrow stance can make balancing a challenge and relies on the strength and stability provided by your lower body and core. You can take your hands behind you in prayer to intensify the demand on your core and stabilizing muscles.
How to:
- Stand tall at the top of the mat. Place your hands on your hips. Step your left foot back 2-4 feet. Keep your hips facing forward and draw your right hip back slightly.
- Inhale as you lengthen your spine and press your feet into the mat. Exhale and hinge forward at your hips, reaching your chest toward your front thigh and lowering your hands to blocks on either side of your front leg in Pyramid Pose. Breathe here for 20-30 seconds.
- To exit the pose, inhale and press your feet into the mat as you return to an upright position. Repeat on the other side.
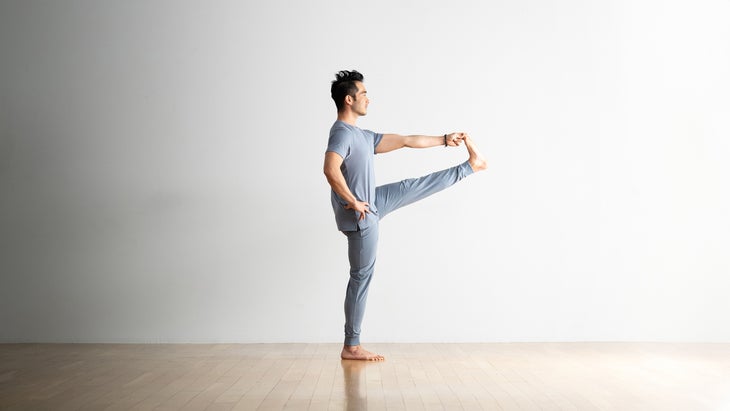
4. Extended Hand-to-Big-Toe Pose (Utthita Hasta Padangusthasana)
Extending your lifted leg straight in front of you engages the quads while it stretches the back of your leg. You’ll feel this from your hips to your heels.
How to:
- Stand tall and press your feet into the mat.
- Shift your weight into your right leg. Bend your left knee and draw it toward your chest. Clasp your big toe with the first two fingers of your left hand or wrap a strap, belt, or towel around your left foot and hold onto the ends with your left hand. Press your lifted foot straight ahead to the wall in front of you in Extended Hand-to-Big-Toe Pose.
- Lift your chest and draw your shoulders down and back. Keep pressing your left foot into the mat for stability. Breathe here for 20-30 seconds or longer.
- To come out of it, exhale as you gently release your grip or strap from your right foot and lower it to the mat to return to standing. Repeat on the other side.
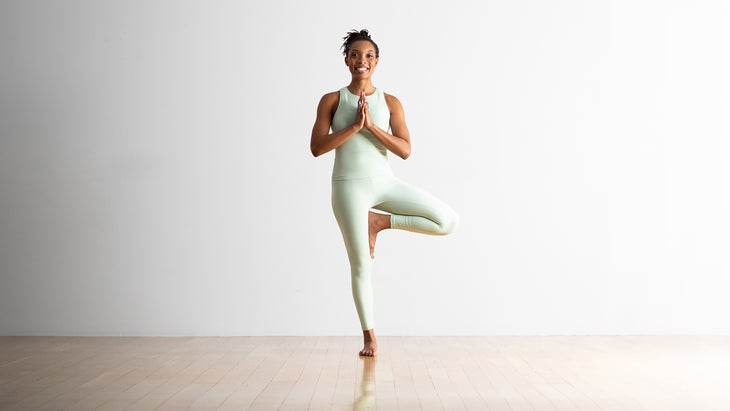
5. Tree Pose (Vrksasana)
Your lifted leg gets an inner thigh stretch as your supporting leg, ankle, and foot strengthen as they keep you steady. (Still, it’s okay if you sway a little in Tree Pose.)
How to:
- Stand tall. Spread your toes and press your feet into the mat. Draw your navel toward your spine and your shoulders down away from your ears. Look ahead at a steady gazing spot.
- Place your hands on your hips and lift your left foot, placing it against your inner right calf or thigh. Press your left foot and right leg into each other.
- Bring your hands into prayer position at your chest or stretch your arms overhead with your palms facing each other in Tree Pose. Breathe here for 30 seconds.
- Return to standing and repeat on the other side.
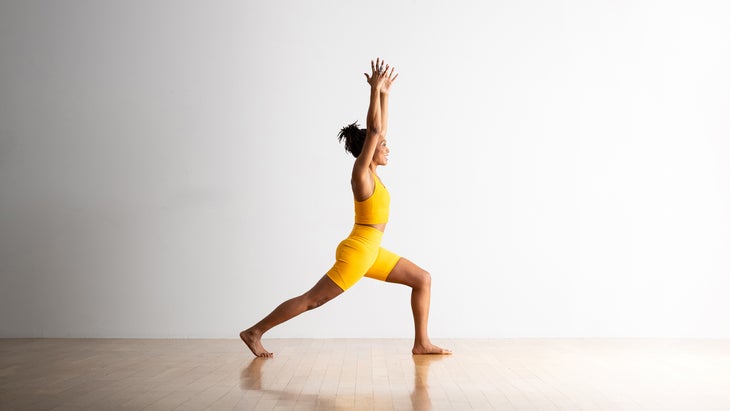
6. High Lunge
Practicing this pose works each leg differently. The quads in your front leg activate and contract to support you in High Lunge as the hip flexors in your back leg lengthen as they stretch.
How to:
- From standing, inhale and step your right foot back 2-3 feet, staying on the ball of your right foot.
- Reach your arms overhead, lengthen your spine, and bend your left knee. Start to straighten your right leg, pushing your heel toward the back wall. Reach your arms alongside your head in High Lunge. Breathe here for 60 seconds or more.
- To come out of it, exhale and step your left foot back beside the left. Repeat on the other side.
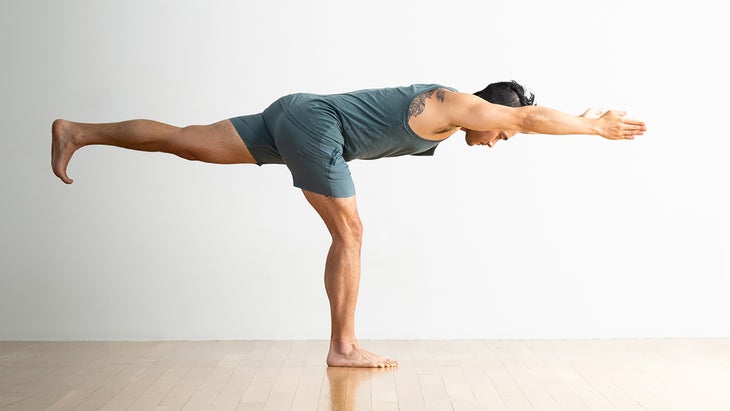
7. Warrior 3 (Virabhadrasana III)
This pose requires you to support the weight of your body with your standing leg, which strengthens the easily overlooked calves and ankles.
How to:
- Come into High Lunge.
- Shift your weight into your front foot and exhale as you reach your chest and arms forward over your front leg. Slowly lift your back foot off the mat in Warrior 3. Keep your arms alongside your ears or bring them together in prayer at your chest or on blocks beneath your shoulders. Reach your back foot toward the back wall and draw your navel toward your spine. Breathe here for as long as you can. Then slowly step your lifted foot back to the mat, returning to High Lunge. Repeat on the other side.

8. Standing Split (Urdhva Prasarita Eka Padasana)
Similar to Warrior 3, Standing Split takes the stretching component one step further in your lifted leg.
How to:
- Come into High Lunge.
- Shift your weight into your front foot. Then exhale as you bend forward and reach your hands to the mat or blocks on either side of your right foot. Inhale as you reach your left leg up toward the ceiling in Standing Split. Keep a slight bend in your right knee.
- Breathe here for 30 seconds to 1 minute. Then exhale as you lower your lifted leg and step your feet together in Standing Forward Bend. Take a breath here, then slowly roll up and repeat on the other side.
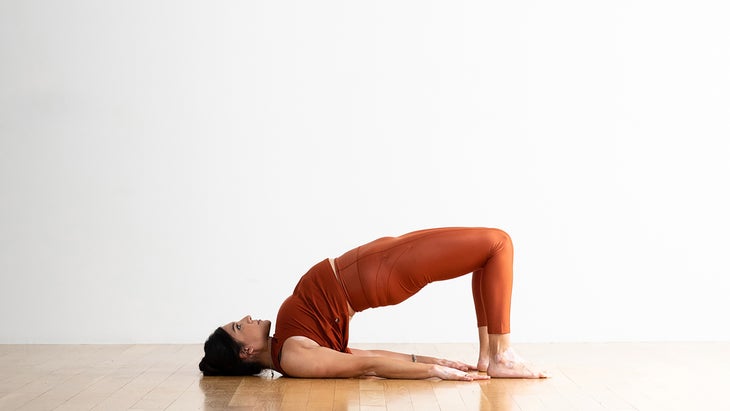
9. Bridge Pose (Setu Bandha Sarvangasana)
Your glutes and hamstrings activate to lift your hips and stretch your hip flexors in Bridge Pose. The higher your pelvis lifts, the more intense the stretch.
How to:
- Lie on your back with your knees bent and your feet flat on the mat about hip-distance apart.
- Inch your feet closer to your sitting bones. Press your feet firmly into the mat and lift your hips. Press your palms into the mat at your sides or clasp your hands underneath your back. Draw your shoulder blades underneath you in Bridge Pose. Breathe here for 30 seconds.
- For an added challenge, lift your right foot off the mat and reach your right leg up toward the ceiling, keeping your hips lifted. Then slowly lower your right leg and repeat on the other side. To come out of it, slowly lower your hips back down to the mat and straighten your legs.
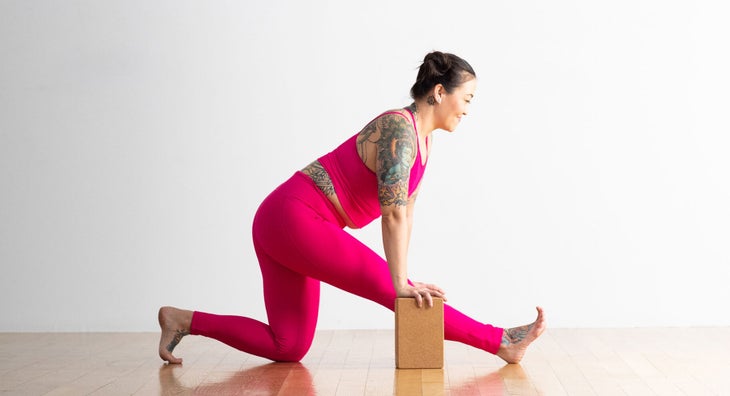
10. Half Splits
Your front hamstring experiences a stretch as your bottom leg helps stabilize your body in Half Splits.
How to:
- Come into Downward-Facing Dog. Step your right foot forward between your hands. Lower your left knee to the mat.
- Shift your hips back to stack them over your left knee. Straighten your right leg, keeping your hips stacked over your left knee. Flex your right foot. Fold forward over your front leg, placing your fingertips on the mat or blocks. Breathe here for 30 seconds. To come out of it, press your hip back slightly and draw your right knee underneath you. Bring your knees together so you’re in a kneeling position. Return to Downward-Facing Dog, then repeat on the other side.
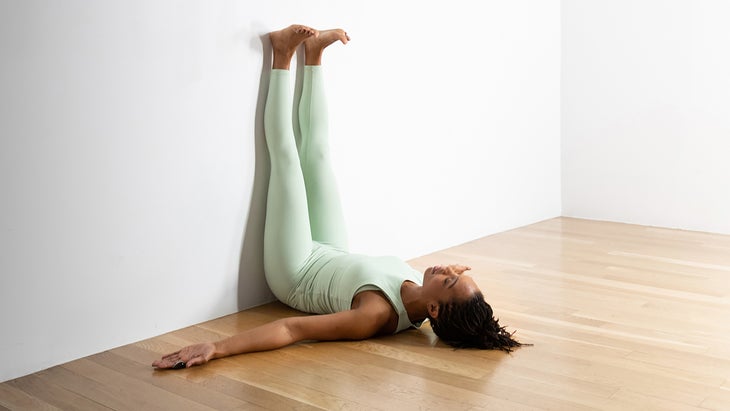
11. Legs Up the Wall (Viparita Karani)
After a yoga session that focuses on strengthening your legs, you benefit from this restorative pose that takes all weight off your legs and provides a passive stretch for your calves, hamstrings, and glutes.
How to:
- Sit on the floor with one hip against a wall. Come to lie on your other side. Then roll onto your back and swing your legs up and rest them against the wall. Adjust your position by scooting your tailbone toward the wall. (It doesn’t need to touch the wall.) Position your feet about hip-distance apart and let the weight of your legs rest against the wall. Rest your arms at your side with your palms facing up in Legs Up the Wall Pose. Breathe here for 5-10 minutes.To release, bend your knees and roll to one side. Remain here for a few breaths before pushing your hands into the mat and rising up to a seated position.
This article has been updated. Originally published July 17, 2022.