Updated February 25, 2025 12:56PM
If you buy through our links, we may earn an affiliate commission. This supports our mission to get more people active and outside.Learn about Outside Online's affiliate link policy
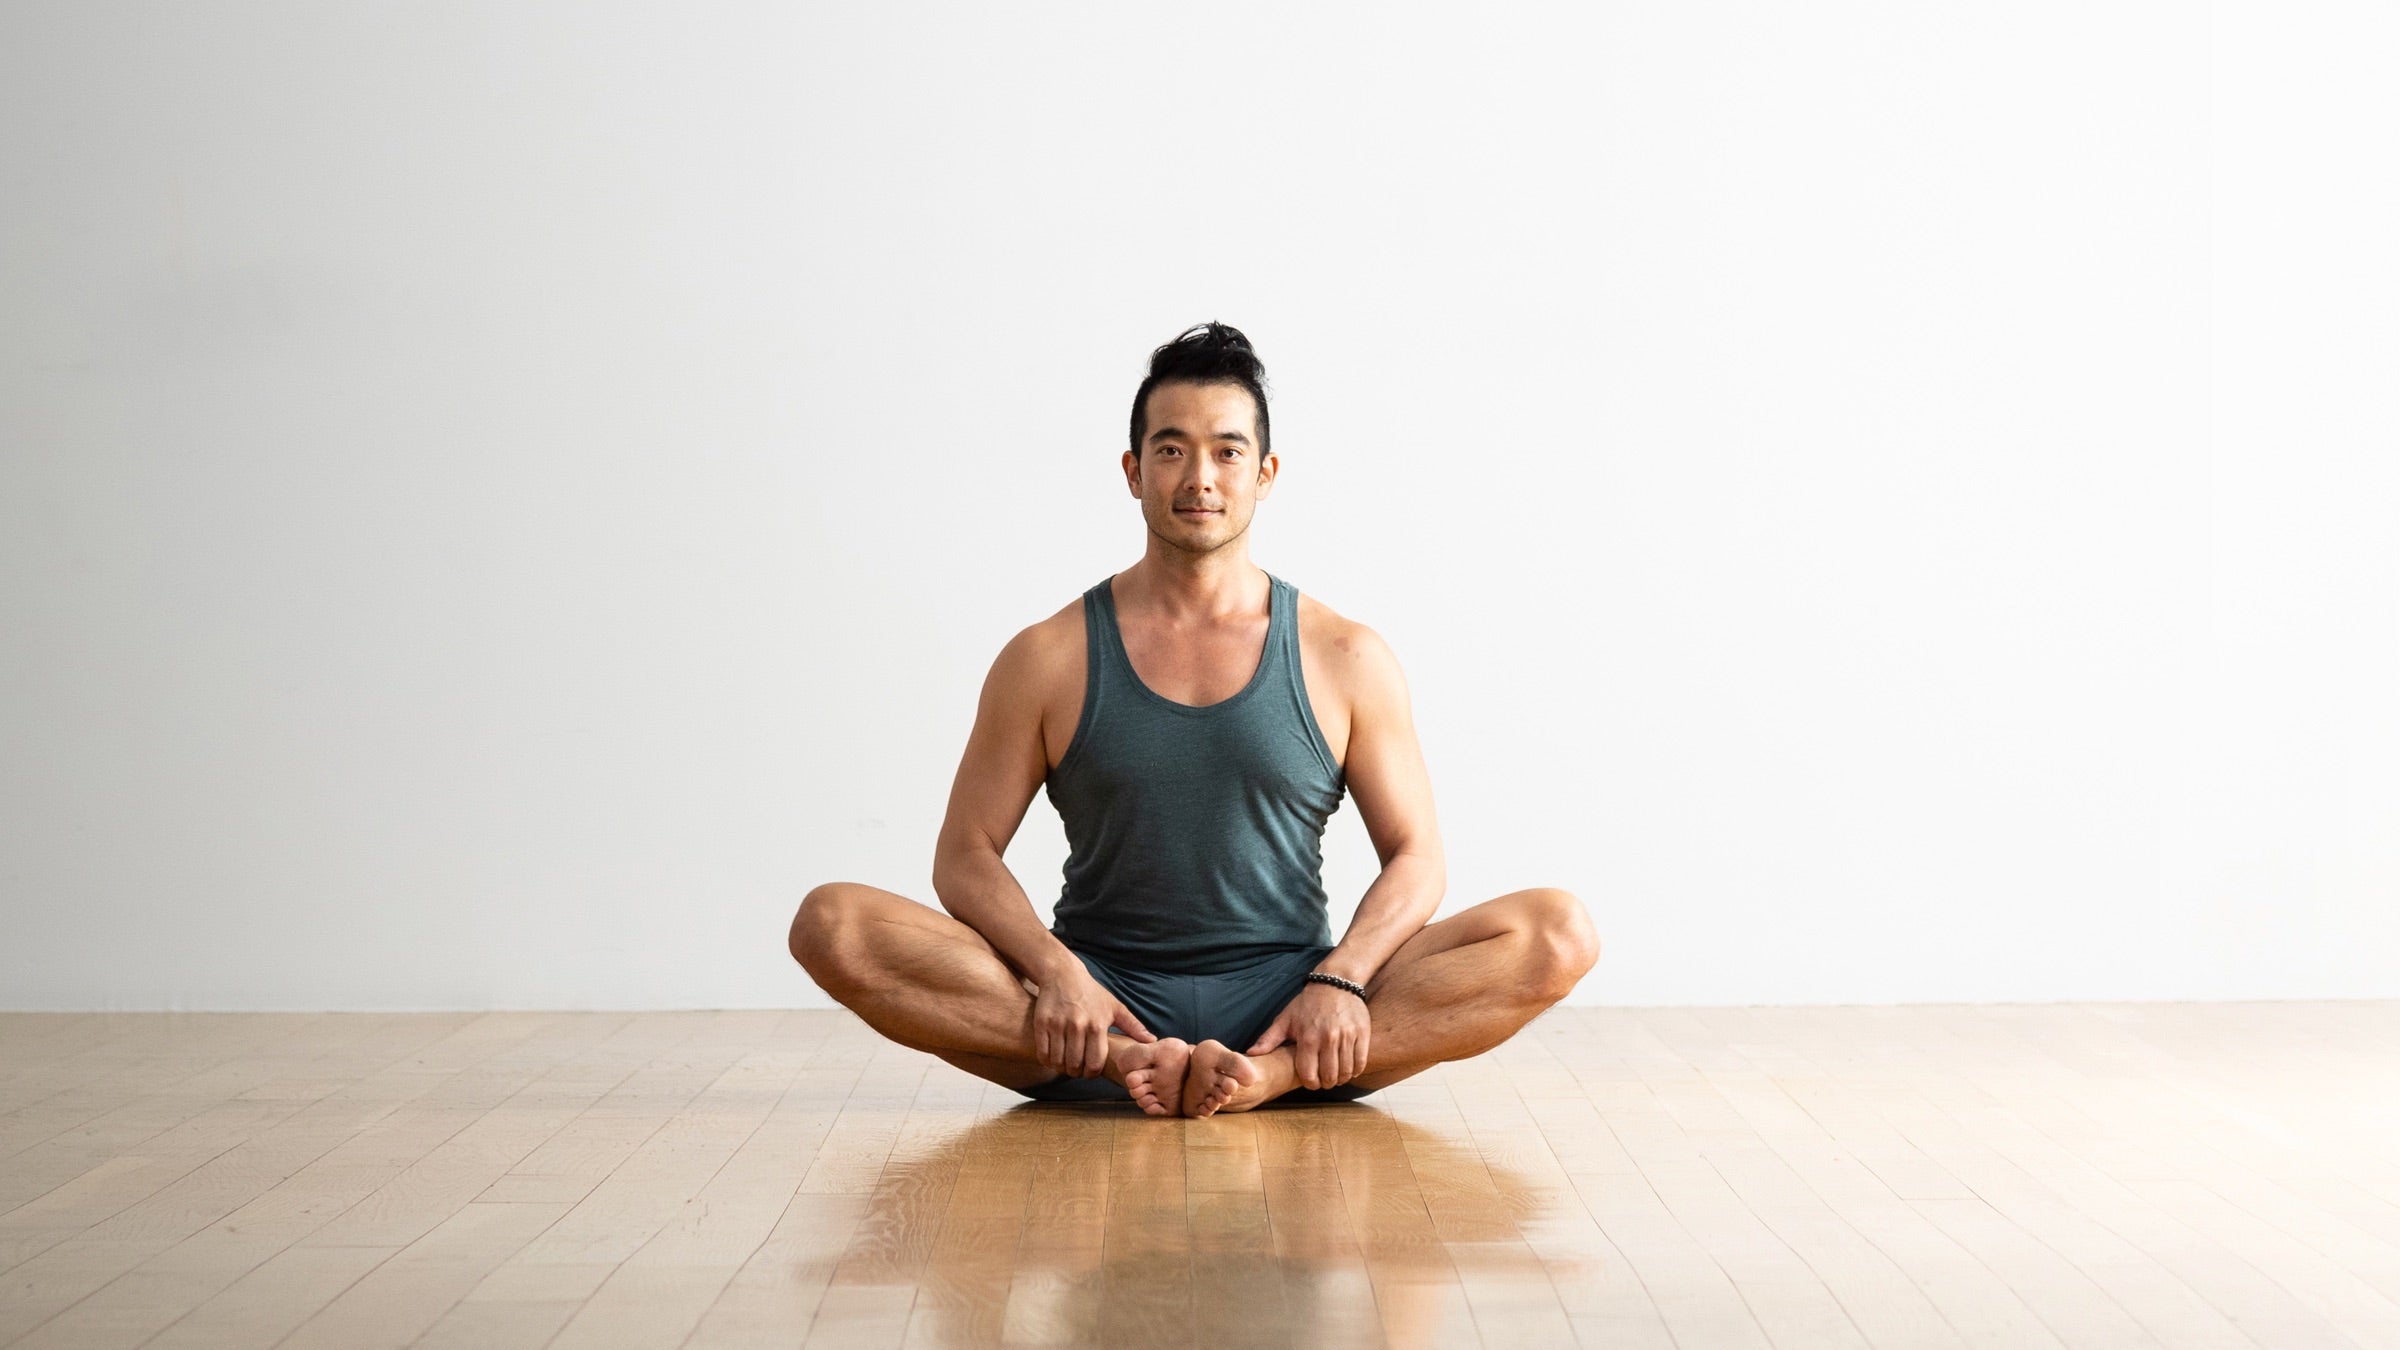
Bound Angle Pose
Bound Angle Pose, or Baddha Konasana, opens the deepest part of the hip muscles.
(Photo: Andrew Clark)
Baddha Konasana (Bound Angle Pose) is a go-to pose for opening the hips and stretching the inner thigh muscles. This seemingly simple pose also strengthens your core and improves your posture.
Also known as Cobbler’s Pose, this asana activates the muscles in your back as you lengthen and stretch through your spine. A strong and stable core is also key to this posture: “When you sit on the floor in Baddha Konasana, your core works to keep you from rounding the back and dropping the chest,” says yoga teacher Annie Carpenter, creator of SmartFLOW Yoga.
While Bound Angle Pose may seem simple, if you stay in it for an extended period of time, your back muscles will likely tire, making it difficult to keep your chest upright, says Carpenter. Your hip, thigh, and hamstring muscles may also feel fatigued. If that happens, ease out of the pose. “Exploring your edges should not create pain,” she says. “It should help you move toward an amount of stretch or muscular effort that’s sustainable for you.”
Sanskrit
Baddha Konasana (BAH-dah cone-AHS-ah-nah)
baddha = bound
kona = angle
ADVERTISEMENT
How to
- Begin in Staff Pose. Sit directly on top of your sitting bones, rather than behind them.
- Bend your knees and allow them to fall open to the sides.
- Draw the soles of your feet together and use your hands to open them as if you were opening the pages of a book.
- Press your shoulder blades against your upper back to lift through your sternum or chest. Clasp your ankles to help you find lift along your torso.
- To exit the pose, gently release your feet and come back to Staff Pose.
Variations
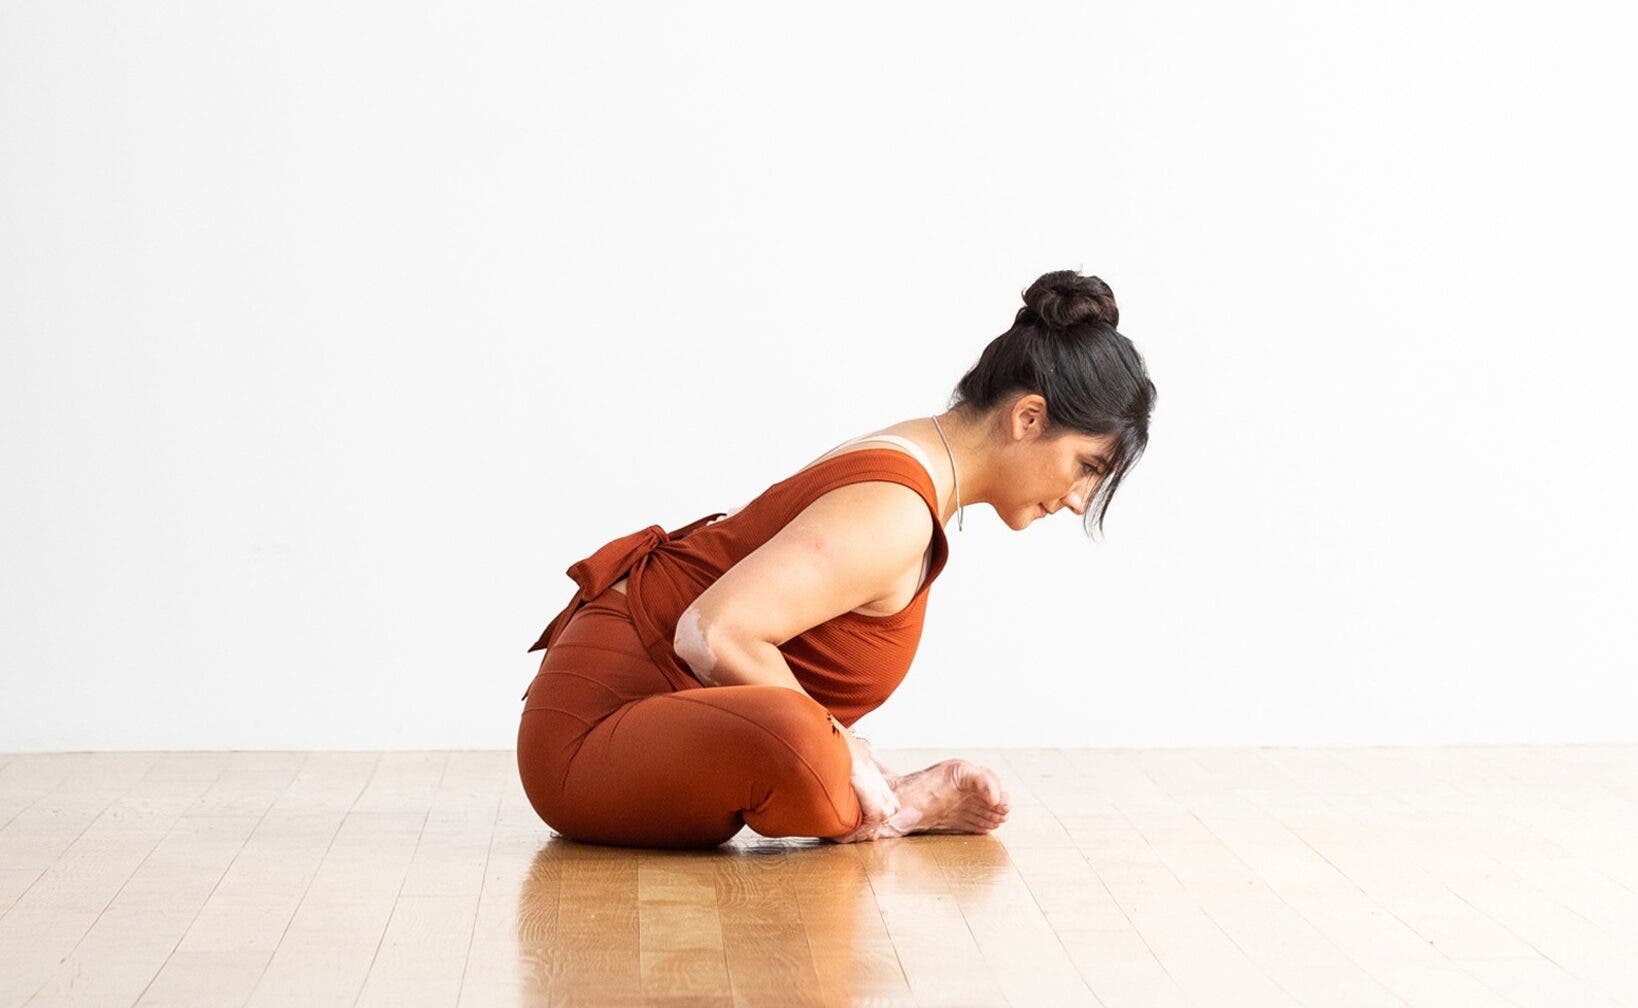
Bound Angle Pose with a slight lean forward
Lean forward whatever amount you can—even a few millimeters—by flexing at your hips while keeping a long spine. This may intensify the sensations in your inner thighs. To help prevent slouching, you can sit on the edge of a folded blanket or bolster, which will tilt your pelvis forward so that you can come into the pose with a flat back.
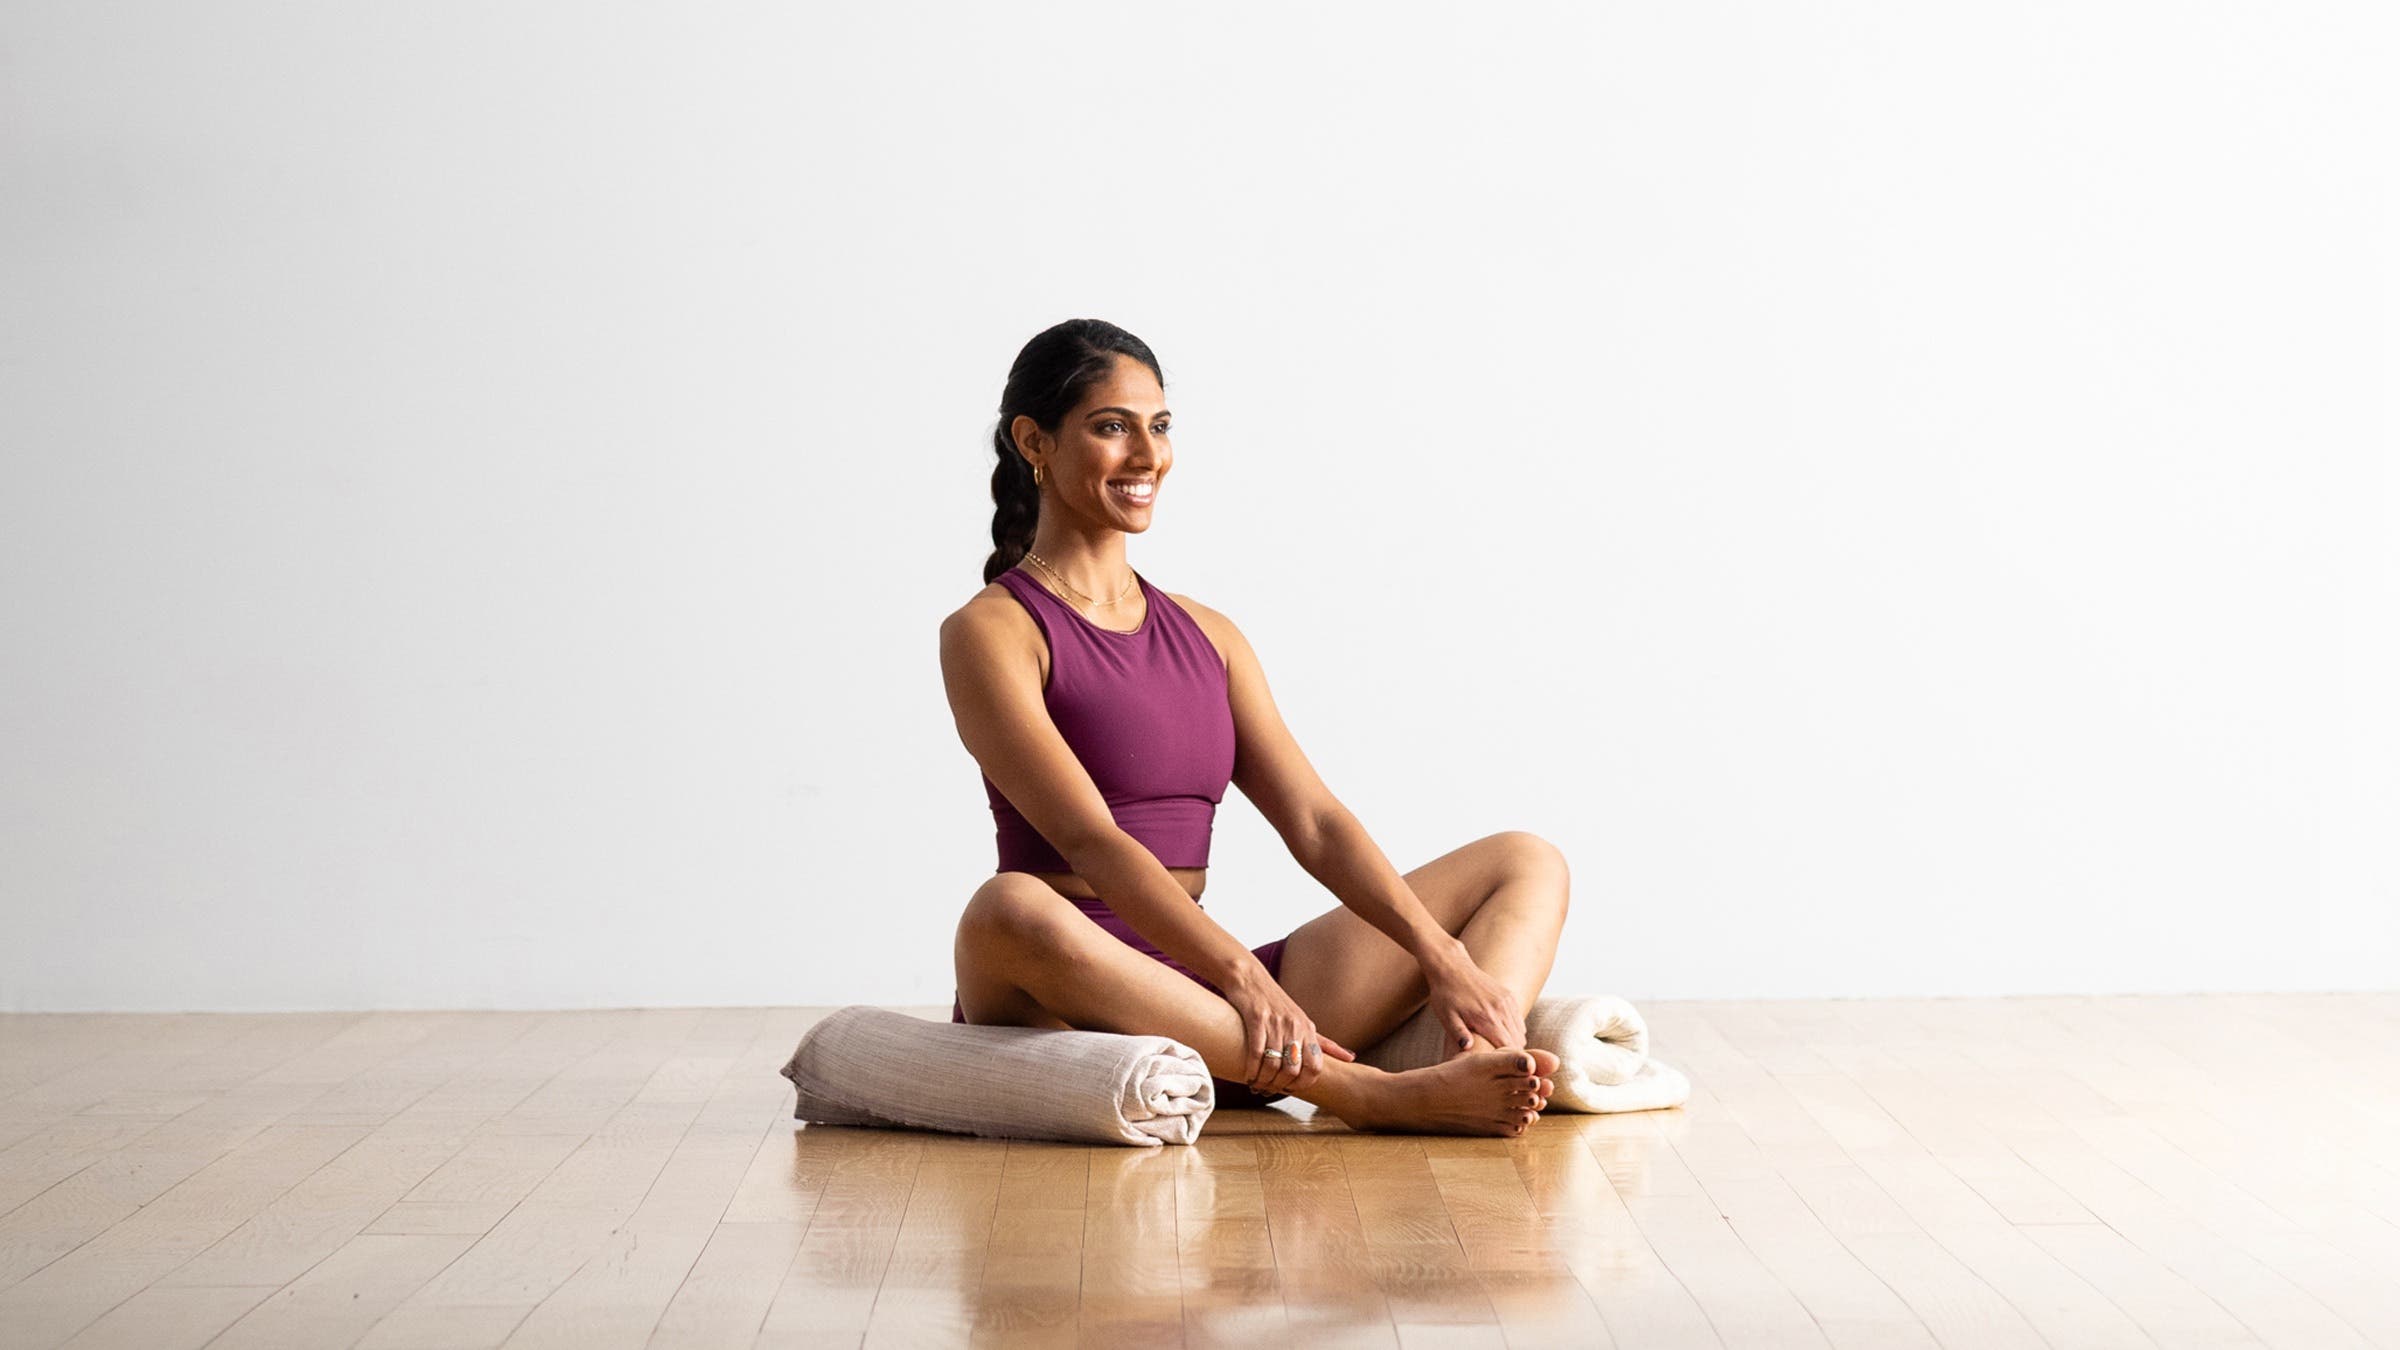
Bound Angle Pose with props
If your knees remain far from the ground, place blocks under your knees for support or slide blankets that you’ve folded or rolled under your shins and thighs.
ADVERTISEMENT
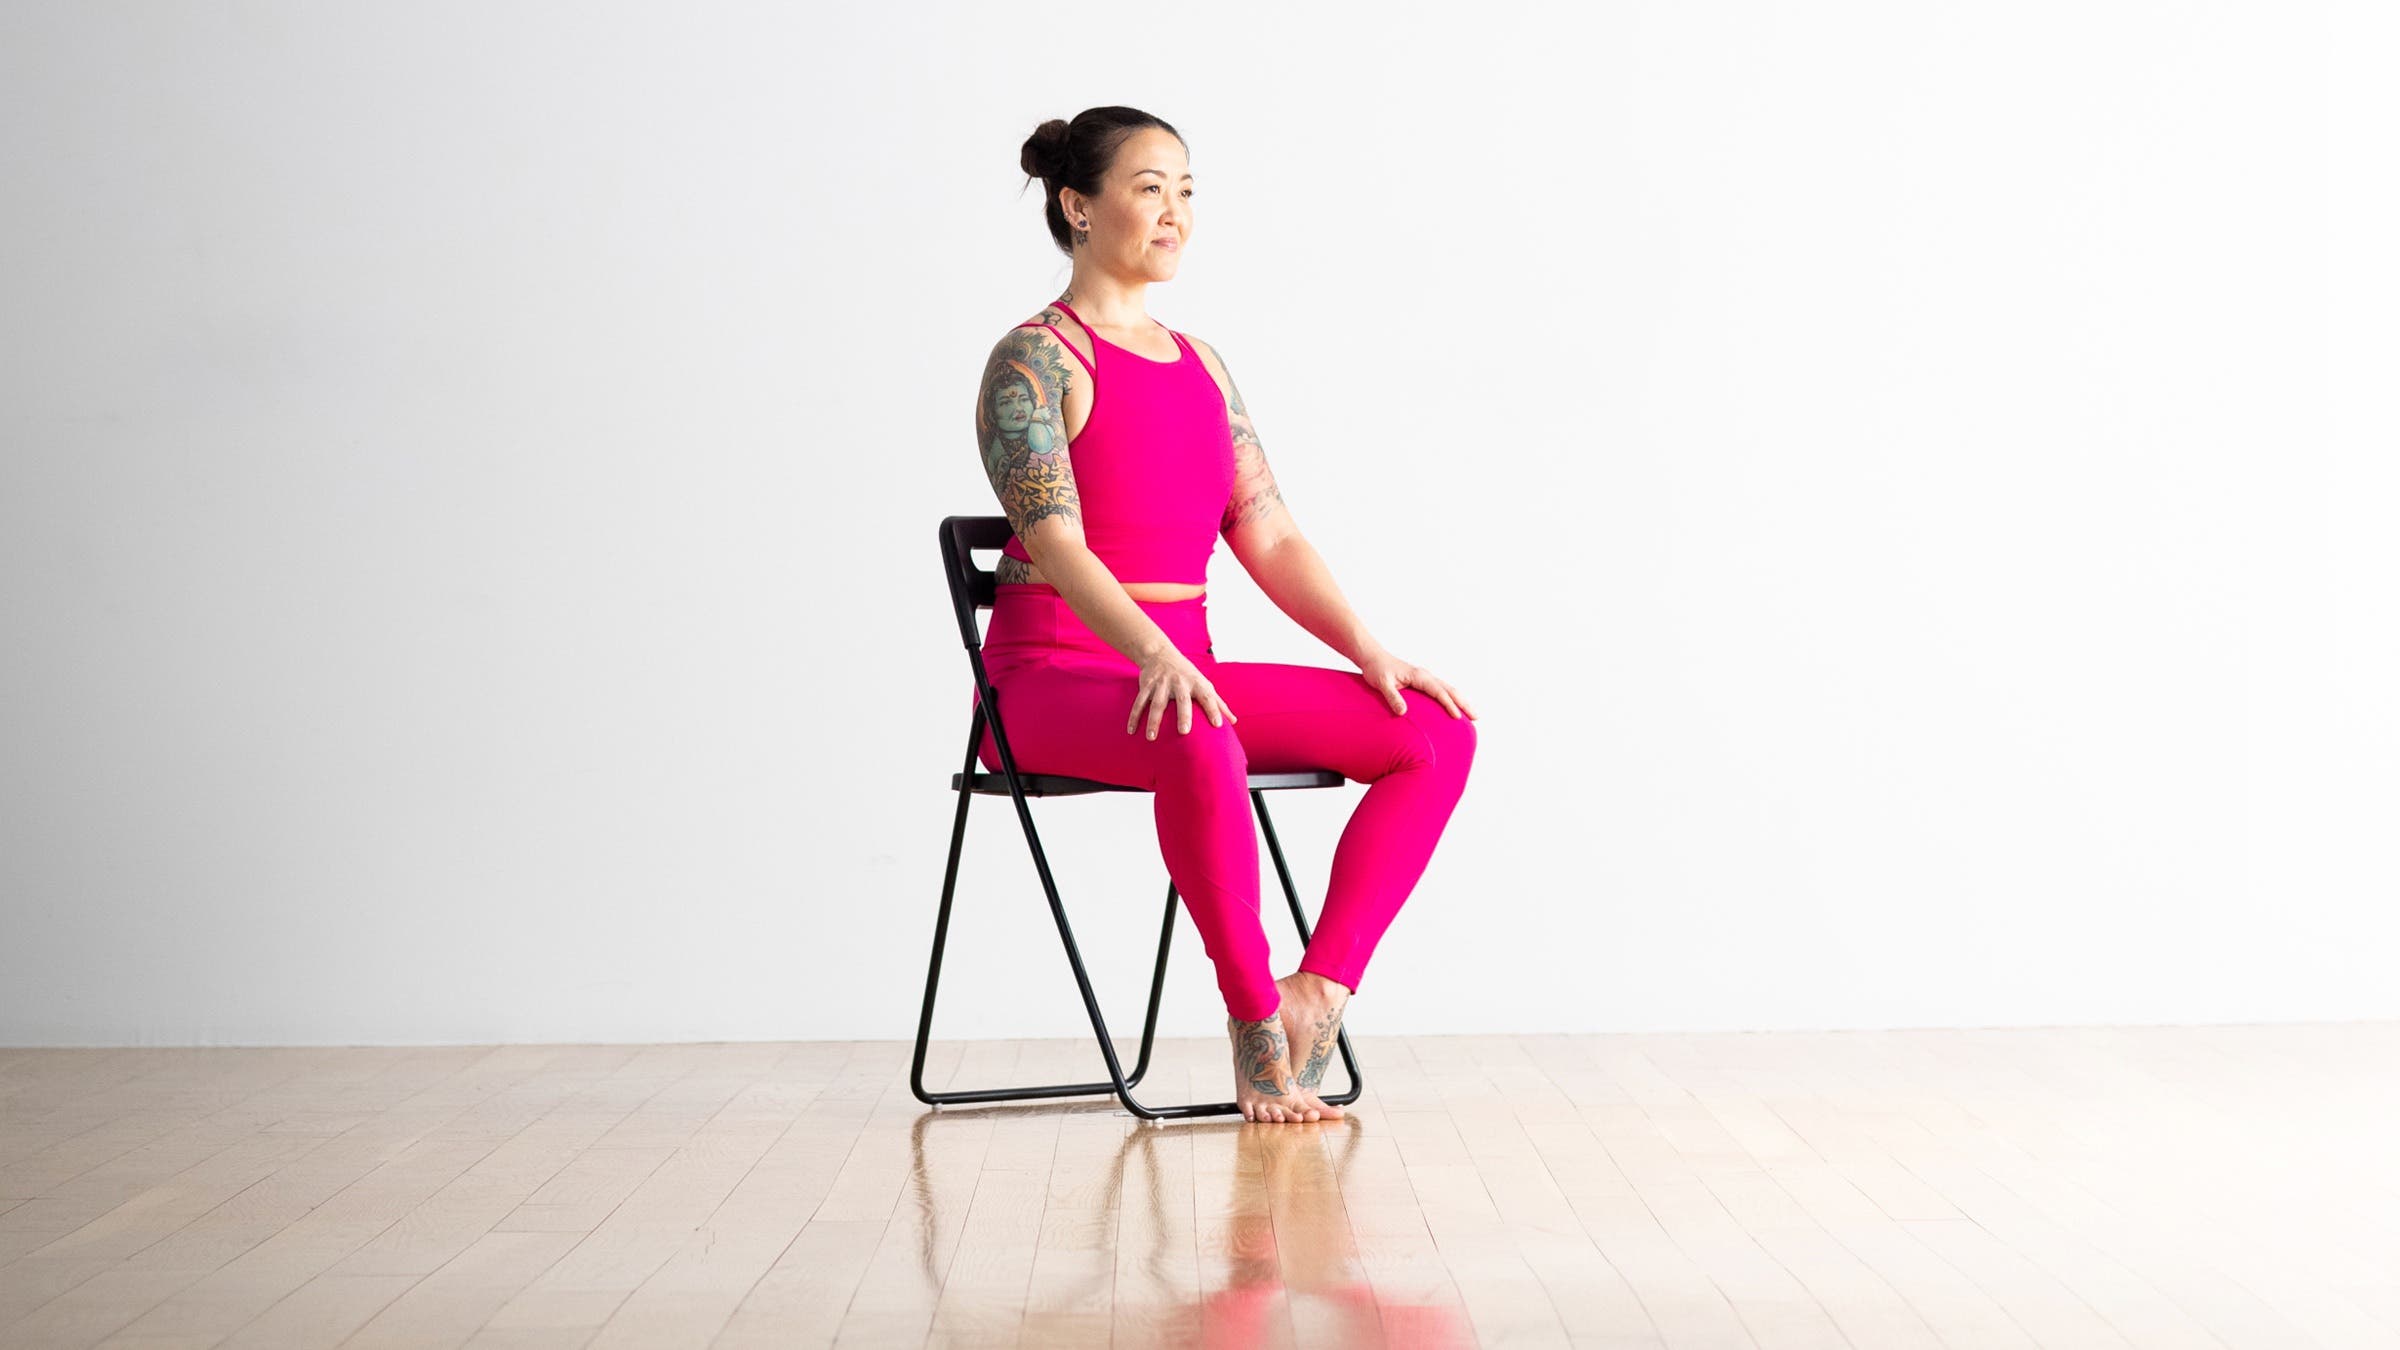
Bound Angle Pose in a chair
Sit in a chair and draw the bottoms of your feet together, allowing your knees to fall out to the sides.
Bound Angle Pose basics
Pose type: Seated
Targets: Hips
Benefits: Bound Angle Pose improves postural and body awareness. Because it stretches your inner thigh muscles (adductors) and the front of your thighs (quadriceps), it can help you recover after running. It’s also a helpful pose for people who spend a lot of time sitting in chairs.
ADVERTISEMENT
Other Bound Angle Pose perks:
- The actions in Bound Angle Pose are similar to some standing postures that call for you to open your hips. Practicing it improves your ability to hold poses such as Virabhadrasana II (Warrior Pose II) and Utthita Trikonasana (Extended Triangle Pose).
- Practicing Bound Angle Pose helps you get comfortable with finding and exploring your edge. Doing so improves your ability to stay mindful at your physical limitations.
Beginner tips
Remember that everyone has natural limits. Your bone structure and muscular development may prevent your knees from ever opening all the way to the floor. That’s OK; Baddha Konasana will still help you to stretch your inner thighs and build strength in your back.
Explore the pose
If you have tight hips, place rolled-up blankets under your thighs and lower legs. This can release tension in your hips and reduce strain on your knees.
ADVERTISEMENT
If you need help activating your hips and inner thighs, place a block between your feet and press your feet firmly into the block, turning the soles to face upward. Then place your hands on the floor behind you and press into them to lengthen your spine.
If you find yourself leaning back or rounding your back, try using a strap. Bring it behind your back, across your sacrum, over the tops of your thighs, and cinch it underneath your feet. The strap should be tight enough to feel secure but not so restrictive that you feel compression in your hip joints. The strap will keep your lower back and hold your feet closer to your pelvis.
Be mindful!
- If you have a hip or knee injury, perform this pose with folded blankets underneath your outer thighs to support them.
- Don’t press the balls of your feet together in this pose—the pressure can cause tension in your lower body. Instead, press your heels together while drawing the balls of your feet away from one another. Maintain the pressure between your heels as you relax your thighs and release the heads of the thigh bones toward the floor; your knees will follow.
Why we love this pose
“How does a yogi sit in meditation comfortably? At first thought, I would say with kind attentiveness and mental fortitude,” says Jenny Clise, a frequent YJ contributor. “But, there is a literal element to this as well—by preparing the physical body to experience ease, as well. I love Bound Angle Pose for this purpose.” She sites Cobbler’s Pose as one that improves the flexibility in your lower back, hips, thighs, groins and ankles—dissolving some of the tension you may experience from sitting for extended periods. “There are many ways this pose serves me, but in its rawest form, the action of this pose helps prepare me for a more comfortable practice of inaction. My meditation moves from only noticing areas of discomfort while seated, to mindfulness of other senses, thoughts, and emotions,” says Clise.
Teacher tips
These cues will help protect your students from injury and help them have the best experience of the pose:
- If your back is tight or your posture needs attention, sit with your back against a wall for support.
- Never force your knees down. Instead, release the heads of the thigh bones toward the floor; your knees will follow. (Use blocks, folded blankets or pillows to support your knees.)
- If your knees are tender, move your feet further away from the groin.
- If you find it challenging to sit upright, place one or more folded blankets under your hips to lift your pelvis and spine.
ADVERTISEMENT
Preparatory and counter poses
Baddha Konasana is an intense hip stretch for many students, but there’s no need to force it. Ease your way into it by first practicing other poses that target your hip flexors. It helps to come into increasingly challenging hip stretches.
Preparatory poses
- Supta Padangusthasana I (Reclining Hand-to-Big Toe Pose)
- Vrksasana (Tree Pose)
- Upavistha Konasana (Wide-Angle Seated Forward Bend)
Counter poses
- Dandasana (Staff Pose)
- Purvottanasana (Reverse Plank | Upward Plank Pose)
- Setu Bandha Sarvangasana (Bridge Pose)
Anatomy
Baddha Konasana is a symmetrical pose. In the pose, your hips flex and turn outward and your knees bend and move away from each other in a mirrored fashion. Because of this, the pose provides an opportunity for you to locate and balance asymmetries, particularly in your hips and pelvis, based on where you feel tightness, explains Ray Long, MD, a board-certified orthopedic surgeon and yoga teacher.
ADVERTISEMENT
When you focus on specific components of the pose, you bring awareness to the nuances of each movement. Begin with abduction. Tight adductors can restrict your ability to draw your knees apart. When you begin, over time, to create length in those muscles, it will free your hips to open your knees.
In the drawings below, pink muscles are stretching and blue muscles are contracting. The shade of the color represents the force of the stretch and the force of contraction. Darker = stronger.
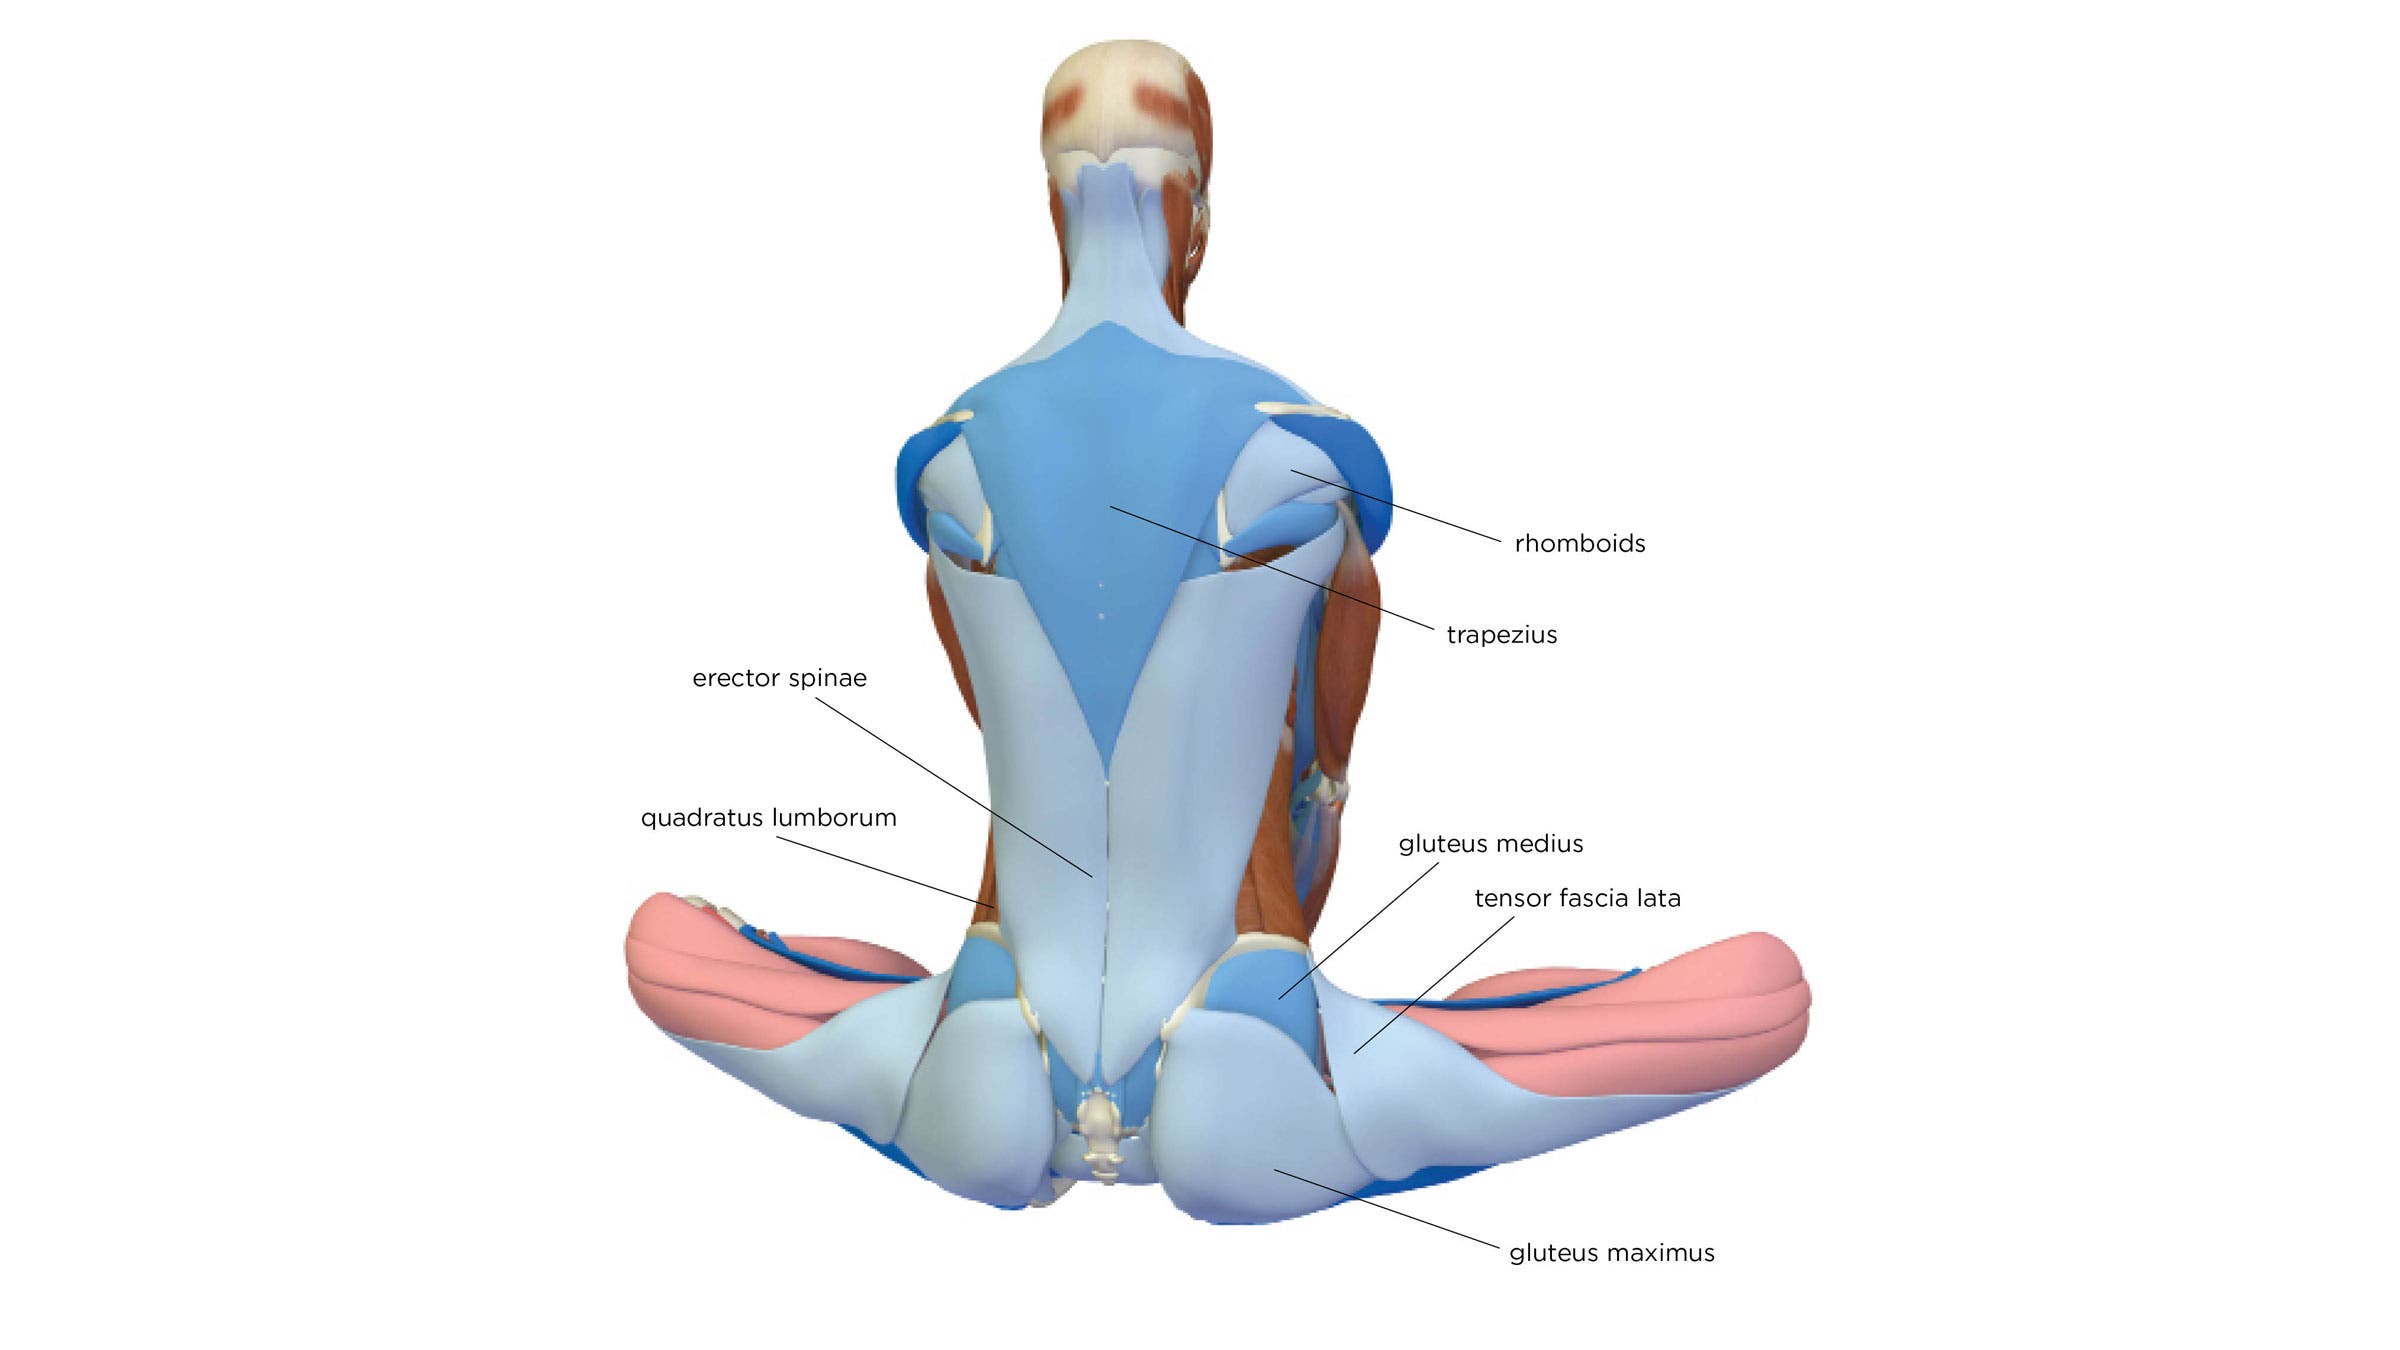
Bend your knees by contracting the hamstrings. Engaging the hamstrings also draws the tailbone down and under because the hamstrings originate on the ischial tuberosities on the back of the pelvis. This tucking of the tailbone turns the hips outward and synergizes external rotation.
The sartorius muscle runs from the front of the pelvis to the inner knee. It flexes, abducts, and externally rotates your hip. When contracted, the sartorius feels like a cord at the front of the pelvis. This muscle also crosses the knee and thus aids the hamstrings in flexing and stabilizing this joint in the pose.
Engage the psoas muscle to flex and externally rotate the hips. A cue for this action is to place the hands on the knees and attempt to draw the knees toward the chest while resisting with the hands.
Squeeze the sides of the buttocks to abduct and externally rotate your hips, drawing your knees toward the floor. The gluteus maximus externally rotates the hips while the gluteus medius and tensor fascia lata abduct them. Activating these muscles stimulates reciprocal inhibition of the adductor group on the inner thighs, allowing them to relax into the stretch.
Note that when your hips are fully abducted, the contractile force of the tensor fascia lata and gluteus medius is far less because these muscles are shortened almost completely. At this point, it becomes necessary to engage your hamstrings and use your hands to draw your feet closer to the pelvis and your knees closer to the floor. The gluteus medius, tensor fascia lata, and gluteus maximus (the fibers that attach the iliotibial band) act together to provide that extra inch of abduction in the pose.

Sit straight and tall by activating the erector spinae and quadratus lumborum muscles. Engaging these muscles transmits a force to your hands, which in turn hold your feet. When you connect your hands and feet, you create subtle depth in the pose. Flex your elbows by contracting the biceps and brachialis muscles. This draws the heels closer to the pelvis and increases the stretch of the adductor group on your inner thighs.
One approach to take the pose deeper is to bend your elbows to draw your body forward. Another variation is to remain more upright as you arch your back and draw your shoulder blades together to lift your torso upward, expanding your chest. Use your arms and hamstrings to draw your feet closer to the pelvis. Note that arching your lower back also tilts the pelvis forward, pulling on the hamstrings at their attachment on the sitting bones and drawing the lower legs closer to the thighs.
ADVERTISEMENT
Excerpted with permission from The Key Poses of Yoga and Anatomy for Hip Openers and Forward Bends by Ray Long.
Put Bound Angle Pose into practice
5 Calming Yoga Poses You Can Do In 5 Minutes
7 Ways to Use Blocks to Open Your Hips (And Your Heart)
5 Yoga Poses to Safely Stretch Tight Groin Muscles
About our contributors
Teacher and model Natasha Rizopoulos is a senior teacher at Down Under Yoga in Boston, where she offers classes and leads 200- and 300-hour teacher trainings. A dedicated Ashtanga practitioner for many years, she became equally as captivated by the precision of the Iyengar system. These two traditions inform her teaching and her dynamic, anatomy-based vinyasa system Align Your Flow. For more information, visit natasharizopoulos.com.
Ray Long is an orthopedic surgeon and the founder of Bandha Yoga, a popular series of yoga anatomy books, and the Daily Bandha, which provides tips and techniques for teaching and practicing safe alignment. Ray graduated from the University of Michigan Medical School and pursued post-graduate training at Cornell University, McGill University, the University of Montreal, and the Florida Orthopedic Institute. He has studied hatha yoga for over 20 years, training extensively with B.K.S. Iyengar and other leading yoga masters, and teaches anatomy workshops at yoga studios around the country.