Published August 28, 2007 04:23PM
Give Your Back a Treat with This Series of Twists
Loosen your spinal muscles and tame your tension with these 5 twisting yoga poses.
If your massage therapist, your shrink, and your yoga teacher ever got together, they’d surely agree that you need twists. Your masseuse knows that your back muscles are tighter than the strings on a soprano ukulele; your shrink knows that half your tension comes from stress. And your teacher knows that twisting poses are often the best way to untie both physical and psychological knots.
Forward bends, side bends, and backbends bring relief, but twists really get to the core of your tension. Only twists can effectively stretch the deepest layer of back muscles: the small ones closest to your spine. The more you practice twists, the more you realize they don’t just release tightness; they also dissipate the frustration, anxiety, or fear that’s often behind physical tension. On many levels, twisting is more about what you let go of than what you accomplish.
See also Twist Yoga Poses
Make Your Spine Long
You’ll get more out of twists if you elongate your trunk as you inhale, and relax and turn as you exhale. When you lengthen your torso, you’re positioning your spine so it can rotate safely and effectively. This, in turn, stretches and strengthens your muscles in ways that reinforce healthy posture. When you relax before rotating, you soften your diaphragm, abdominal, spinal, and rib cage muscles so they’re ready for a thorough, satisfying stretch.
ADVERTISEMENT
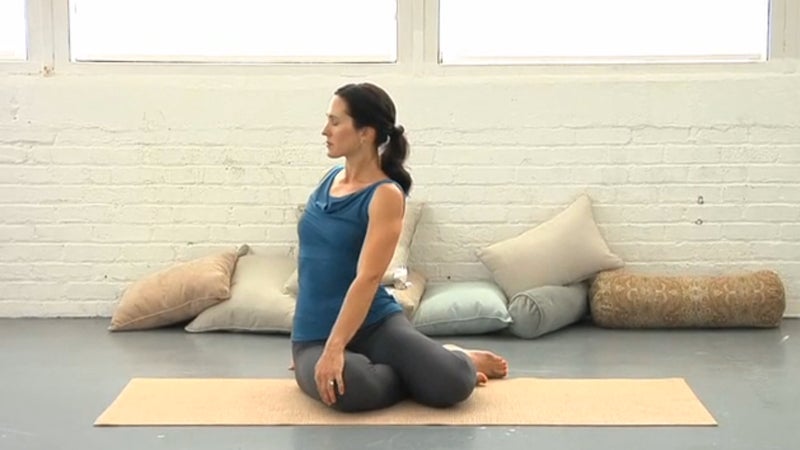
Here’s a simple way to learn the elongation and relaxation phases of twists. Sit cross-legged with your pelvis and upper back against a wall. (If your lower back rounds and touches the wall, elevate your hips on enough folded blankets to let you arch it slightly.)
Place your hands on the floor or blanket alongside your hips. As you inhale, push your hands and chin down while you press the back of your head into the wall and up. As you do this, keep your shoulders down and feel your chest lift. This is the elongation phase. Now, keeping your spine tall and your hands pressing down, exhale fully but without forcing, completely softening your belly, ribs, and back. That’s the relaxation phase.
See also Spine Stretches
Surrender to the Twist
Twists come in many varieties—standing, seated, reclining, inverted, and arm balances—and each twisting pose is powered by a slightly different balance of physical forces—gravity and the muscles of your arms, legs, waist, and back. In this series, you’ll use your arms to drive the twist whenever possible, allowing the muscles around your waist to relax and passively receive the action. If you engage your trunk muscles to twist, you usually limit your range of motion; beyond a certain point, you wind up contracting muscles that should be relaxing and stretching.
ADVERTISEMENT
Whichever way you power a twist, first you have to release the large outer layers of the trunk muscles in order to rotate at the deep level of your small spinal muscles. So before you explore these five twists, practice a well-rounded set of the nontwisting postures that release the large muscles of the torso: forward bends, side bends, and backbends.
Jathara Parivartanasana

To come into Revolved Abdomen Pose, lie on your back with your knees bent and the soles of your feet on the floor. Reach your arms out to the sides, palms down. Lift your pelvis into the air, shift it as far as you can to the right, and set it back down. Exhaling, straighten your legs toward the ceiling. As you inhale, create a slight arch in your lower back; maintain that position as you exhale and slowly lower your feet to your left and to the floor. Keep your right rear lower ribs and your right shoulder as close to the floor as possible. Your legs should now lie perpendicular to your trunk or angled a bit toward your left hand.
Leave your legs on the floor for just one inhalation. On the exhalation, lift your legs to vertical again, and then inhale. As you exhale, lower your feet to your left once again. Repeat this up-down movement on the left side 10 times, or until your waist or back muscles begin to tire. From the legs-up position, bend your knees, place the soles of your feet on the floor, shift your pelvis as far as you can to your left, and repeat the entire practice, lowering your legs to your right.
ADVERTISEMENT
See also Hit Refresh with a Reclining Twist
Parivrtta Parsvakonasana

To come into Revolved Side Angle Pose, stand with your legs about four feet apart. Turn your right foot out 90 degrees and your left foot in 60 degrees. Bring your left hip forward (toward your right foot) until it’s square with your right hip. (If you can, keep your left heel on the floor with the foot rotated in; if not, go ahead and let the heel come up, but continue reaching it toward the floor.) On an exhalation, bend your right knee to a right angle and tilt your pelvis and trunk forward about 45 degrees, keeping your body in a straight line from the crown of your head to your tailbone. Rest both hands on your right thigh for now.
Now you’re ready to rotate. Throughout the twist, keep your left leg straight and its outer side rotating toward the ceiling. Turn your torso to the right, starting with your lower left ribs, then working up to your upper left ribs and shoulder. Next, reach your left elbow across your body and place it on the outside of your right thigh near your knee. Place your right hand, palm down, on the middle of your right thigh. Then, while exhaling softly but deeply, press your right hand down and pull your left elbow to the left against your right thigh. Allow your waist and back to relax and receive the movement as you twist your body farther to the right.
ADVERTISEMENT
On your next inhalation, lengthen the back of your neck and bend back slightly to counteract the tendency of your upper trunk to slump. On your next exhalation, slide your left armpit closer to the outside of your right thigh. Keep it there as you inhale and repeat the backbending action. Exhaling again, soften and rotate your trunk to the right. Inhale once again and, as you exhale, slide your left armpit as close to your outer right thigh as it will go. Again backbend into alignment as you inhale, and twist deeper as you exhale. Finally, reach your left hand to the floor outside your right foot and reach your right arm diagonally over your right ear. Hold the pose for a minute, breathing softly, easily, and evenly, then repeat it on the other side.
See also Extended Side Angle Pose
Ardha Matsyendrasana II (Half Lord of the Fishes Pose II)

To come into Half Lord of the Fishes Pose II, sit with both legs straight out in front of you. Press your hands into the floor slightly behind your hips and lift your spine long. Bend your left knee, turn your left hand thumb-down, use the first two fingers to grip the tendons behind the inner knee, and place your thumb on your thigh. Rotate your left thigh out and draw your left heel close to your pelvis. Take your left ankle with your right hand and place it on your right thigh in Ardha Padmasana (Half Lotus Pose) position, high up near your hip and well to the right side.
ADVERTISEMENT
Place your hands back on the floor alongside your hips, then release your left knee down and forward to bring it near your right knee. Inhale, press your hands and tilt your pelvic rim forward to lift your spine, and move your head back and up to lift your chest. Exhale and turn your trunk slightly to the right, placing your right hand on the floor behind your pelvis and your left hand on the floor between your knees. Inhaling, lift tall again, pressing your hands and the back of your right knee into the floor; exhaling, soften your waist and use your arms to rotate your lower rib cage to the right, letting your chest and shoulders follow. Feel the release in your waist as the muscles lengthen.
As you inhale you grow tall again and shift your left hand to the outside of your right knee. On an exhalation, repeat the releasing and twisting action; remember to rotate by pressing your left hand against your right knee. Inhale again to lengthen your spine; on the exhalation, swing your right hand behind you to grasp your left shin with your right hand. (If you can’t reach your shin, hold your left thigh; if you can’t reach your thigh, loop a belt around your left leg and hold that.) Again inhale to lengthen; on your exhalation, reach forward with your left hand, then turn your thumb down and hold the outside of your right foot; at the end of your exhalation, turn just your head to gaze toward your right big toe.
On your next inhalation, lift your torso as if to sit up and do a slight backbend. On the exhalation, soften your trunk and use your arms to twist farther to the right. Hold this position for another minute or so, breathing evenly, paying close attention to elongating your spine each time you inhale, and releasing deeper into the twist each time you exhale. Release the pose slowly on an exhalation, then repeat it on the other side.
ADVERTISEMENT
See also Half Lord of the Fishes Pose
Ardha Matsyendrasana I (Half Lord of the Fishes Pose I)

To come into Half Lord of the Fishes Pose I, kneel on your left knee and place the sole of your right foot on the floor in front of you. Your left thigh, pelvis, spine, and head should be upright. Turn your left foot so the toes point to the right and the foot rests on its outer edge. Sit on your left foot, with your left sitting bone on the heel and your right sitting bone on the side of the ball of the big toe. Then cross the right foot over your left thigh, and put it on the floor outside your left knee. Hold your left knee in your left hand and put your right hand on the floor behind you and press it down and, as you inhale, grow tall by tilting the rim of your pelvis forward and drawing the base of your skull back and up. Exhaling, turn your trunk to the right, releasing your waist.
Next, crook your left elbow around the front of your right knee. Inhale and grow tall again. As you exhale, turn your torso—first your lower rib cage, then your upper rib cage and shoulders-to the right. When your left shoulder is as far to the right as your right knee, move your left elbow to the outside of the knee.
ADVERTISEMENT
As you exhale, twist your trunk more by pushing your right hand into the floor, and pushing down and to the left against your right leg with your left arm. (Don’t let your right knee and thigh shift to the left.) As you exhale and press with your arms, soften your waist, rib cage, and spine.
Again inhale and lengthen your spine. Then, exhaling, bring your outer left armpit as near as possible to the outside of your right knee. Press the arm and leg into each other and, without letting the point of contact slide, inhale and create a backbending action in your upper back. As you exhale, soften your trunk and allow it to move as far into the twist as possible.
Next, rotate your left arm in and wrap it around your right knee so the upper arm stays to the outside of the knee and the hand reaches past the inner knee toward your back. Inhale and lift tall again. As you exhale, swing your right arm behind you and grab your left wrist with your right hand. To complete the pose, inhale and lift as tall as you can. Then exhale, and as you let the deep muscles of the spine release, straighten both arms as far as you can and pull your left arm against your right thigh to bring yourself into your maximum twist. Turn your head to the right without tensing your neck, and look to your right without creating strain in your eyes. Hold for a minute, breathing softly; then repeat on the other side.
ADVERTISEMENT
See also Show Your Spine Some Love
Parsva Halasana

For Side Shoulderstand, prop your shoulders on a stack of two to four firm, folded blankets to protect your neck and improve your spinal alignment. (Yes, even if you’re an experienced, flexible practitioner.) Place a sticky mat on top of the stack, but leave a strip of blanket several inches wide uncovered along the folded edge.
Lie down with your shoulders supported on the blankets and your head on the floor. Start with your shoulders about an inch or two from the edge so that when you lift into the pose, they’ll roll up to the brink but not off. In the final pose, you’ll want the lowest vertebra or two of your neck supported on the blankets but the rest of the neck free.
ADVERTISEMENT
Press your hands into the floor alongside your hips, bend your knees, and swing both legs up and over to place your feet on the floor behind your head. The bottoms of your toes, not your toenails, should be on the floor. Exhaling, move your tailbone and sitting bones up and back behind you and draw your lower back into your body as you do in Adho Mukha Svanasana (Downward-Facing Dog Pose). Reinforce these actions as you exhale again, straighten your legs, and lift your spine as tall as possible, drawing your pubic bones toward the ceiling to lengthen the front of your body. Shift your weight to one shoulder and roll the other shoulder underneath you, placing it so its top surface meets the blanket. Do the same on the other side. Then interlace your fingers behind your back and stretch both arms parallel to the floor. Roll your upper arms away from each other and press them into your mat. Tilt your chest to vertical to complete the powerful lift of your trunk from shoulders to sitting bones. Unclasp your hands, place them on your back as close to your shoulders as possible, and use them to lift your back as high as you can.
Keeping your legs straight, your hands on your back, and your spine tall, walk both feet around to your left. As you move, maintain the slight arch in your lower back, keep your tailbone directly above the base of your neck—your tailbone will tend to shift to the left—and don’t turn your head or shoulders.
Make sure both your sitting bones are at the same height by equalizing the weight on your left and right feet and keeping the distance from your lower ribs to your pelvic rim the same on both sides.
ADVERTISEMENT
Rolling your collarbones toward the floor to keep your chest open, remain tall in the pose, legs firm, for a minute or more. Then walk your legs to the right side and hold for an equal time. To exit, return your feet to the center, release your hands from your back, bend your knees, and carefully roll down onto your back.
After you do twists, a slight, passive backbend feels wonderful. To finish, practice Salamba Setu Bandha Sarvangasana (Supported Bridge Pose, with your back and legs resting on folded blankets), followed by Savasana (Corpse Pose).