Published November 14, 2018 07:00AM
Still a Little Hesitant to Go Upside Down? This Home Practice Will Help
Strengthen your core and build upper-body strength so you feel more comfortable in any inversion.
When practiced regularly, inversions build upper-body strength, connect you to your core, and offer a new perspective on your practice. The work you put in to find balance on your hands (or head) can help you meet the challenges you face in your day-to-day life. Like any obstacle, mastering inversions takes quite a bit of focus, courage, and a willingness to try, but the results can be incredibly rewarding.
Going upside down with confidence requires dedication: building strength, learning to use your core for stability, and keeping your legs light and energized so they can balance above your hips.
See also Kino MacGregor’s 4-Step Get-Your-Handstand Plan
The first time I found my balance upside down, I realized the untapped potential of my incredible body. I was hooked. But I also found the journey challenging at times. A moment of clarity came when I realized how under-utilized some of my muscles were. We are so accustomed to relying on the major muscles that help us navigate our pedestrian lives (think quadriceps and biceps) but when asked to call upon the subtle muscles in our hands or low belly, we don’t quite know how to engage them or how to use them to our benefit.
Hopefully this sequence will help you wake up the parts of your body that you will need to call upon when going upside down, in turn, stimulating your mind! Be patient but courageous as you search for your (vertical) potential.
ADVERTISEMENT
1. Wrist Lifts

From all fours, stack your shoulders above your wrists, hips over your knees. Spread your fingers wide, pointing your index fingers straight ahead. Press into your knuckles, and lift the base of your palms. Pause for a moment at the top of the lift (pictured), energetically drawing your arms inward with straight elbows. Slowly lower your wrists back to the floor. Take 1 count to lift and 3 counts to lower. The weight of your shoulders should be directly over your wrists as you lift and lower your palms, which will add resistance and strength training to the exercise.
See also 8 Yoga Poses to Strengthen Your Wrists
2. Elbow Taps

From all fours, place a block between your elbows. Squeeze it tightly to find your midline, broadening your upper back. Keep your shoulder blades protracted throughout the exercise. Bend your elbows back, softly lowering your forearms to the ground (pictured). Lift back up without losing the block. Repeat 10 times. Add in an Adho Mukha Svanasana (Downward-Facing Dog Pose). Once you straighten through your arms, press your hips up and back, squeezing your arms in toward your midline. Then, lower your knees before lowering your elbows. Repeat 10 times.
See also Plank Pose: Your Ticket to Power and Grace
ADVERTISEMENT
3. Elbow to Knee Core Work

Lie on your back, knees bent. Draw your right knee toward your chest. Lift slightly through your torso, and place a block between your right elbow and thigh. Press into the block equally with your thigh and elbow. Interlace your hands behind your head. Only the bottom tips of your shoulder blades touch the floor. Lengthen your left leg with your heel a few inches from the ground (pictured). Keep pressing into the block. Slowly bend your left knee toward your nose, then re-extend. Repeat 10 times. Keep your left leg extended a few inches from the ground, and take small pulses on the right side. Repeat 10 times, then switch sides.
See also 7 Poses for Core Strength
4. Hollow Body Core Work

You will need two blocks for this exercise. From your back, take one block between your palms and one between your knees. Lengthen your arms straight overhead, pressing firmly into the block. Lift your head slightly off the ground so your ears are in line with your biceps (your chin will draw slightly down). Extend your legs off the ground to about a 45-degree angle, squeezing the block between your knees to engage your lower abdominals. Your lower back should be drawing down to the ground, your belly drawing in. Keep your legs as straight as possible. Hold this position for 20 seconds, then repeat 3–5 times.
ADVERTISEMENT
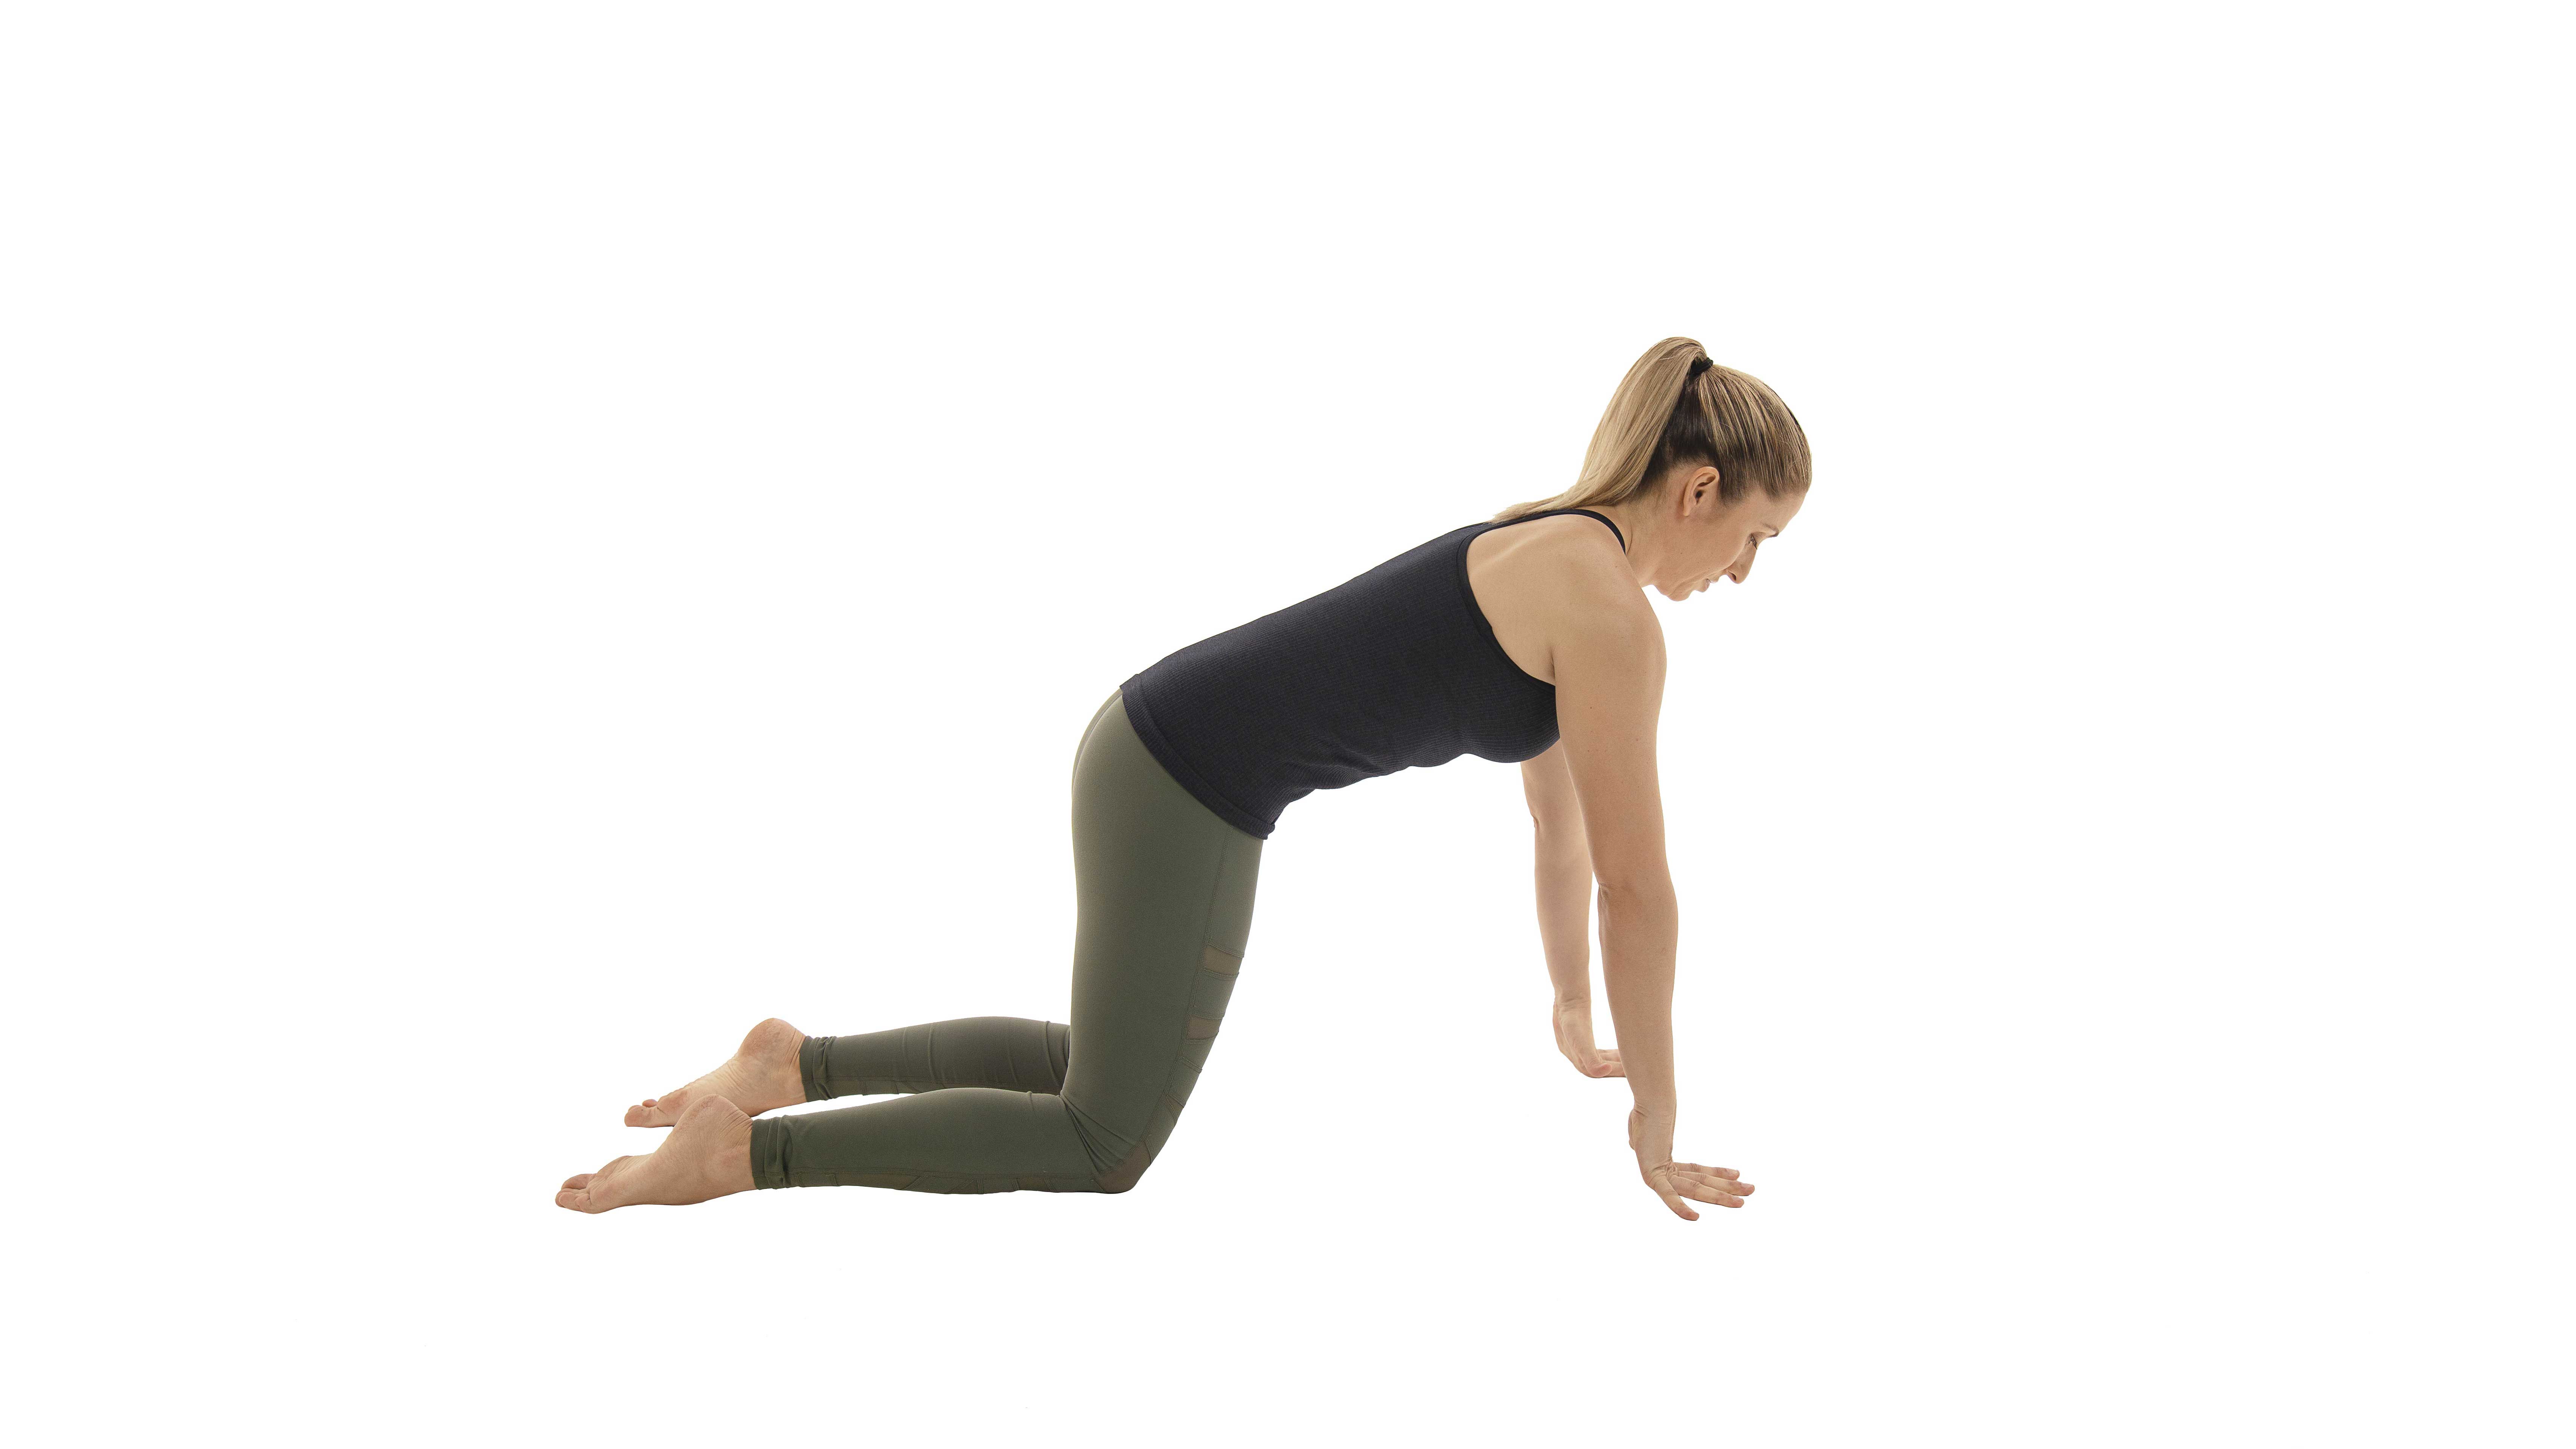
5. Belly Scoop to Asymmetrical Reach

Move back to Tabletop. Draw your knees to touch. Extend your left leg back, toes tucked, pressing your heel back to lengthen your calf muscles. Press into your hands. Curl your right knee toward your nose, scooping in your belly and lengthening your upper back. Draw your right heel as close to your hamstrings as possible (pictured). Place your bent right knee back down, and come into an asymmetrical reach, lifting your left leg and right arm off the ground. Continue to draw your belly up, and lengthen from foot to hand. Do this 5 times, then repeat on the other side, concentrating on abdominal control and energizing your arms and legs.
6. Plank Pose variation

Begin in Downward-Facing Dog, finding length in your spine. Hold for 5 breaths, then roll forward to Plank Pose. Make sure your shoulders are stacked over your wrists, heels over toes. Straighten your arms and energetically draw your wrists toward your toes, engaging your core. Hold this pose for 5–10 breaths. Then lower one arm down, and then the other, into Forearm Plank (pictured). Isometrically move your forearms closer together. Stay here for 5 breaths. Then, press into one hand, then the other, coming back to Plank Pose. Lift back to Down Dog. Repeat 6 times, alternating which hand initiates the lift.
See also Yoga for Back Health: 3 Variations of Plank Pose to Strengthen Your Core
ADVERTISEMENT
7. Standing Knee-to-Chest variation

This pose will help you balance in Adho Mukha Vrksasana (Handstand), because it doesn’t allow a bend in your lower back or external rotation in your hips (root causes of imbalance). Start in Tadasana (Mountain Pose). Shift your weight to your left leg. Draw your right knee toward your chest, placing a block between your upper thigh and rib cage. Clasp your hands around the front of your right shin to find balance and length in your spine. Then release your hands up alongside your ears. Hold for 10 counts, then repeat each side 3–5 times.
See also Fall for Yoga: 15 Poses Proven To Build Better Balance
8. Low Lunge Jump Switches

Place 2 blocks vertically on middle height at the top of your mat. Come to a Lunge with your right foot forward between the blocks. Put your hands on the blocks, stacking your shoulders above your wrists. Press your palms firmly into the blocks, engaging your arms and protracting your shoulder blades. Bend your back knee (it will act as a springboard), and then jump, lifting your hips high and switching your legs—landing your left foot between the blocks and your right leg extended in a Lunge. Straighten your legs on the jump, touching your big toes as they pass. Keep your arms straight and your core engaged! Repeat 10 times.
ADVERTISEMENT
See also Tight Hamstrings? Maybe Not
9. Prasarita Padottanasana (Wide-Legged Forward Bend)

From Mountain Pose, step out into a wide-legged stance. Your ankles should line up under your wrists when your arms are extended from your sides. Keep your feet parallel, and exhale to fold forward, lining up your fingers with your toes (or using blocks beneath your palms). Stay here for 5–8 breaths. Inhale to come up.
See also Wide-Legged Forward Bend
10. Malasana variation (Garland Pose)

Move your feet under your hips, slightly externally rotating your legs and feet. Bend your knees to lower into a squat. Try to keep both feet rooted firmly into the ground as you lengthen your spine. It’s OK if your heels lift a little. Place a block between your palms, and lengthen your arms up alongside your ears. The goal here is not to collapse your lower back but to draw in your core, lengthening through your spine. Keep your legs engaged with your inner thighs active and your arms vigorously reaching up—working on maintaining upper-thigh to rib connection. Hold for 10 seconds, and repeat 3 times.
ADVERTISEMENT
Learn More For a video of this practice, visit yogajournal.com/inversion-home-practice.
11. Descended Femur Fold

Come back to Mountain Pose. Take your hands to your hips, shifting your weight into your left leg. Draw your right femur (upper leg bone) farther up into your hip socket. Your right leg remains straight, the foot lifting a few inches off the ground, in line with your standing leg. Maintain that lift, and hinge at your hips, coming toward a pike position (pictured). Draw your core in and up, lengthening your spine. For an additional challenge, extend your arms forward alongside your ears. Stay for a few rounds of breath, then lift up, and repeat on the other side.
See also Standing Forward Bend
12. Dynamic Parsvottanasana variation (Low Lunge to Intense Side Stretch Pose, aka Pyramid Pose)

Step your left leg back into a Lunge. Place your hands on blocks on either side of your front foot (knee directly over your heel), creating a 90-degree angle. Keep your back leg straight and engaged, heel pressing back, quads active. On an exhalation, straighten your right leg by pulling your hips up and back into a long Pyramid Pose (pictured). Focus on opening your front hamstrings. Your back heel can stay lifted and your inner thighs should isometrically move toward each other. Re-bend, extend, and repeat 3 times. Then, repeat on the other side.
ADVERTISEMENT
See also Extended Triangle Pose
13. Urdhva Prasarita Eka Padasana (Standing Split / Jiva Squat)

From Low Lunge, walk your hands ahead of your front foot (on the ground or on blocks). Press off your back foot, lifting to a standing split. Try to keep your hips even while finding height in your back leg. Don’t let your lifted hip open. A slight bend in your front knee is OK. Lower your torso toward your front shin. Curl into a ball by lowering your lifted leg and drawing your knee toward your nose. Bend your standing leg, lifting your heel. On an inhale, lengthen back to Standing Split, moving slightly deeper into the stretch. Repeat 5 times, then switch sides.
See also A Healing Home Practice to Foster Confidence & Resilience Against Chronic Pain
14. Anahatasana (Extended Puppy Pose)

From Balasana (Child’s Pose), walk your hands forward, lifting your hips above your knees. Sink your chest and chin toward the ground. For a modification, drop your forehead (rather than your chin) to the earth, or place it on a block. Stay here for 5 breaths.
ADVERTISEMENT
See also Poses for Your Spine
15. Eka Pada Rajakapotasana variation (One-Legged King Pigeon Pose)

From Extended Puppy Pose, lift to Down Dog to create some space to draw your right knee behind your right wrist. Take a moment to check that your back ankle is straight and your back leg is firmly rooted to the ground, in line with your hip. Both hips should be directed forward to ensure a safe lower back position. Inhale to lengthen your spine and open your chest before walking your hands forward, folding into a restorative Pigeon Pose. Soften here for 5–8 breath cycles, then repeat on the other side.
See also Master Sleeping Pigeon Pose in 4 Steps
16. Setu Bandha Sarvangasana (Bridge Pose)

Lie on your back with your knees bent, feet flat. Lift your hips, and slide a block beneath your lower back where your sacrum meets your upper glutes. Choose a block setting depending on how intense you want the stretch, but remember that the purpose of this posture is to restore and cool down your body. Lower onto the block, and begin to relax. You should be able to balance here without effort, so if you feel like you’re holding yourself up with your legs or falling off the block, make small adjustments until you hit that sweet spot. Close your eyes, and stay here for 8–12 breaths. Then finish with 5 minutes of Savasana (Corpse Pose).
See also Wake Up Your Body and Mind with Bridge Pose
About the Author
Jolie Manza is an international yoga teacher and movement professional in Bali. She’s the founder of YogaKoh, a school specializing in teacher trainings, retreats, and workshops worldwide. Learn more at yogakoh.com.