Updated July 12, 2024 04:16PM
14 Modifications For Common Yoga Poses That You've Probably Never Seen Before
When the standard alternatives don’t feel right, try these instead.

(Photo: Jenny Clise)
Like most yoga teachers, I like to think I’m ready with a comprehensive tool belt of pose variations to offer during class. I had always thought I was making my classes accessible to anyone, but when I was living and teaching in New York City, I had an experience that changed how I think.
In any studio class, there are a few people who need a modified practice. But there was one class in which everyone had their own specific needs. At the time, I had thought I had the best modifications in town. But those students were not shy about letting me know, “That doesn’t work for me.”
This challenged me as a teacher. A lot. Each day, I would think, how can I learn to better help my students? I learned so much from my students, who became very dear to me, and their ability to ask for what they needed. This encouraged me to dig deeper and ultimately enroll in a yoga therapy program.
In this program, I learned so many tools to teach yoga in a way that meets the needs of each individual. Following are some of the variations that I was able to eventually share with students in that class. They made all the difference.
ADVERTISEMENT
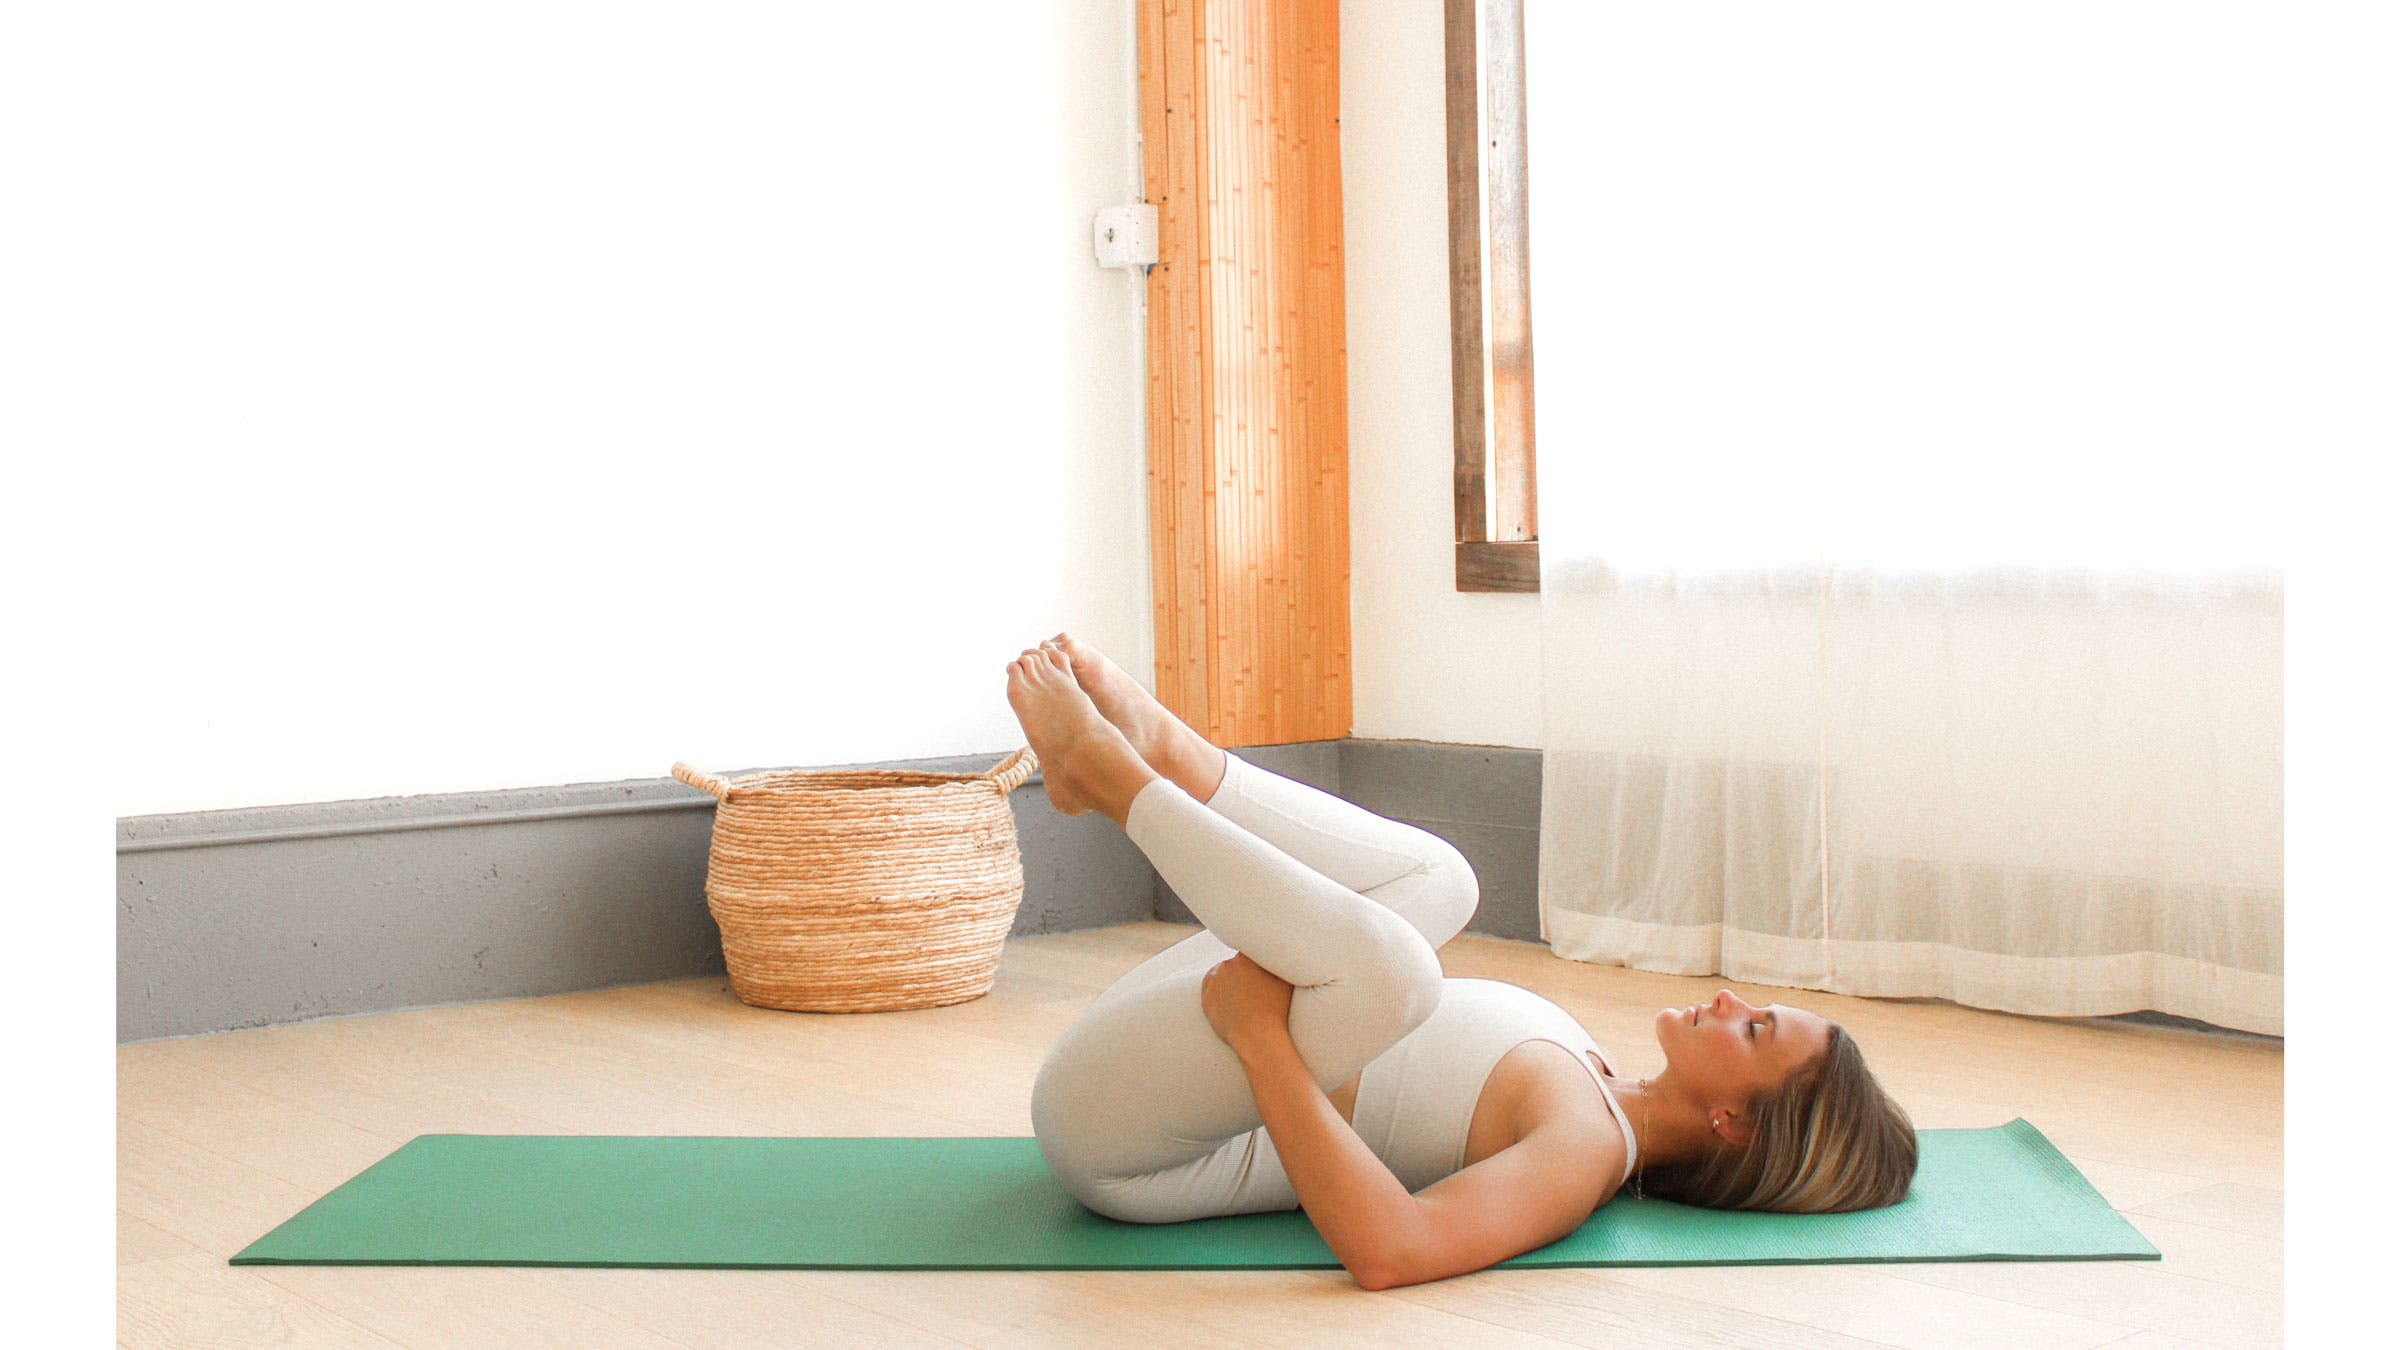
1. Child’s Pose on Your Back
Why it helps:
- Takes pressure off the knees for those with knee injuries
- Takes rounding out of the spine, alleviating further aggravation for anyone with disc herniation or osteoporosis
- Takes pressure off your ankles for those with tendon, muscle, or bone injuries
How to: Start by lying on your back. Hug both knees into your chest. Keep your knees closer together for more of a lower back release or let your knees fall out toward the sides and closer to your armpits to stretch your hips and inner thighs. You’ll be in the shape of Child’s Pose but on your back. If holding your shins just below your knees creates unwanted pressure on your knee joints, rest your hands on the backs of your thighs. Stay here for 5-10 breaths.
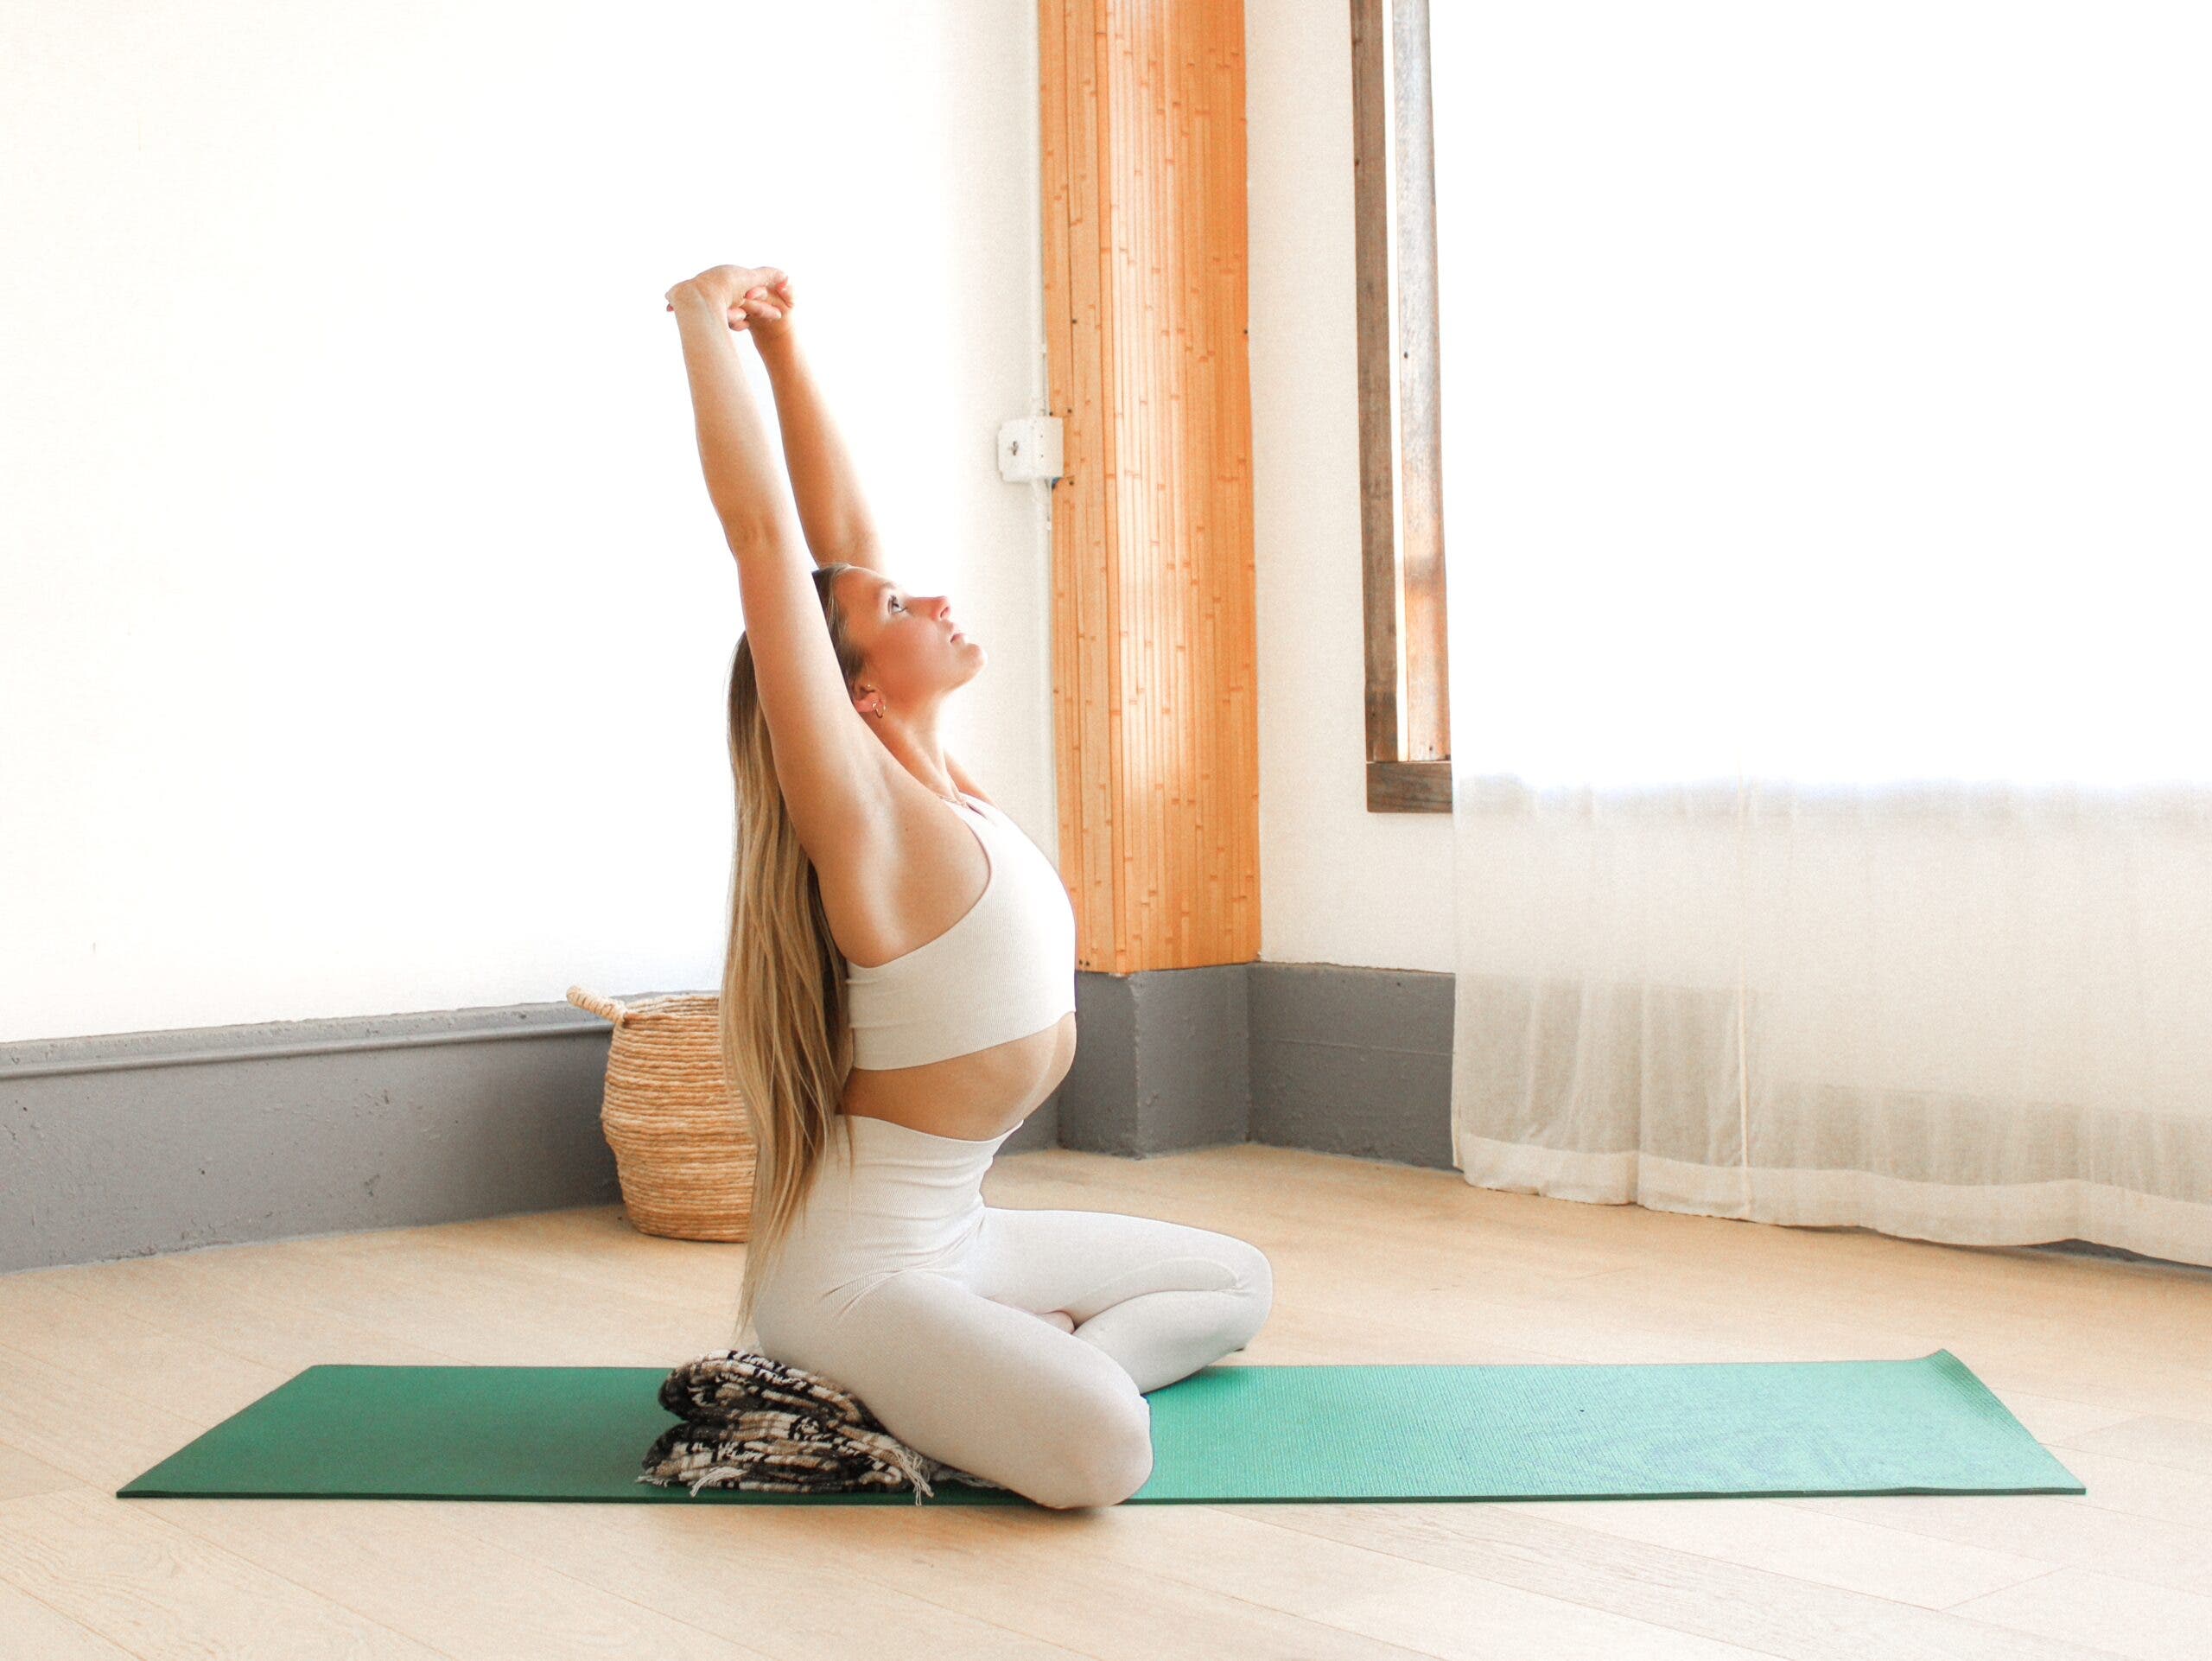
2. Seated Cat-Cow
Why it helps:
- Eliminates weight on your wrists
- Elevates your hips, taking pressure off your knees and low back to help those with tight psoas or hamstrings
- Pelvic contact with the floor or a prop (such as a bolster) helps the spinal movement happen from the tailbone up
How to: Start in a seated cross-legged position. If you feel any rounding in your lower back or tension in your hip flexors, roll or fold a blanket and sit on the edge of it so your hips are higher than your knees. Interlace your hands in front of you and, as you inhale, reach your arms toward the ceiling, pressing through the palms of your hands. Gently arch through your back and open across your chest in a seated version of Cow Pose.
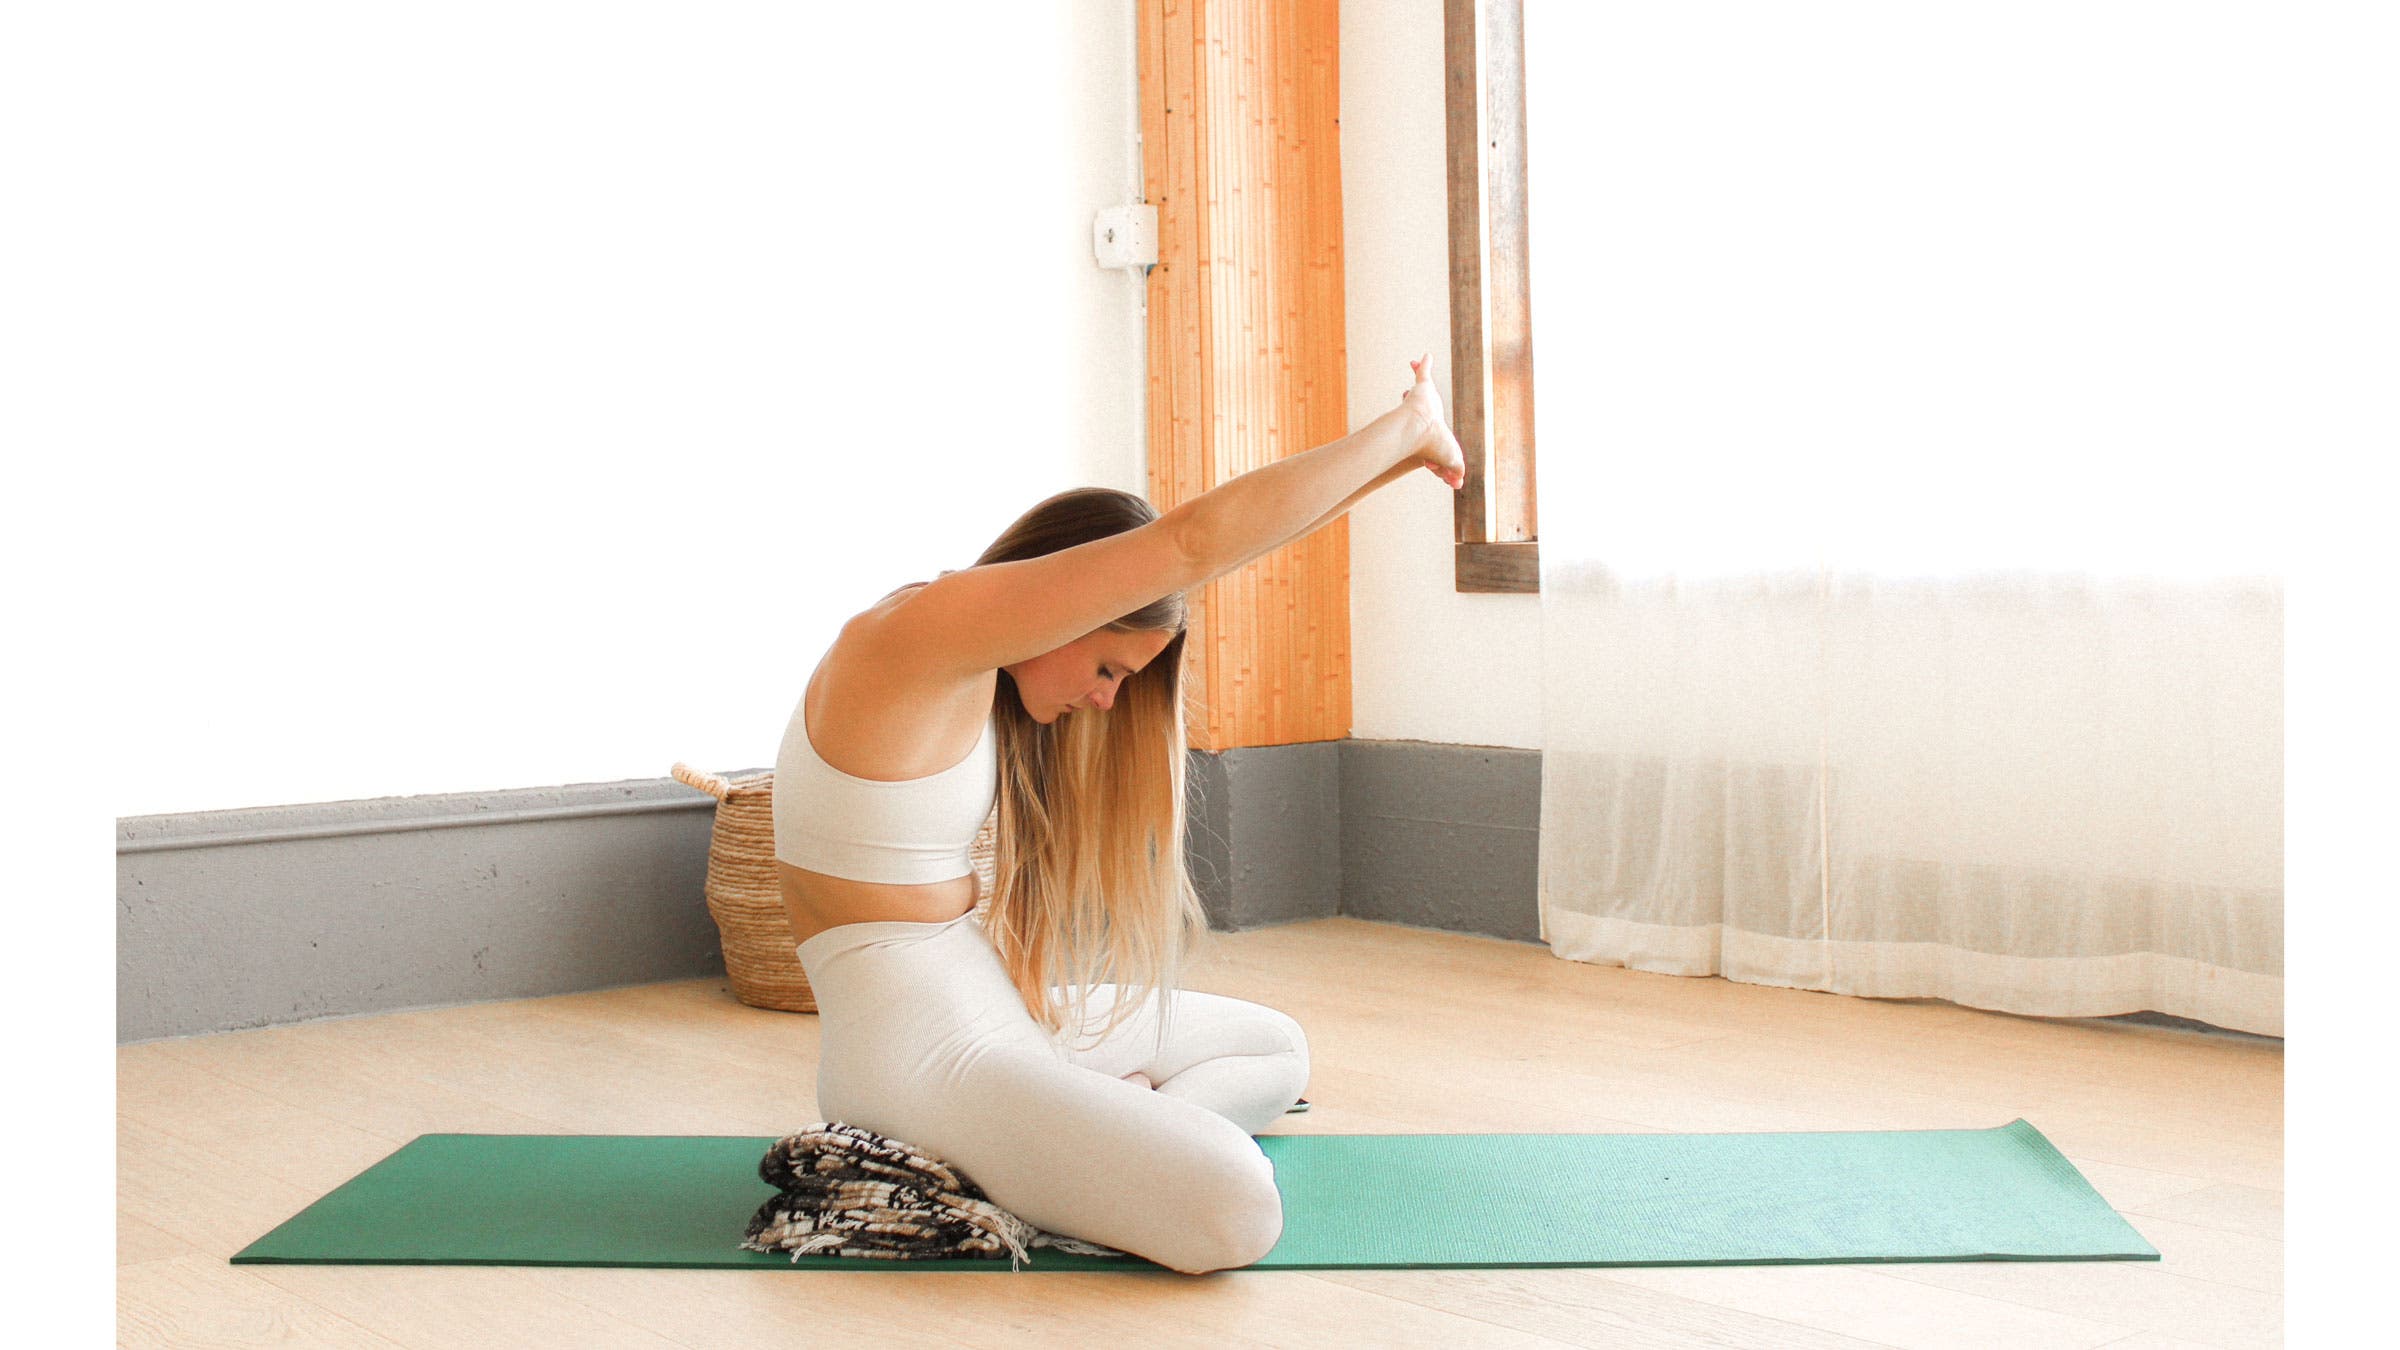
As you exhale, round your back, lower your chin toward your chest, and press your palms forward in front of you in Cat Pose. You have the option to instead place your hands on your knees. Draw your navel in toward your spine. Repeat Cow and Cat for 5-10 repetitions.
ADVERTISEMENT
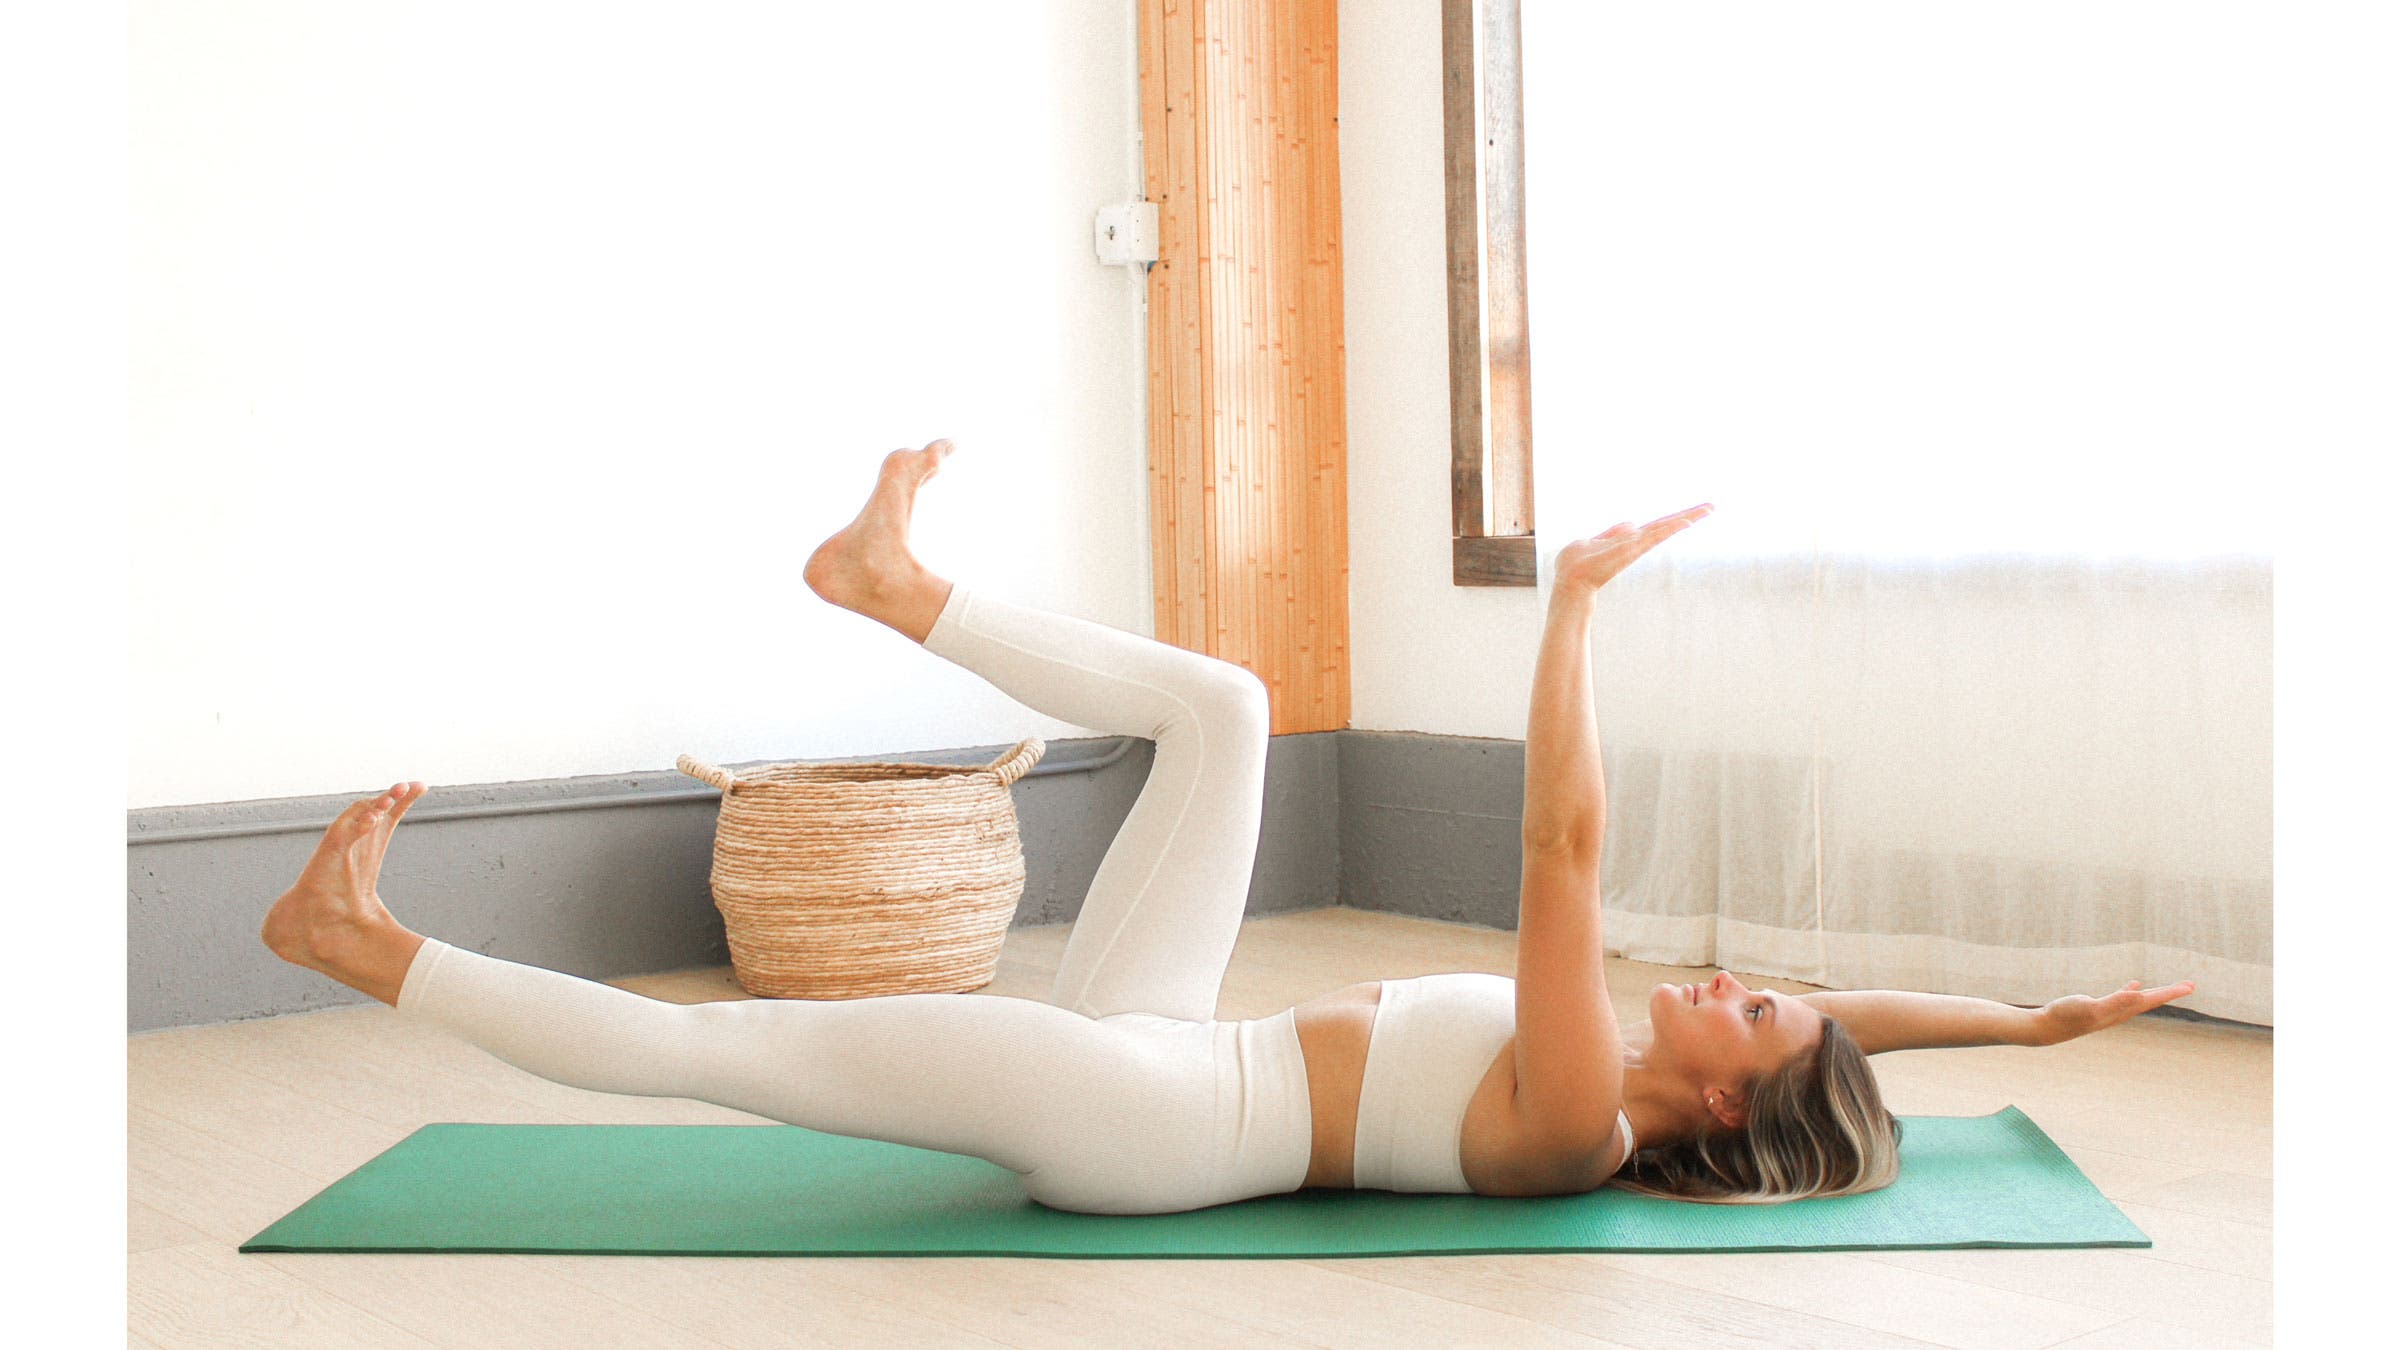
3. Bird Dog on Your Back
Why it works:
- All the core-strengthening benefits without putting any pressure on the wrist and knee joints
- Helps students who have difficulty balancing
- Helps inform neutral spine alignment by keeping the spine on the mat, reducing potential for lordosis in your low back or collapsing in your shoulders
- Informs square hip alignment by lessening the chance of internally or externally rotating your back leg
How to: Start on your back with your feet firmly planted on the ground and your knees pointing toward the ceiling. Draw your tailbone toward the backs of your knees hollow out through your abdomen. Come into position by lifting your shins parallel to the mat so your knees are stacked directly over your hip points. Reach your arms toward the ceiling so your wrists are directly over your shoulders in reclined Tabletop. As you inhale, extend your right leg forward and your left arm alongside your head with your fingers reaching toward the wall behind you. Exhale and return to Tabletop. Inhale as you extend your left leg forward and right arm back overhead. Exhale and return to Tabletop. Repeat for 5-10 repetitions.
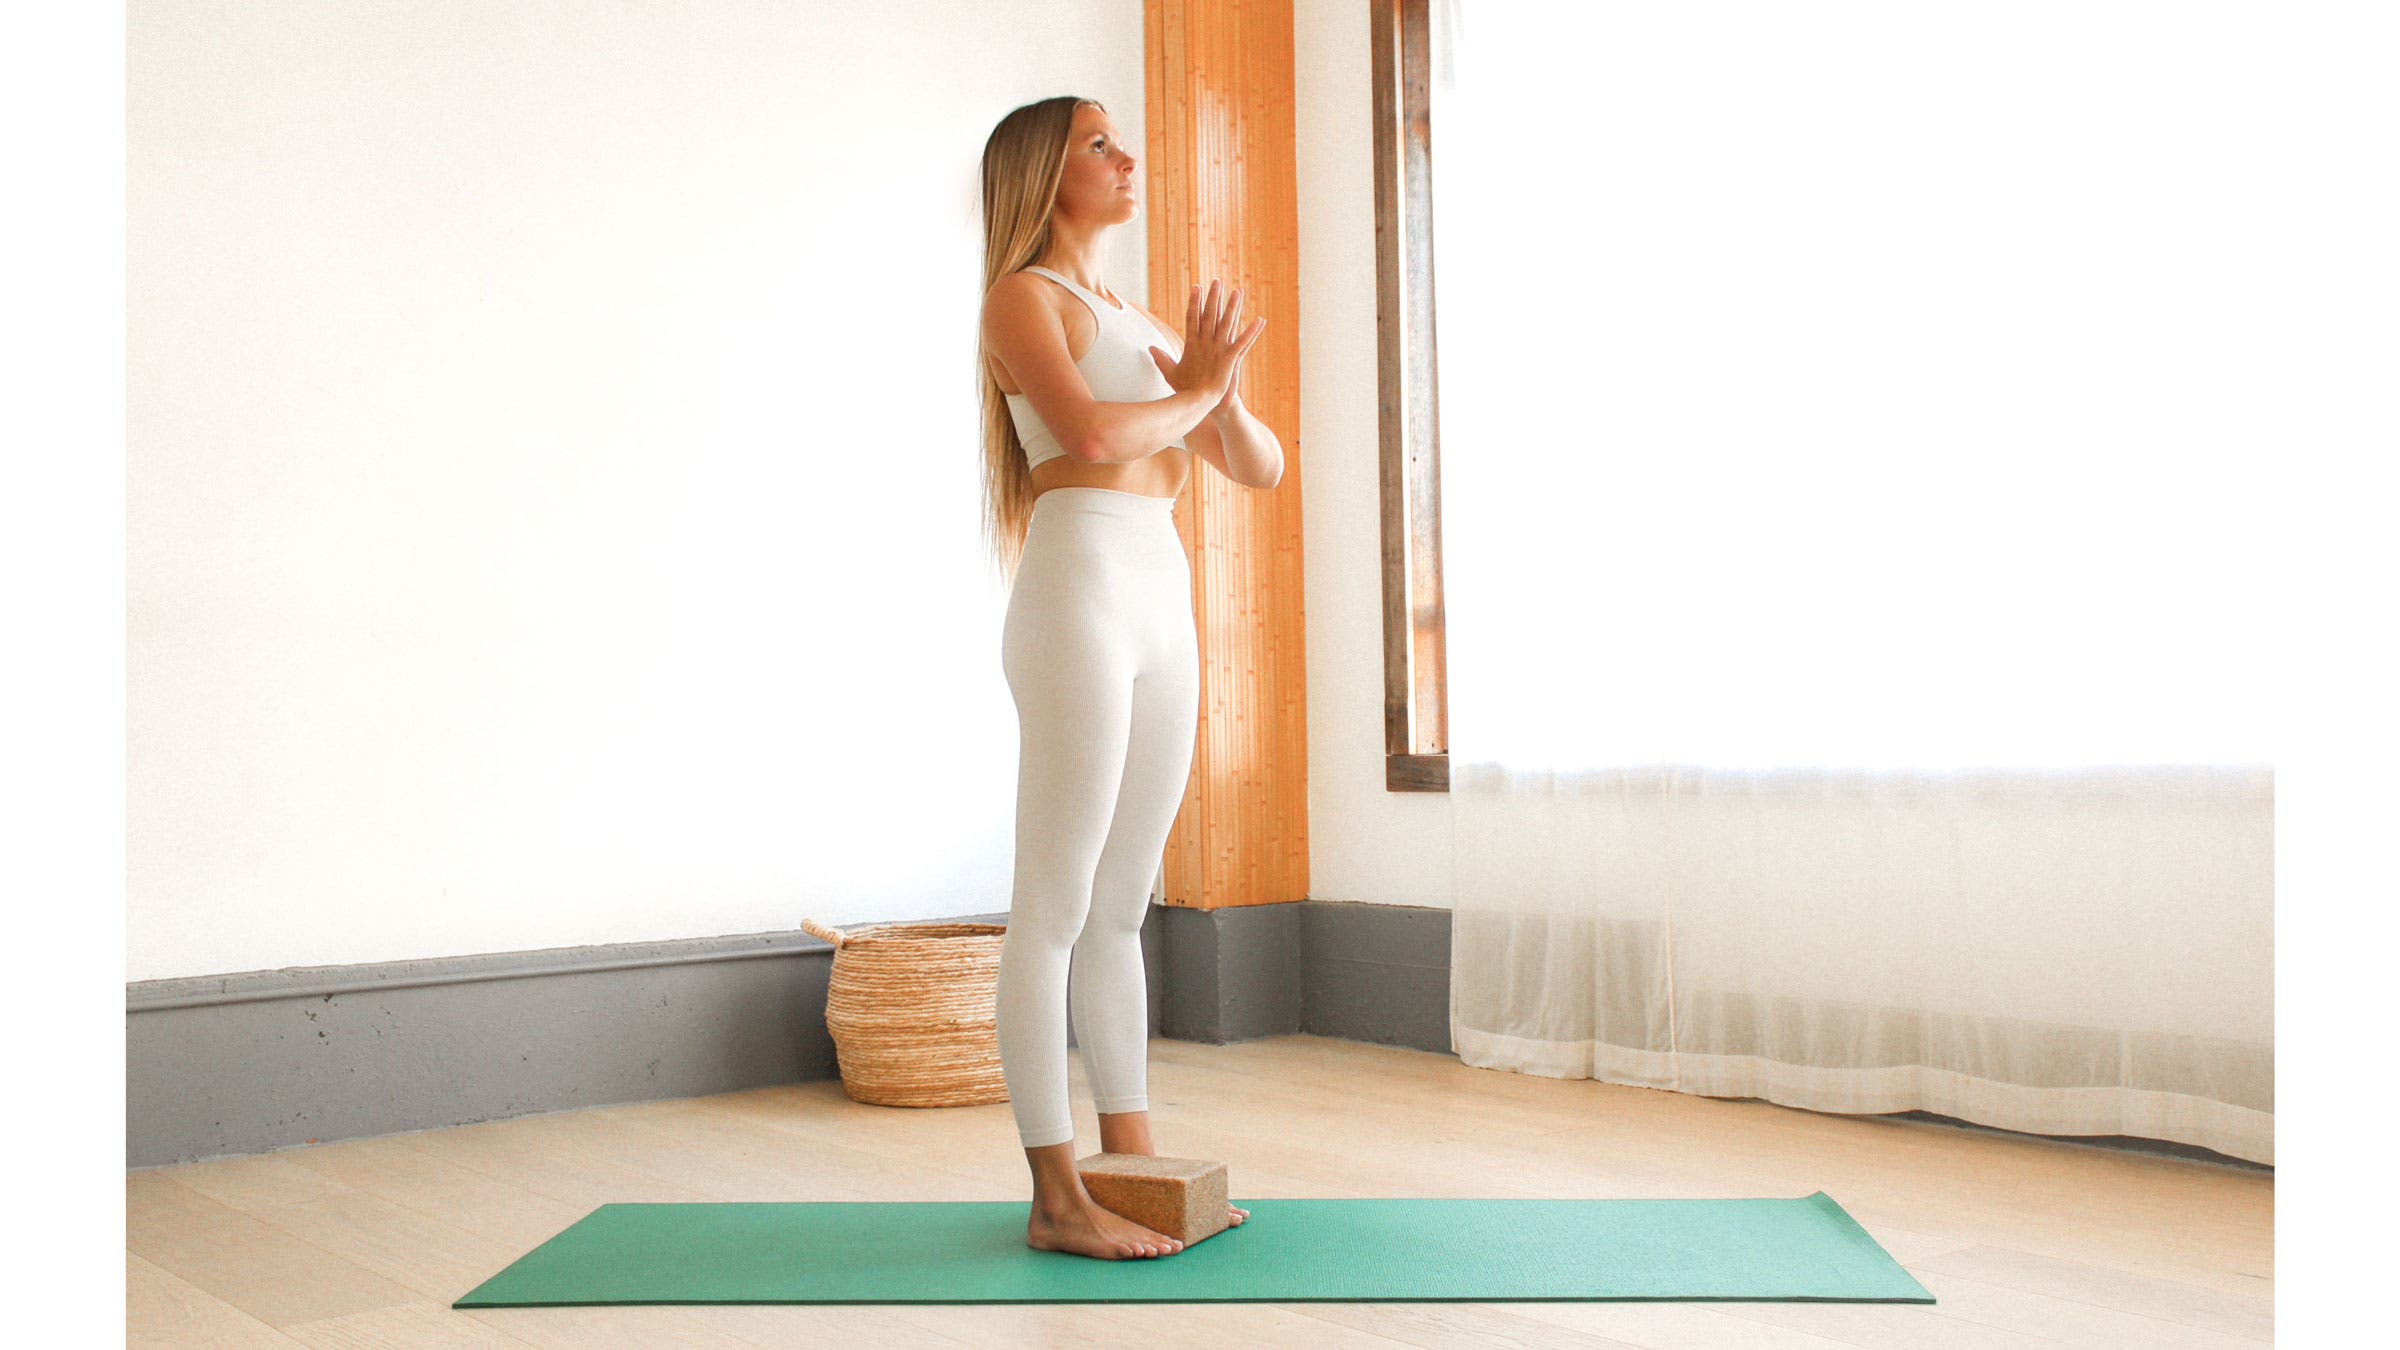
4. Mountain Pose With Feet Apart
Why it helps:
- Minimizes strain on low back for those with tightness or pain
- Helps support weight distribution and improve balance by stacking hip points over knees over ankles
- A block supports proper parallel foot alignment and informs those who pronate (feet roll in toward block) or supinate (feet roll away from block)
- Squeezing block between feet can help correct bow-legged alignment by strengthening inner thighs
How to: Place a block on its lowest height and narrowest width between your feet. Allow the inner edge of your big toe to make contact with the block but allow for a sliver of space between your heels and the block. Stand tall and elongate through your spinal column in Mountain Pose. Your hands can rest at your sides, facing forward, or you can press the palms of your hands together in prayer position (anjali mudra) at your heart center.
Gently lengthen your tailbone down toward your heels. Notice if your feet tend to roll in toward the block or away from it. Use the block as a reference for where you need to shift your weight so you feel it equally distributed across your feet and ankles. Squeeze the block to engage your inner thighs and lengthen through your outer legs. Relax your shoulders down your back and away from your ears. Soften through the muscles of your face and steady your gaze. Stay here for 5-10 breaths.
ADVERTISEMENT
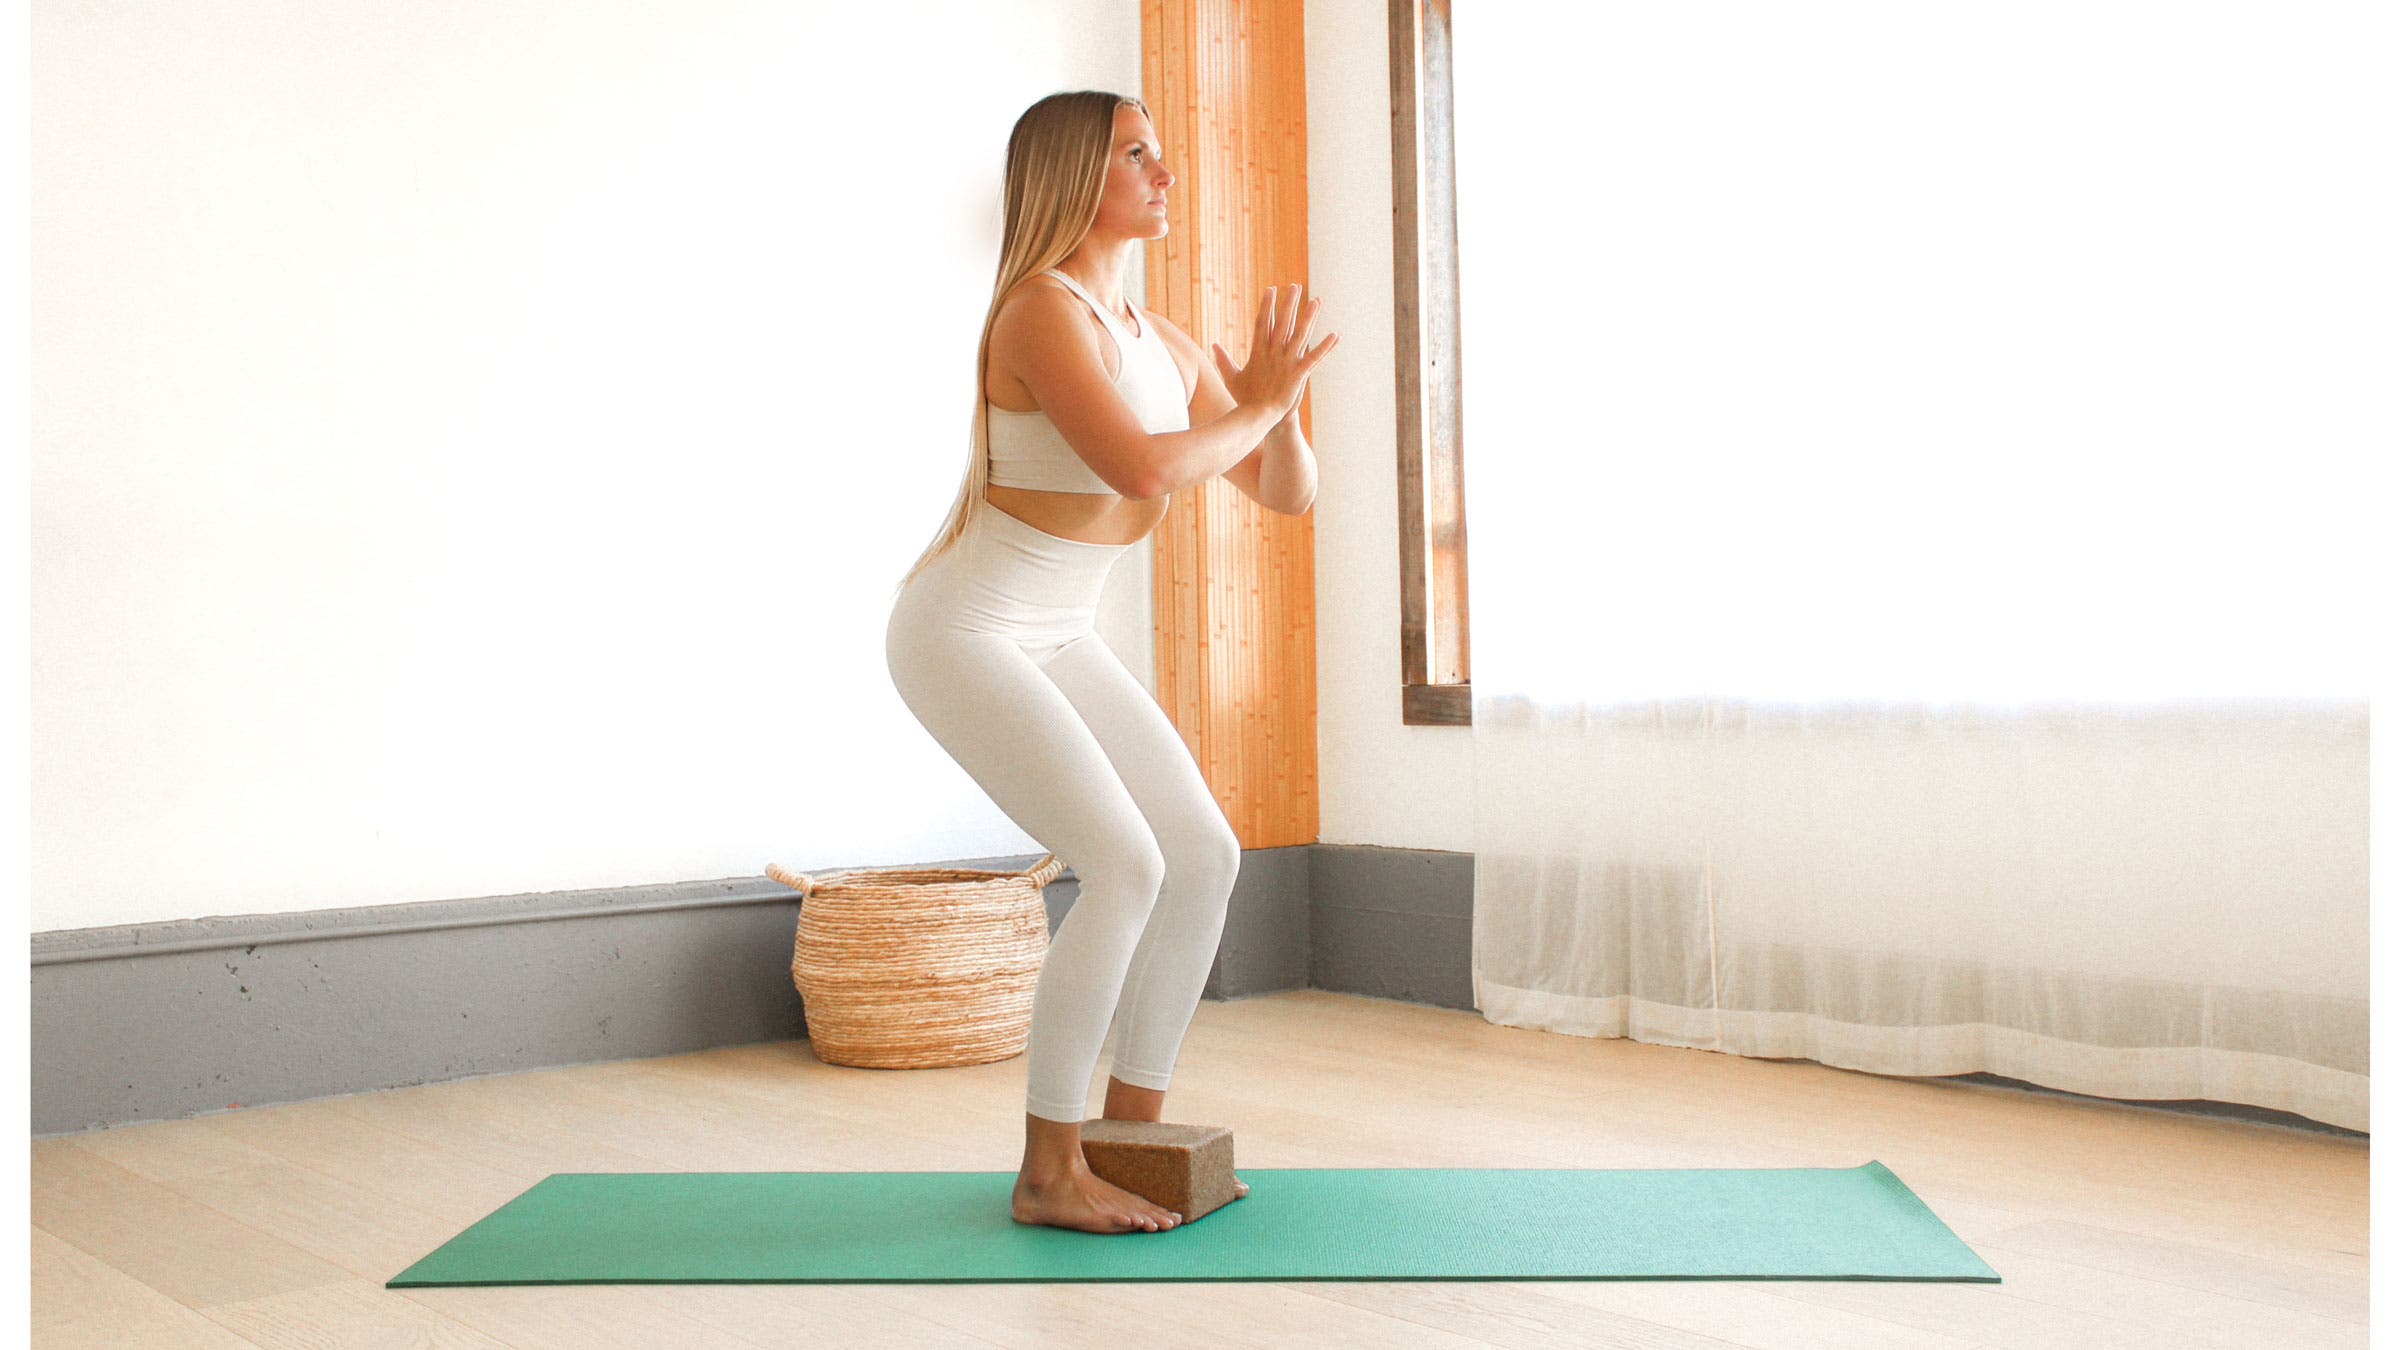
5. Chair Pose With Feet Apart
Why it helps:
- Minimizes strain on low back for those with tightness or pain
- Helps support weight distribution and improve balance by stacking hip points over knees over ankles
- Block supports proper parallel foot alignment and informs those who pronate (feet roll in) or supinate (feet roll out)
How to: Place a block on its lowest height and narrowest width between your feet. Allow the inner edge of your big toe to make contact with the block but allow for a sliver of space between your heels and the block. Stand tall and elongate through your spinal column. Sit your hips back in space as if you were reaching back to sit in a chair. Gaze down and ensure you can still see all your toes. If you cannot, shift more of your weight further back into your heels or straighten your legs slightly. Use the block to inform the parallel alignment of your feet and keep your knees stacked directly over your ankles.
You can keep your hands on your hips, reach your arms overhead to bring your biceps alongside your ears, or press the palms of your hands together in prayer position at your heart center. Relax your shoulders down your back and away from your ears, creating more space in your cervical spine. Stay in Chair Pose for 5-10 breaths.
ADVERTISEMENT
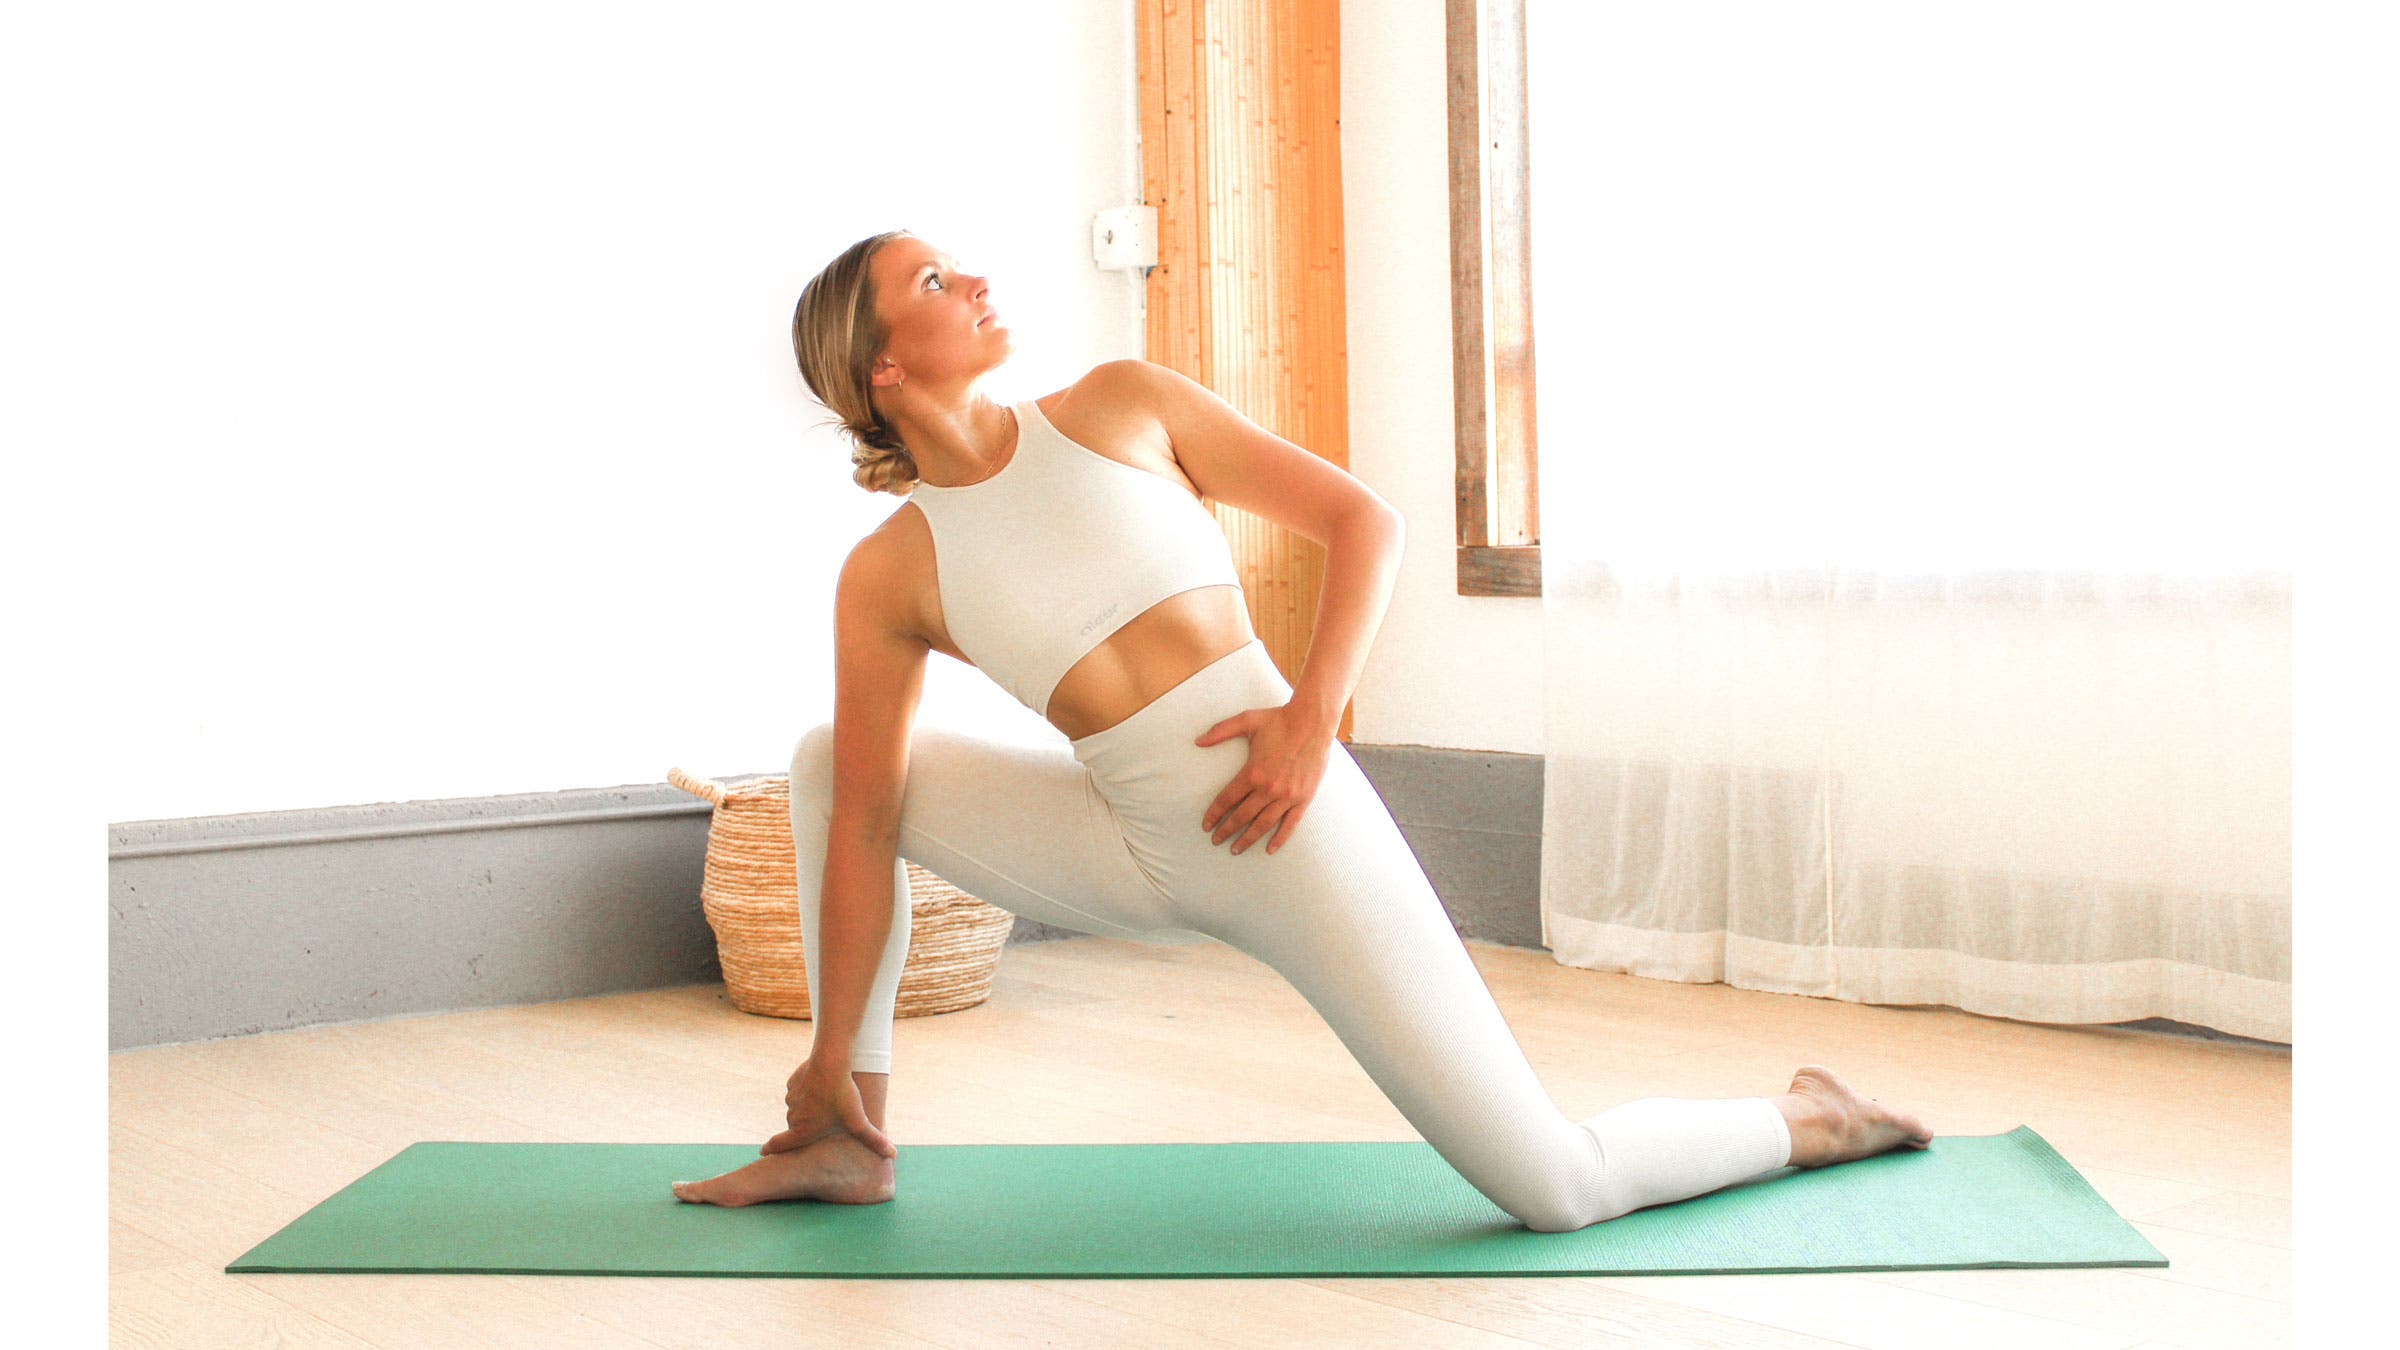
6. Kneeling Side Angle Pose
Why it helps:
- Kneeling supports better balance by stabilizing your legs and hips
- Grabbing the ankle helps knee-over-ankle alignment and gives students the ability to either push down to roll the chest open, or pull up on the ankle to move the low ribs further away from their hip crease—improving equal lengthening of the torso on both sides.
How to: Stand on your knees. Bring your right foot to the mat in front of you and bend your right knee until it is directly above your right ankle and your shin is perpendicular to the mat, as if you were in a Low Lunge. Level your hip points so they face the left long side of the mat and are equal height from the mat. Rest your right elbow on your right thigh and start to twist left. Stay here or play with grabbing your right shin or ankle with your right hand. Note that you can have your arm in front of your thigh, using it to nudge the right knee back so it stays stacked over your ankle or you can extend your arm behind your right thigh and use your muscle strength to press your outer right knee into your arm. Either extend your left arm toward the ceiling or place your left hand on your left hip and draw your left elbow toward the wall behind you to open across your chest and create a slight twist in the spine. Lengthen through both sides of your body. Stay in Kneeling Side Angle Pose for 5-10 breaths. Repeat on the other side.
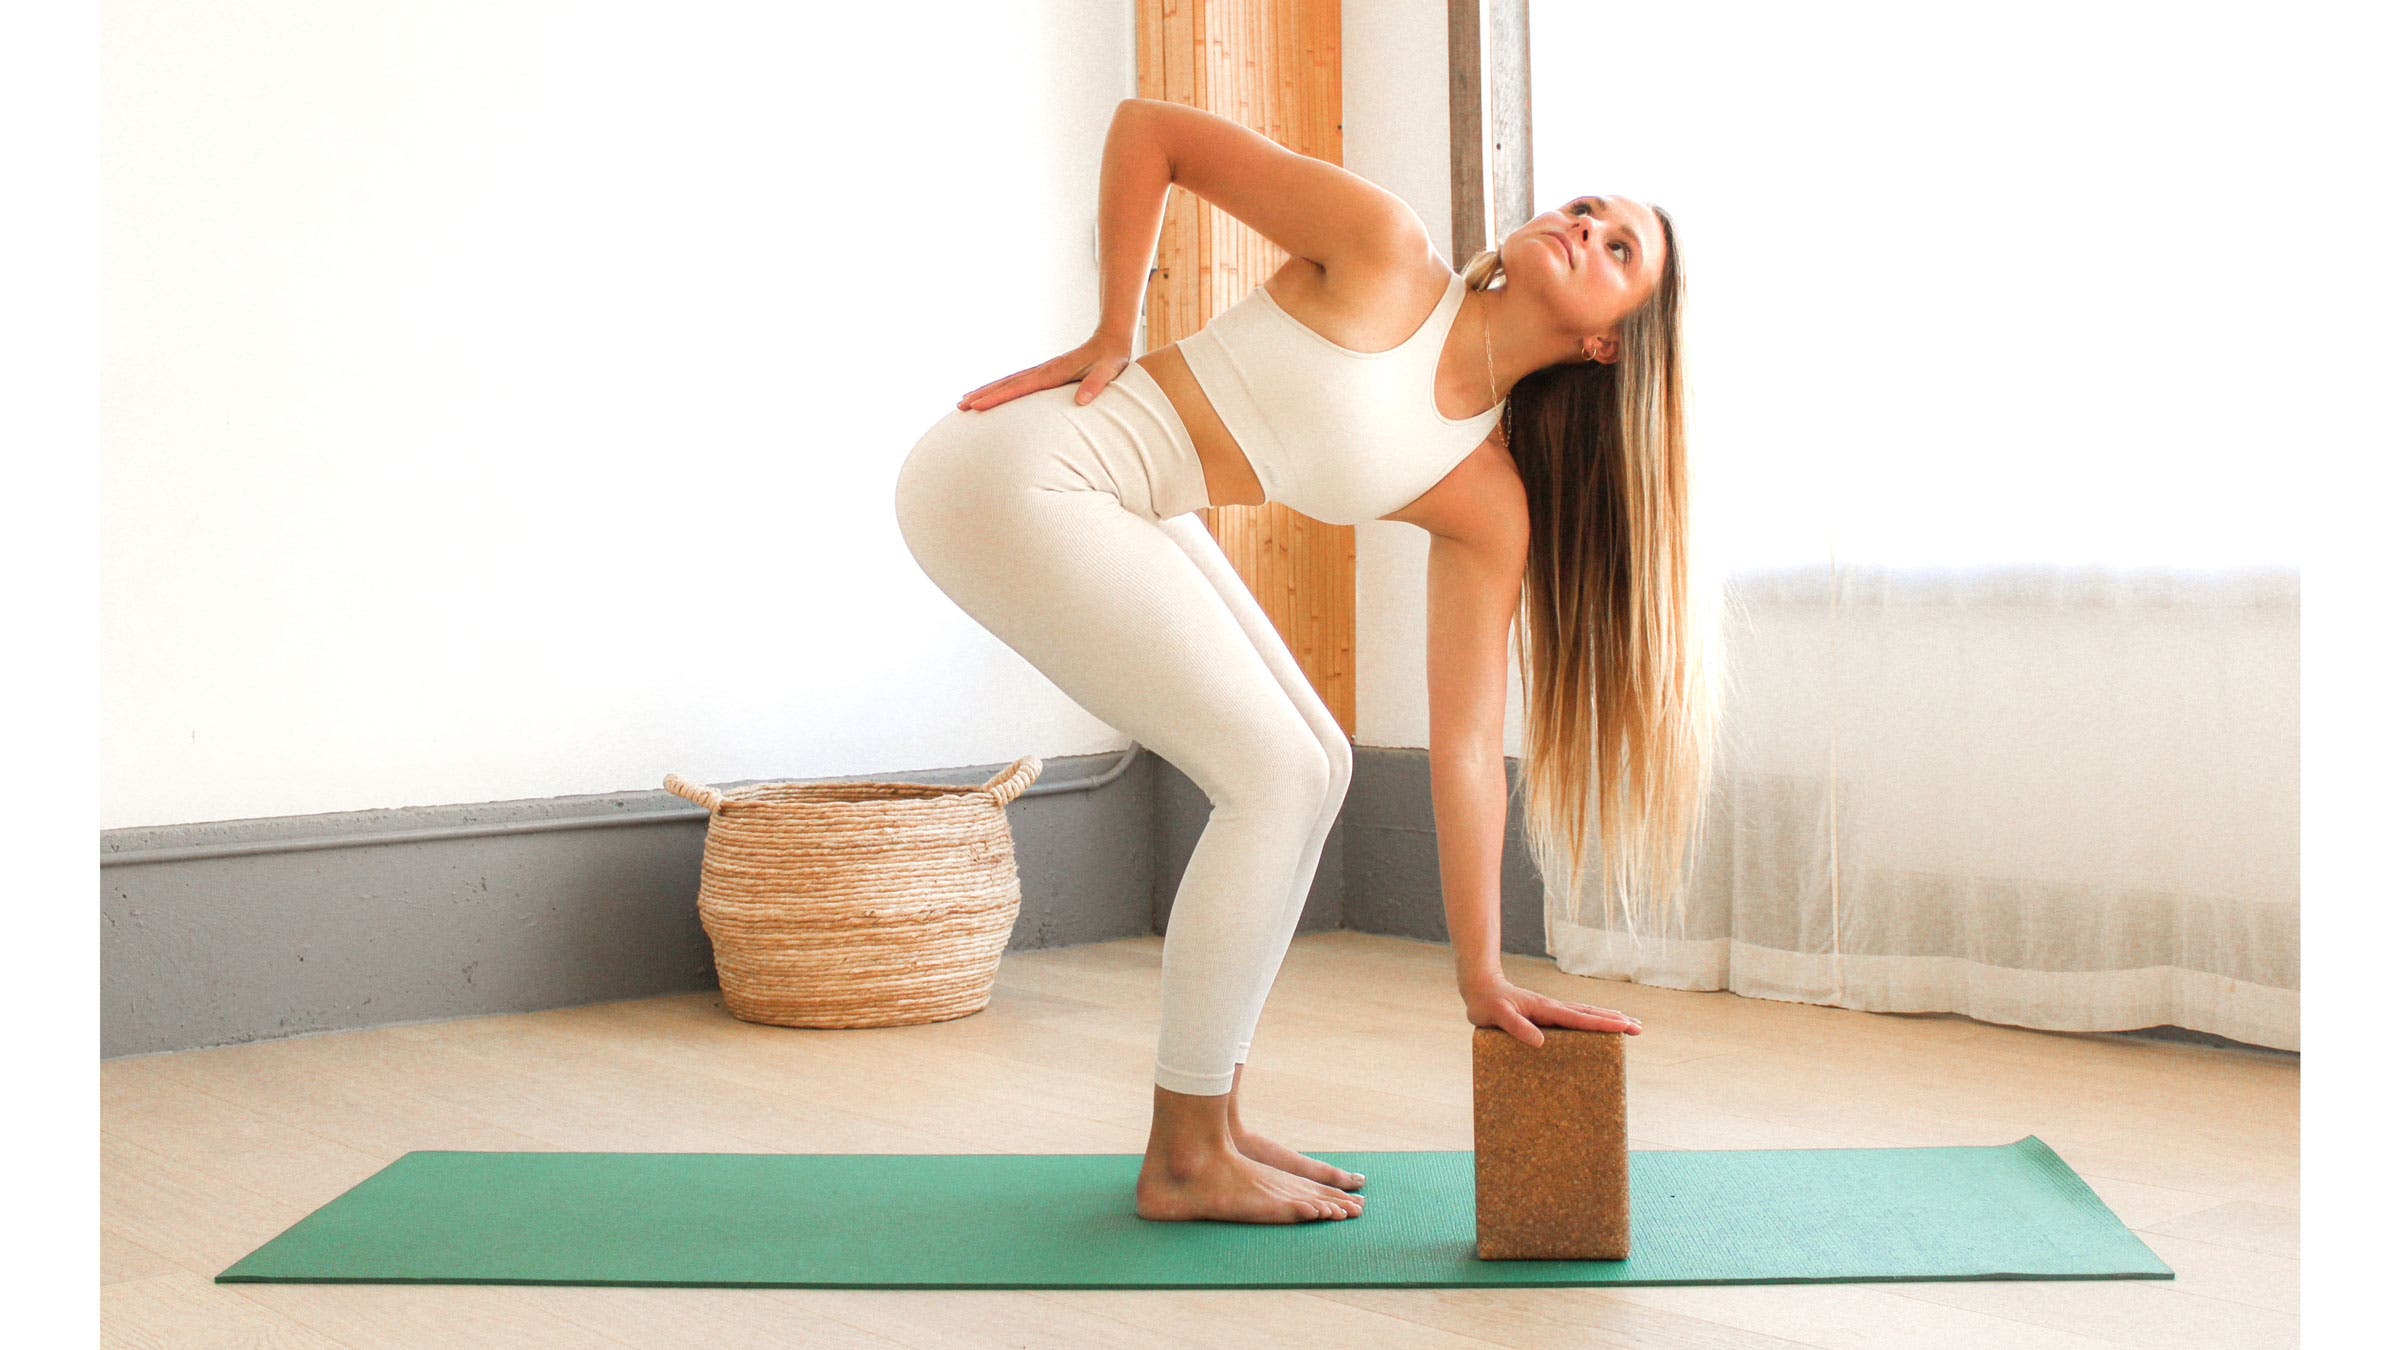
7. Revolved Chair Pose With a Block
Why it helps:
- Raises the ground to meet you, which helps eliminate rounding in the spine that can limit spinal rotation
- Supports core engagement, especially in the obliques, by using the block instead of leveraging your elbow into your knee to twist
- Protects the sacroiliac joint from derangement since the lumbar spine and SI joint are not designed well for the twisting motion, so when the spine twists and the hips are not grounded, it helps to allow the hips to follow in the twisting motion
How to:
Begin in Chair Pose with a block half a foot in front of you and a little to the right on its tallest setting. On an exhale, begin to twist your chest toward the right and reach for the block with your left hand or fingertips. You can place your right hand on your lower back to encourage lengthening (as opposed to rounding) in the lumbar spine. Point your right elbow toward the ceilingto open across your chest. Press into your left hand or fingertips to draw your left shoulder down and away from your ear. Squeeze your shoulder blades toward each other and broaden across your collarbones. Allow your left knee to come slightly forward of your right knee. Stay in Revolved Chair Pose for 5-10 breaths. Repeat on the other side.
Note:
It’s important to keep pressing your hand onto the block. This helps increase your active range of motion in the twist, whereas the passive range of motion that we often use to push or strain as we try to deepen into the pose can lead to injury. Over time, you can move the block further to the right of you as you feel more comfortable deepening the twist.
ADVERTISEMENT
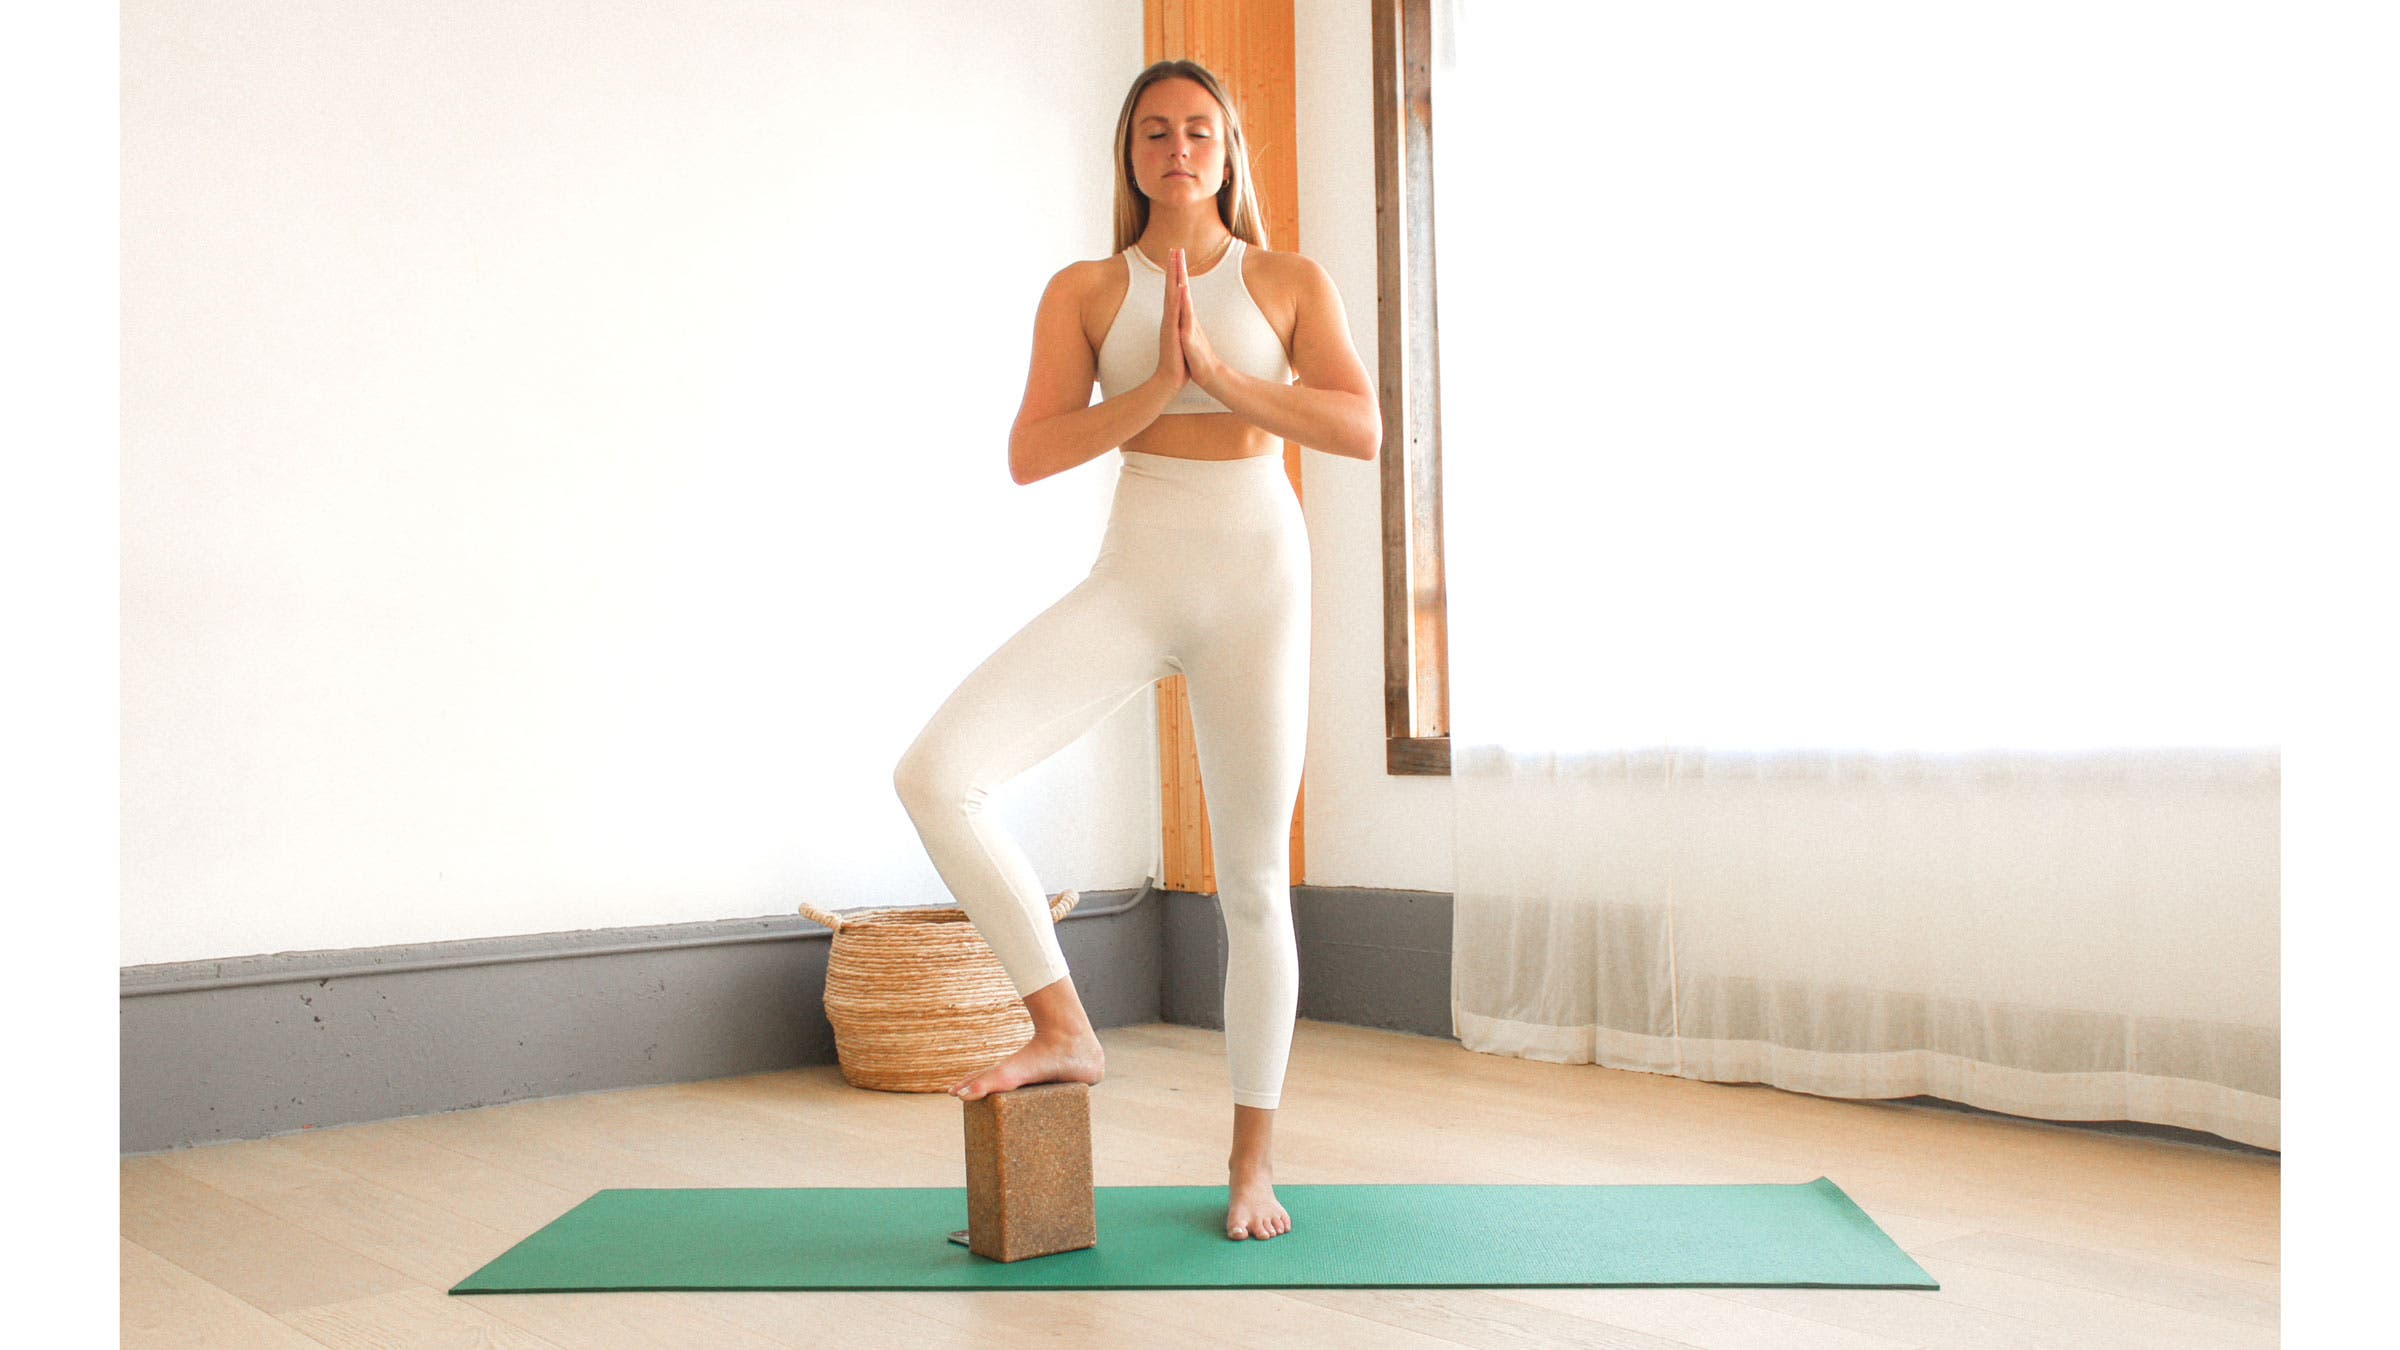
8. Tree Pose With a Block Under Your Foot
Why it works:
- Decreases knee flexion for those with knee injuries
- Helps support equal weight distribution when you’re working on balance
- Can help with bone-strengthening for those with osteoporosis while minimizing the risk of falling or fracturing
- Reduces the risk of internally rotating the hips and putting a strainful sway in the low back by having the foot further away from the body
How to: From standing, place a block on its highest setting to the side and slightly forward of your right foot. Shift your weight into your left foot and place your right foot on the block. Lengthen your tailbone down toward your left heel. Draw your shoulder blades down your back. Focus your drishti (gaze) at one point to help with stability. Stay in Tree Pose for 5-10 breaths. Repeat on the other side.
9. Reclined Tree Pose With a Blanket
Why it helps:
- Supports those who are working on balance
- Informs good spinal alignment
- Supports your knees and hips and reduces strain on the ankle of the straight leg
- Takes weight off of foot and ankle for students with injuries
How to: Start lying on your back and place a folded blanket within reach. Bend your left knee and place the sole of your foot on your right calf or inner thigh in Reclined Tree Pose. Slide the blanket under your left knee or thigh to support your hips, especially if you feel your right hip wanting to lift off the mat. Flex through your right foot so all five toes are pointing toward the ceiling. Your palms can come together to touch or you can reach your arms overhead with your arms framing your ears. Press the back of your right leg into the ground as if you were trying to get your shin and thigh bones to touch the mat. Stay here for 5-10 breaths. Repeat on the other side.
ADVERTISEMENT
10. Supported Wheel Pose
Why it helps:
- Elevates your hips and lessens the intensity of the pose and the potential for back strain
- Makes reaching for your ankles easier
- Keeps your knees and thighs grounded, which helps keep your knees from moving away from one another, which can cause pinching in your low back
- Takes some weight (hence discomfort) out of the midsection
- Helps support lengthening and creating space in your low back (lumbar spine)
How to: Start in hands and knees in Tabletop with a bolster just behind your wrists. From there, lower the front of your hips onto the bolster and lift through your chest. Engage your hamstrings and begin to bend at your knees, drawing your heels toward your glutes. Reach back for your ankles, one hand at a time. If you are able to grasp your ankles, kick into your hands to press your thighs down into the mat and lift through the chest. Stay in Supported Wheel Pose for 5-10 breaths.
11. Reclining Bound Angle With a Blanket
Why it helps:
- Keeps the soles of your feet together and maintains your ankles in a neutral supported position
- Decreases the amount of stress placed on the knees and hips and elevates your knees and shins
How to: Start in a seated Bound Angle Pose and have at least one rolled or narrowly folded blanket within reach. Place the center of the blanket on your inner ankles, then wrap it around your outer ankles and draw it under your calves and tuck it in place to support the shape of your legs. Place your hands on the mat behind you and slowly lower your spine onto the mat. If you feel any pinching in your low back, slowly come back up and slide your ankles further away from you to alleviate the pressure Stay in Reclining Bound Angle Pose for up to 5 minutes.
ADVERTISEMENT
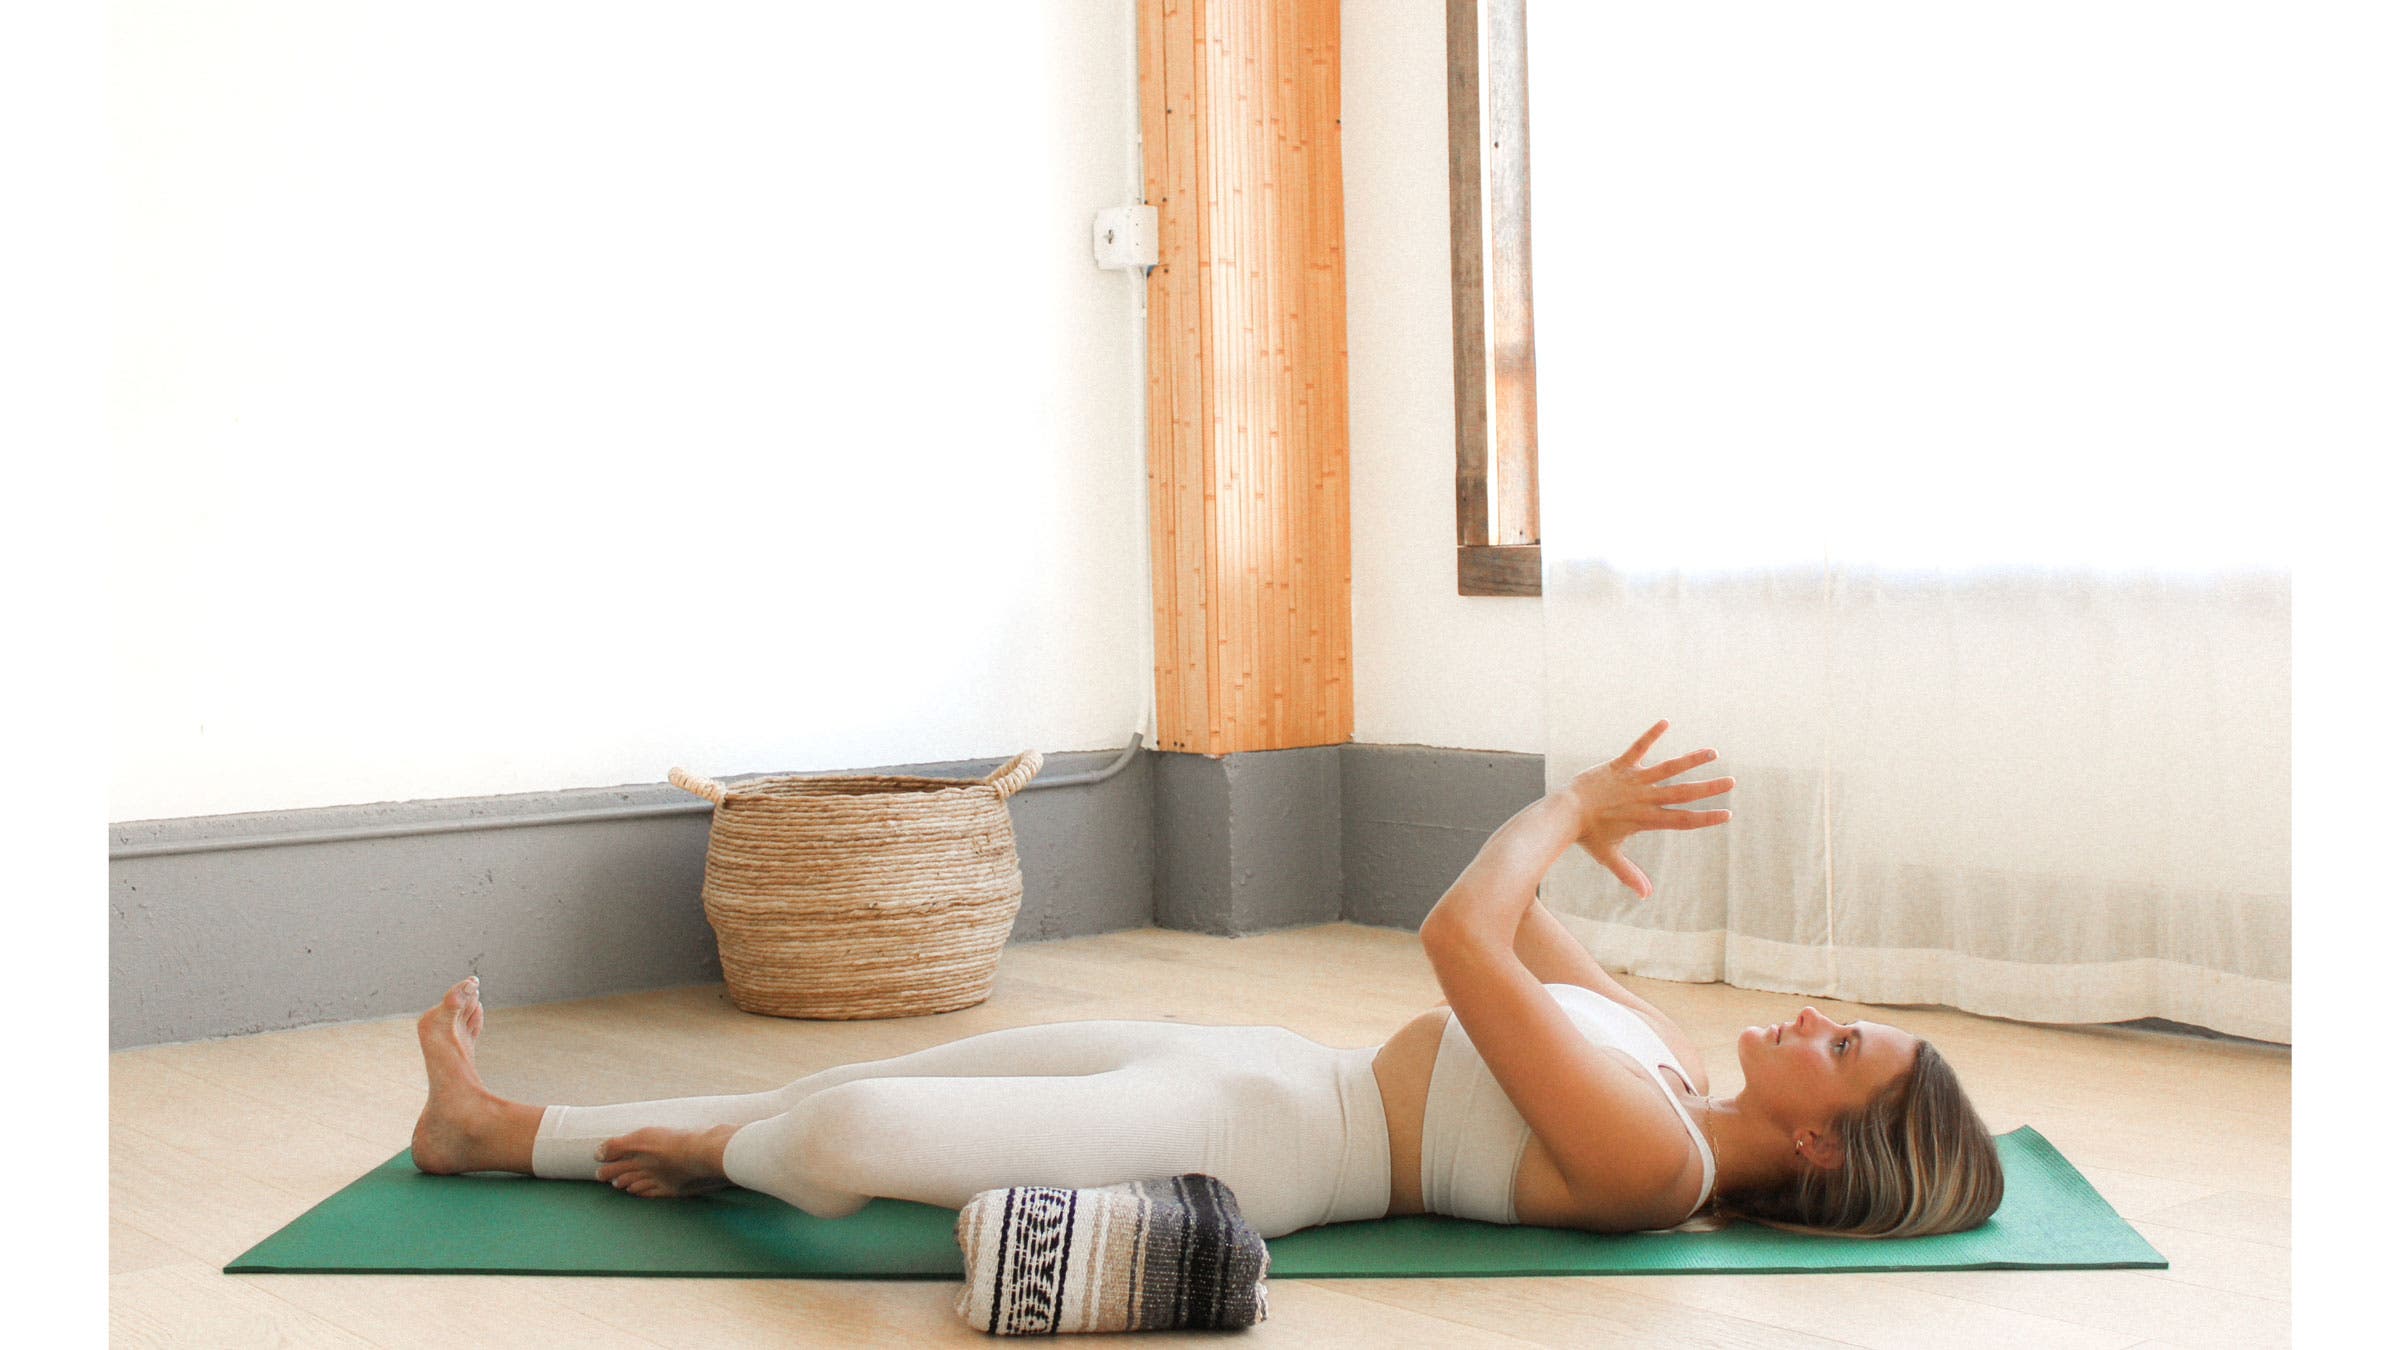
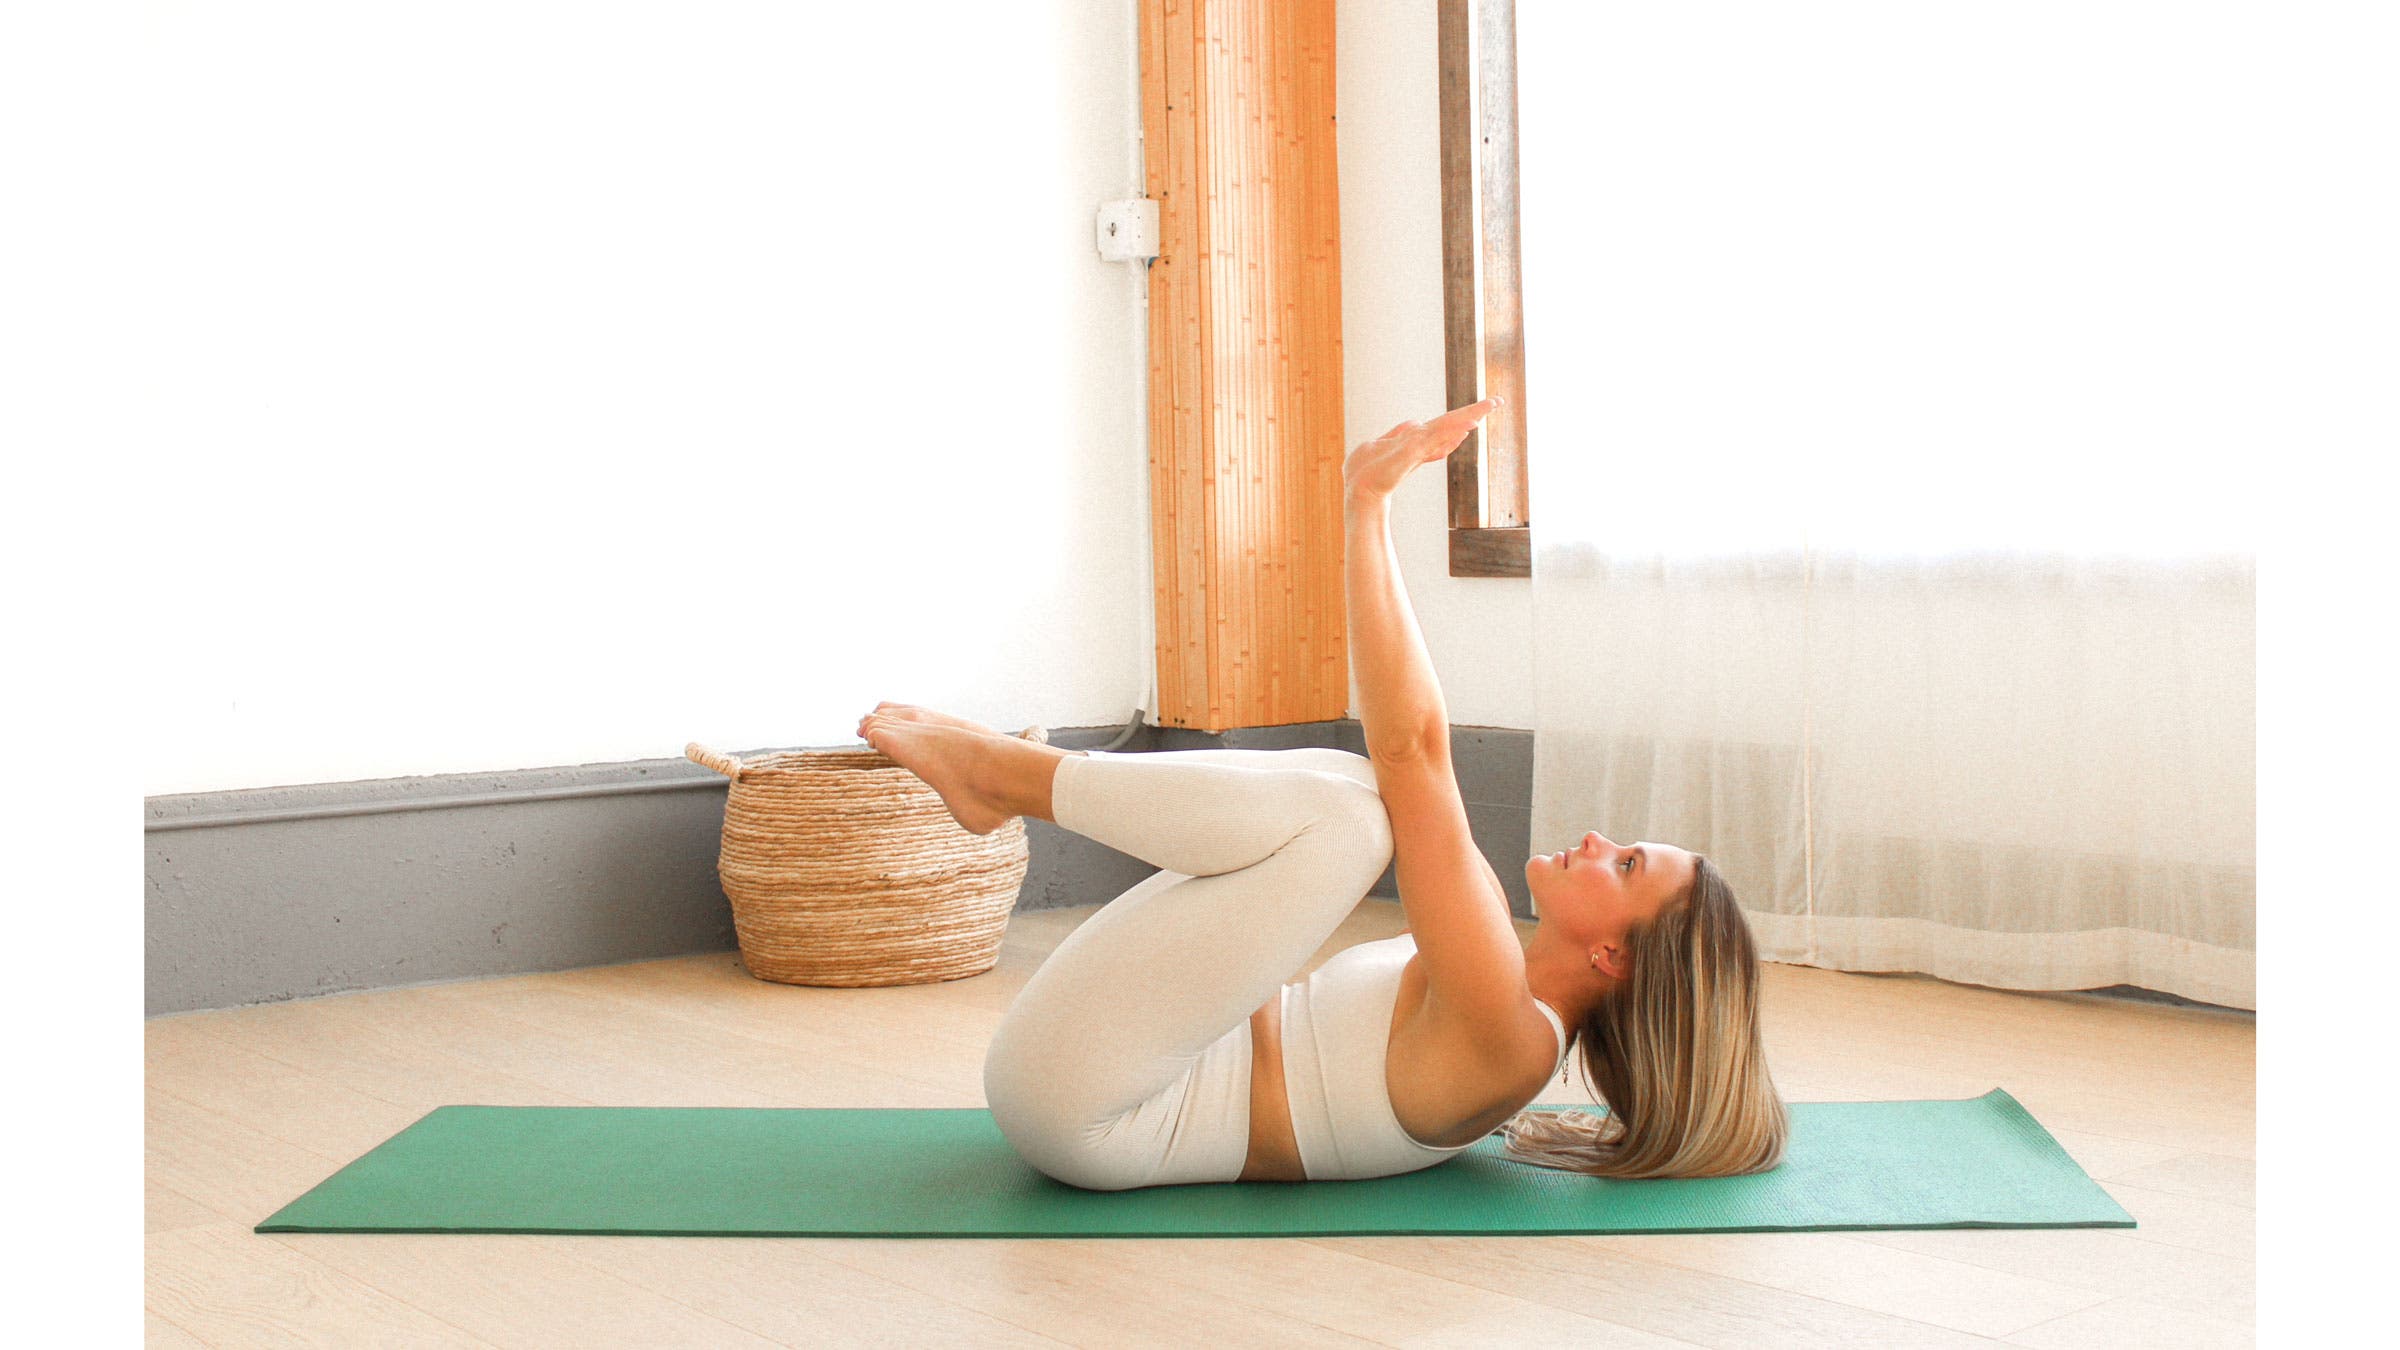
12. Crow or Crane Pose on Your Back
Why it helps:
- Eliminates weight on your wrists
- Relieves pain for those who have shoulder or rotator cuff injuries and cannot yet do weight-bearing exercises
- Removes the very real “fear” element
- Good for developing core and upper body strength as well as the shoulder protraction needed for traditional Crow or Crane Pose
How to: Start on your back with both of your feet firmly planted on the ground and your knees bent. Draw your tailbone toward the backs of your knees and hollow through your abdomen. Come into a relined Tabletop position by lifting your shins parallel to the mat with your knees stacked directly over your hip points. Reach your arms straight toward the ceiling.
Flex your wrists as if you were pushing the ceiling away. Take a deep breath in. As you exhale, draw your knees toward your triceps and continue press your arms straight up to the ceiling. As you reach your arms, try to lift your shoulder blades off the mat. Inhale and return to reclined Tabletop. Repeat coming into Crow or Crane Pose for a total of 5-10 repetitions.
ADVERTISEMENT
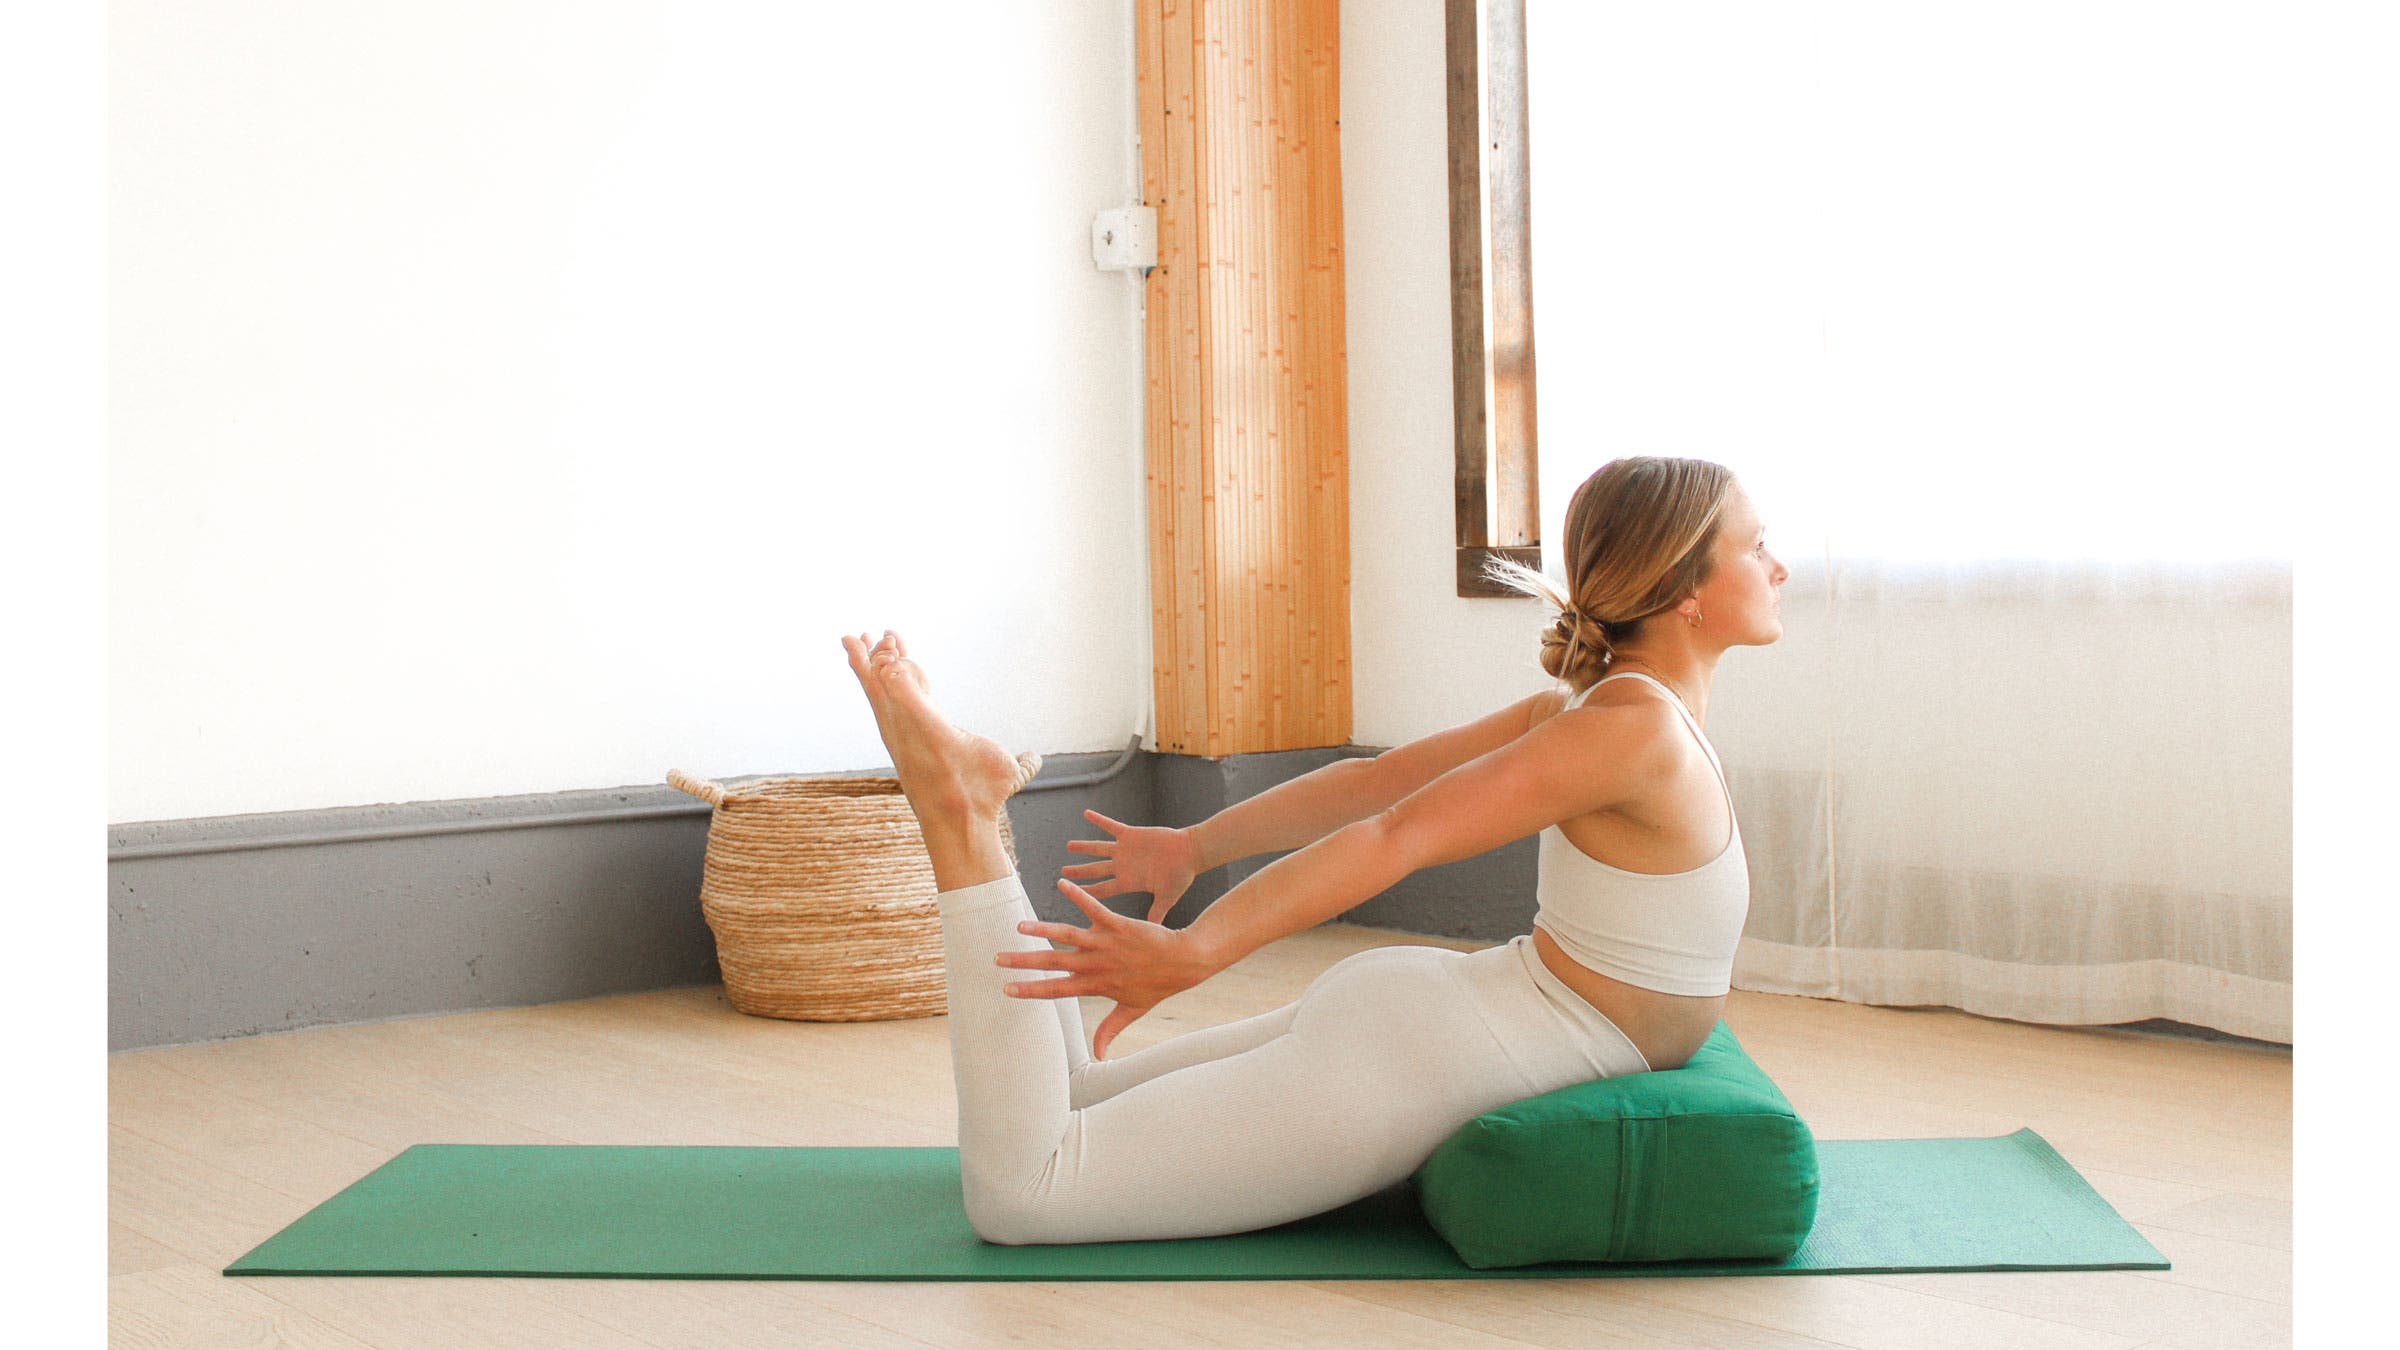
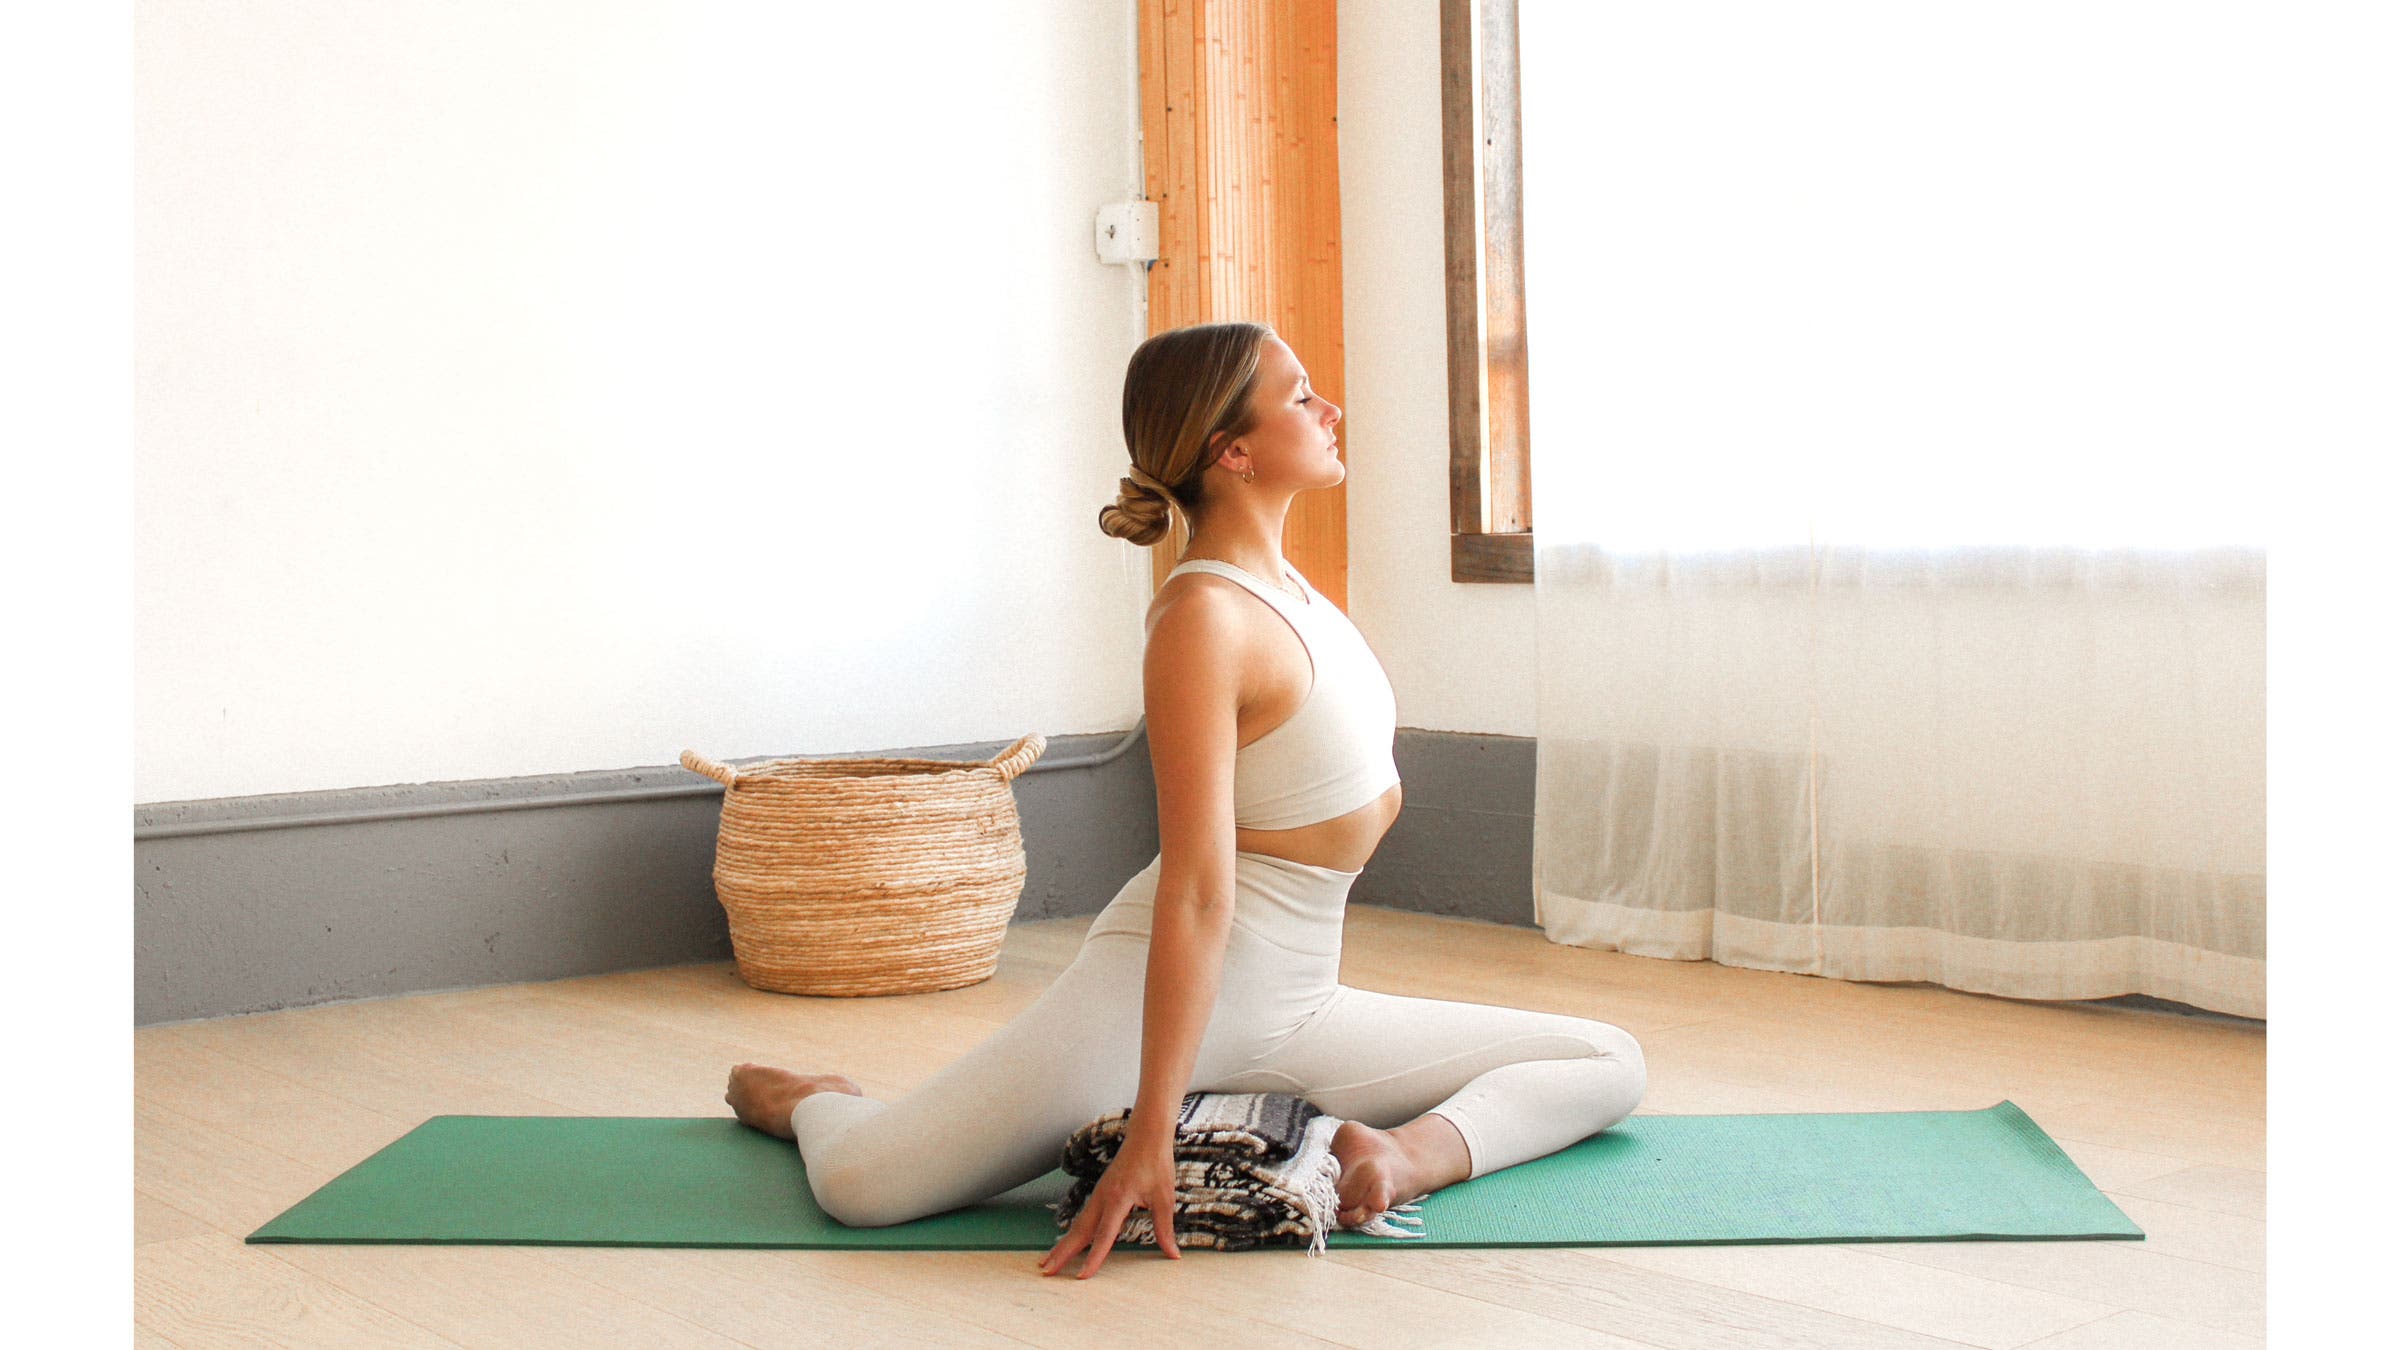
13. Seated Pigeon or Z-Sit
Why it helps:
- Creates an overall stretch in the hips and entire body that’s less intense than traditional or reclined Pigeon Pose
- Takes pressure off your knees and the rotator muscles of your legs by elevating your hips
- Works towards lengthening the psoas but is gentler than traditional Pigeon Pose
How to: From Tabletop, slide your left knee toward your left wrist so your left thigh is parallel to the long side of the mat. Your shin can be perpendicular to your thighs or you can bend your knees and bring them to approximately 45 degree angle with your left heel drawing toward your right hip point. Take your right thigh away from you with your right knee pointing toward the long side of the mat and your right shin resting wherever is comfortable. If you feel any tension in your knees or hips, place a blanket under your sitting bones. Work your left hip forward and down, moving in the direction of squaring your hips to face the front of the mat. Your torso can be upright or slightly forward. Stay here for 5-10 breaths. Repeat on the other side.
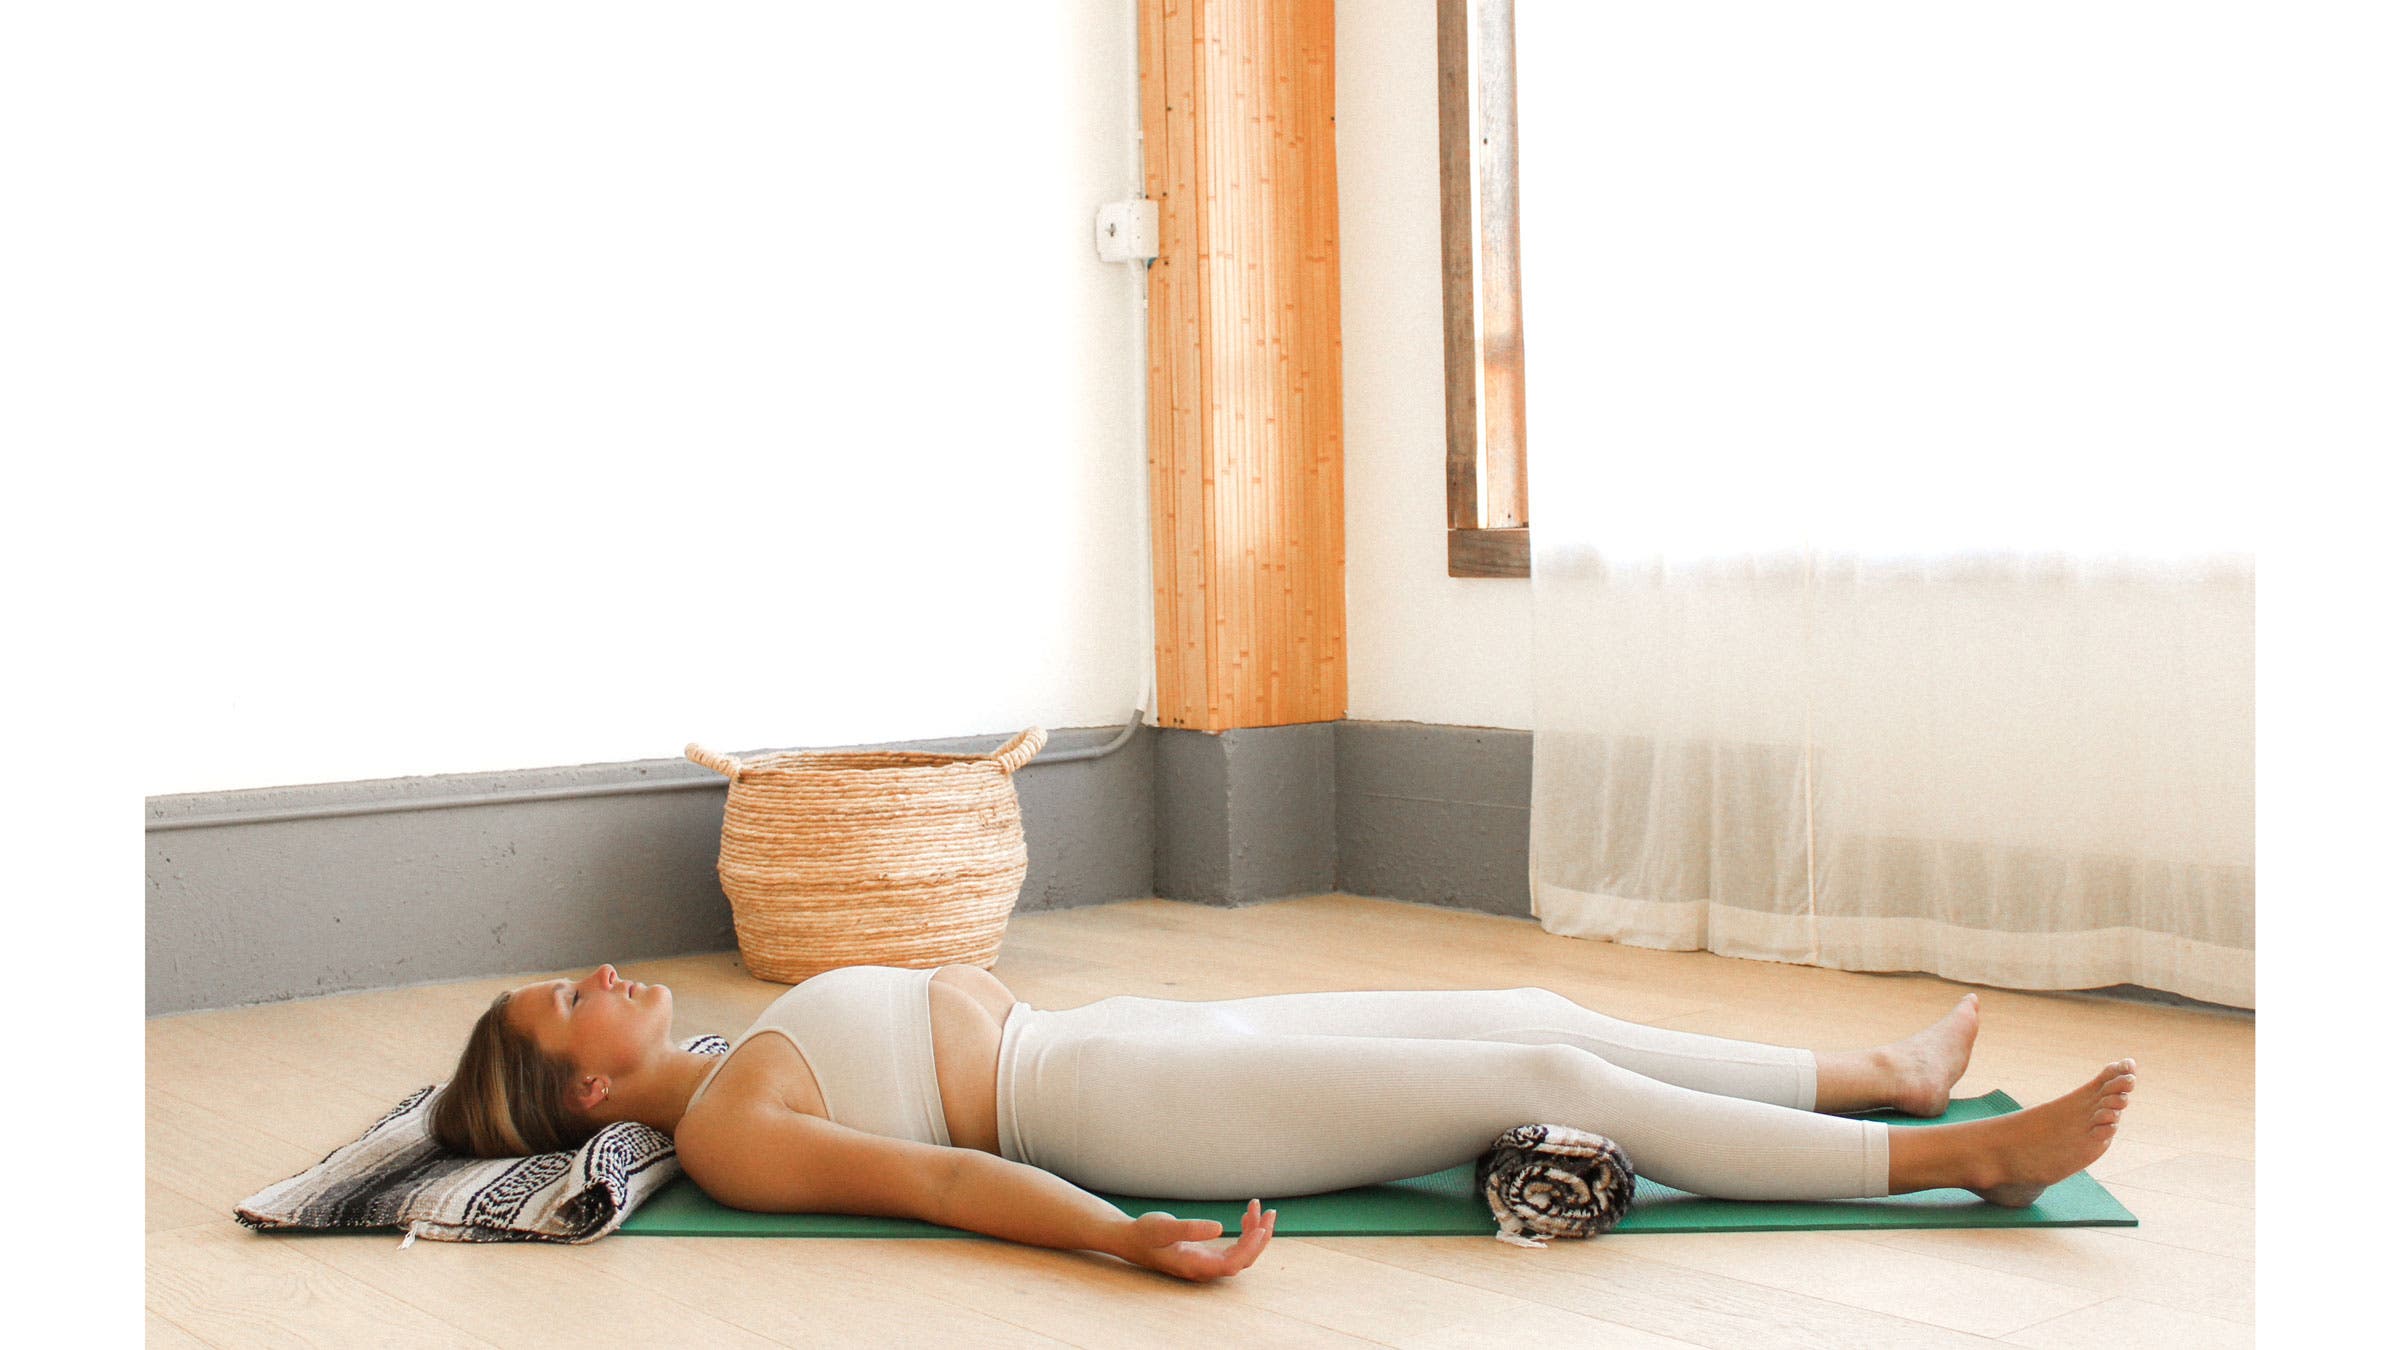
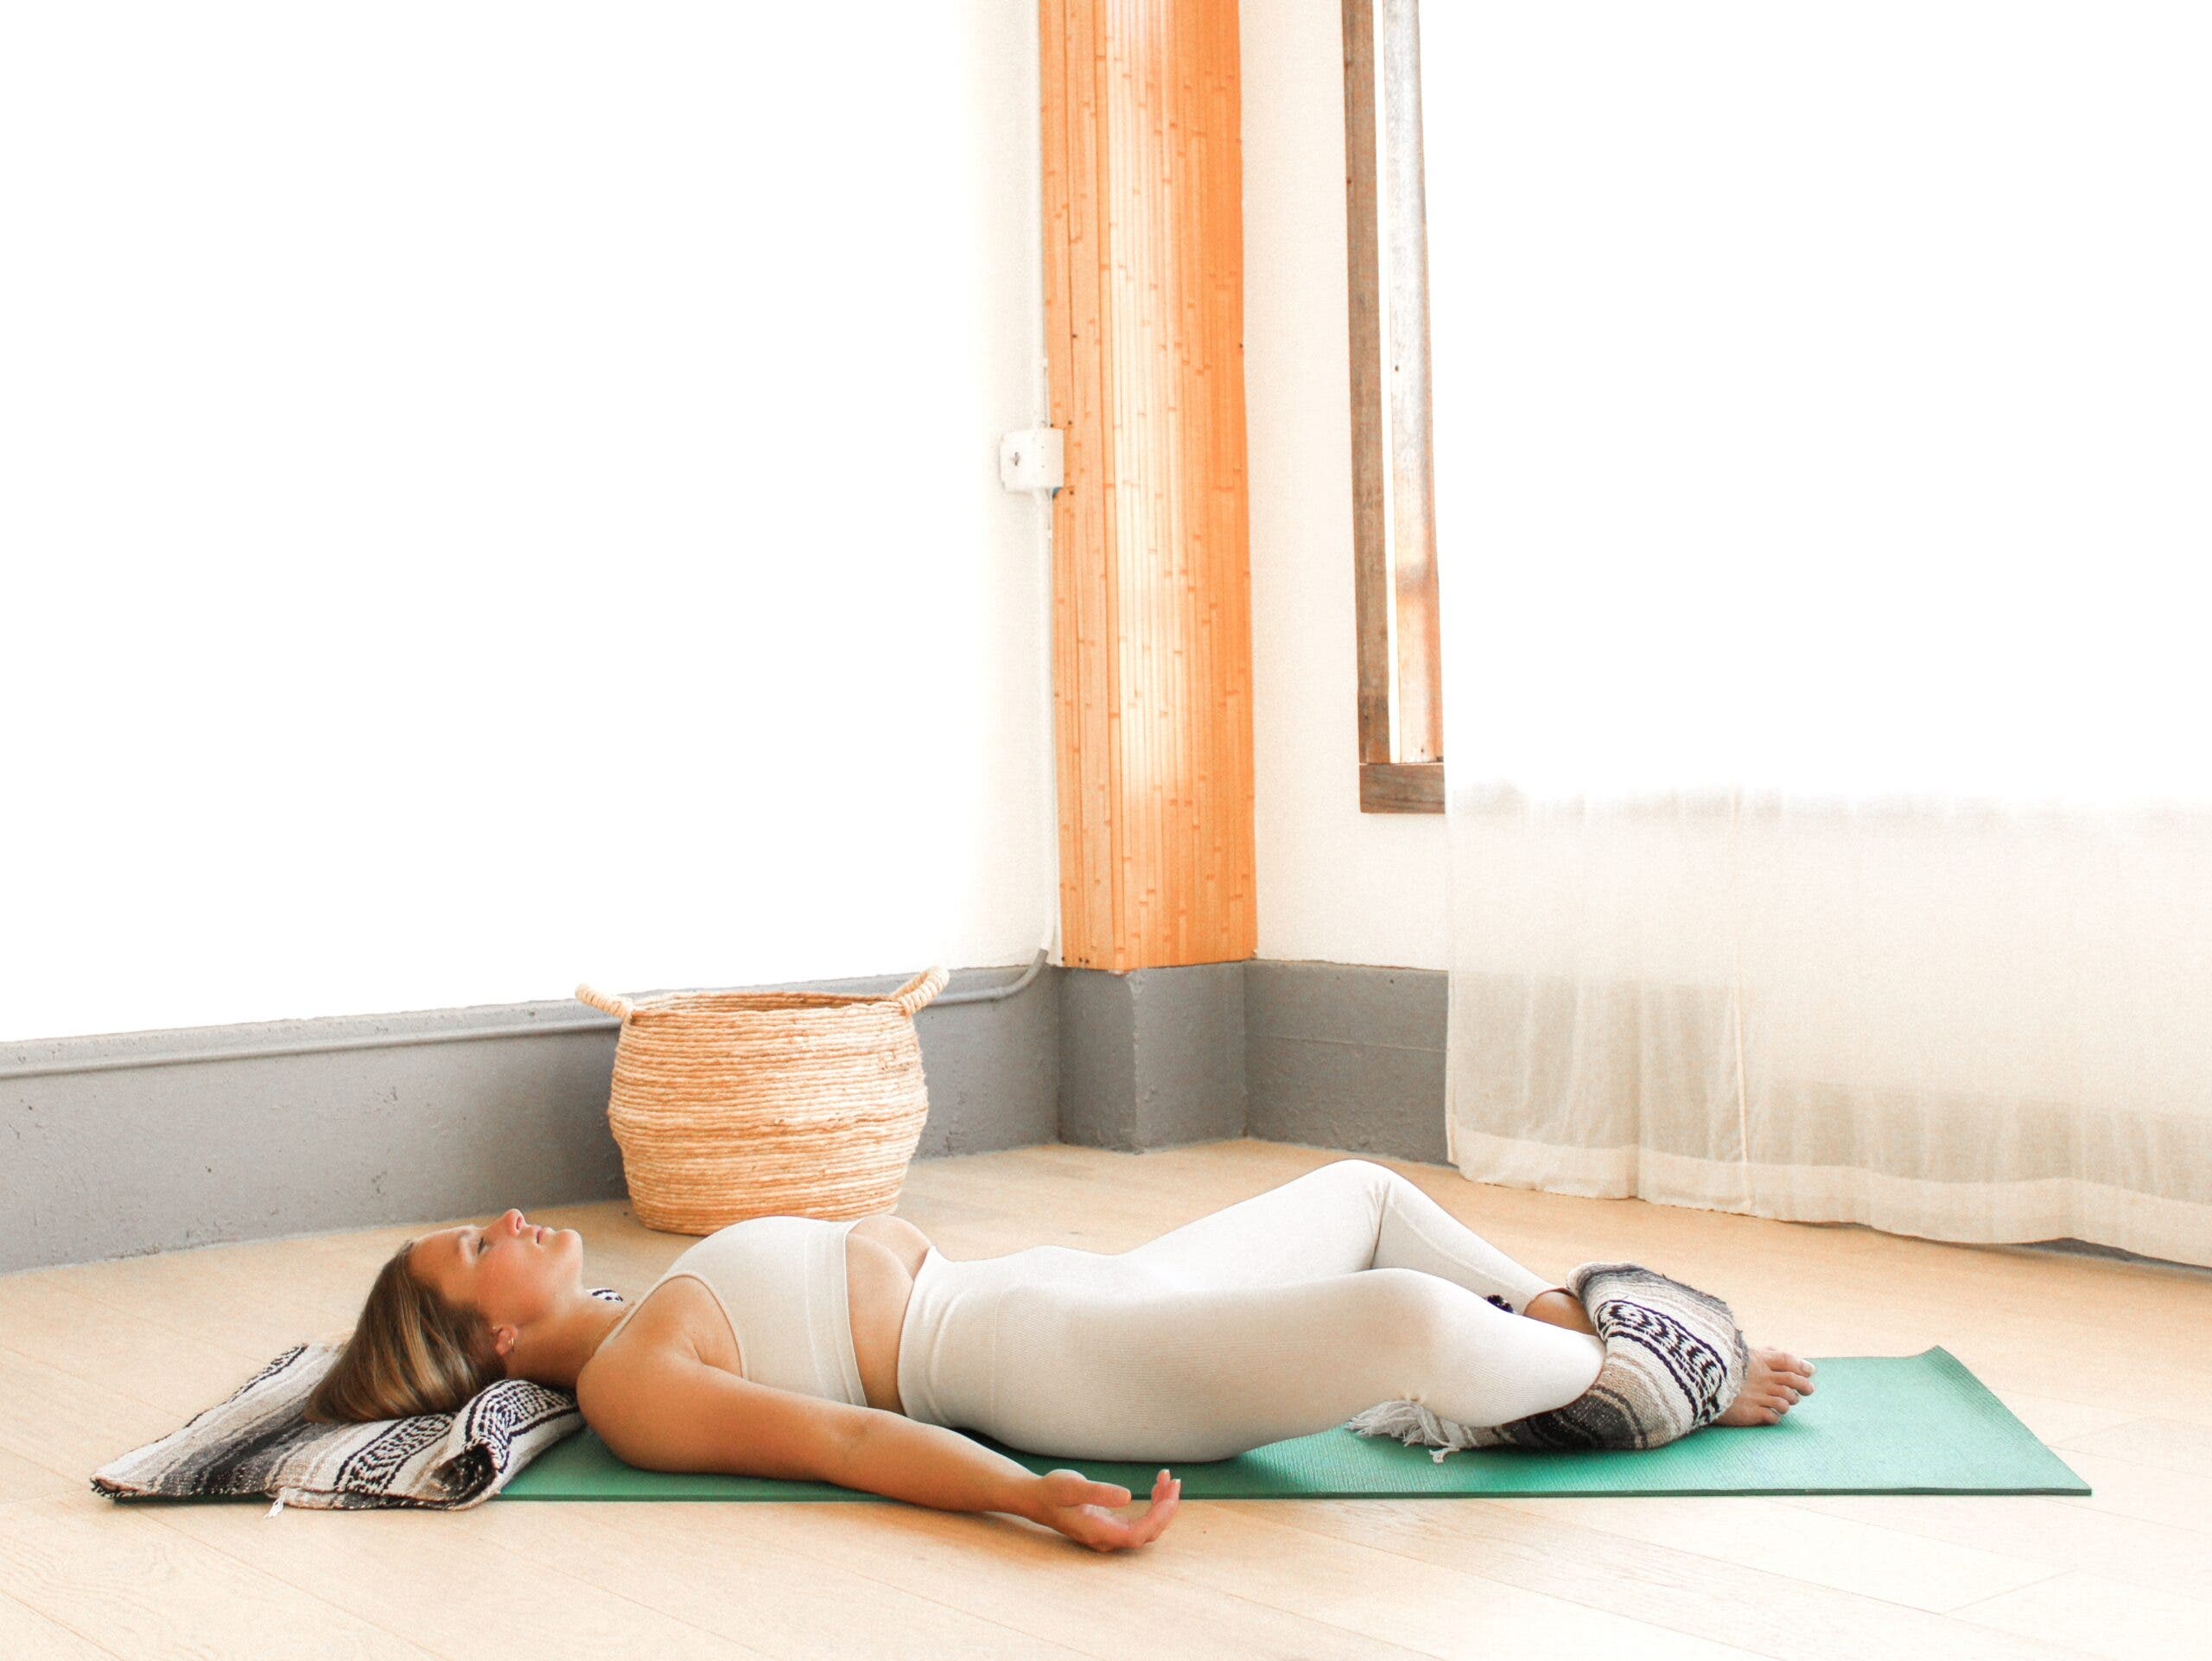
14. Supported Savasana
Why it works:
- Supports students who have “tech neck” or kyphosis of the spine
- Supports a slight bend in the knees, alleviating pressure in the lumbar spine and psoas
How to: Start in Savasana. Roll a blanket and place it under your knees. If you would like support for your neck, roll the edge of a second blanket until it is 2-3 inches thick and rest it under your neck in the hollow space created by the curve of your cervical spine. Your chin should be parallel with your forehead. You can wrap the excess blanket around your head as a relaxing pillow that gives you the comfort of a “tucked in” sensation or leave the excess blanket as is. Breathe here for 5-10 minutes.
This article has been updated. Originally published December 23, 2021.